(no subject)
3 very easy tutorials! :P
all used in paint shop pro 7, i believe they're very translatable.
no selective colouring, easy peasy layers, changable!
the last tutorial has curves.
i don't ask for credit, but please, if someone asks where you got the colouring... send them here? :P
NOTE; i slightly adjusted the percentages to make it look how i wanted it, that's what you have to do. :)
tutorial one!
6 stages - very easy to follow.
FROM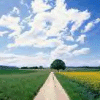
TO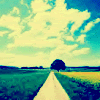
we will start off with this base.

1. duplicate & set it to screen, make it as light as it needs to be then merge layers.
2. duplicate & set to hard light 34%.

3. add a new raster layer, fill with #0F1B45 & set to exclusion 63%.
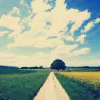
4. add a new raster layer fill with #CFFCFF set this on soft light 89%.

5. copy merged, paste as new layer, burn 100%.
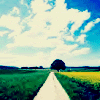
6. add a new raster layer with #0C0C6C set to exclusion 77%.

7. add a new raster new layer overlay #878787 100%.

8. add a saturation layer, just bump it up to +1 and leave it.
THEN
9. adjust ALL layers to suite you, i have like so;
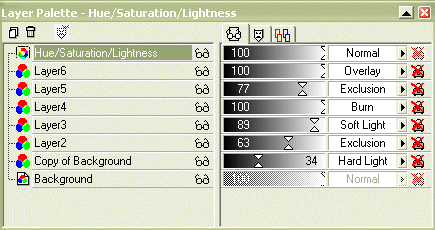
and i changed my saturation to 19 when i adjusted my layers.
so i got;

tutorial two!
10 stages - kinda easy to follow.
FROM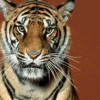
TO
we start off with this base.

duplicate base& set to screen till you get it lighter depending on your base. i did 61%
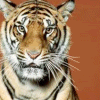
create a new raster layer set to hard light 65%

add raster layer fill with #0F3773 at exclusion 100%

merge all then add an adjustment layer > up the saturation.
add colour balance > 52, 64, 58

merge all layers
enchance photo > automatic sat enchancement > more colourful and select the strenth TO SUITE YOU, i find all icons vary! i did 11%
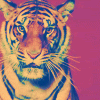
merge all, duplicate, screen 12%
add a saturation layer to the base, put the sat up to 6%.

merge all. sharpen if you feel the need too.
result; (i don't like this much, gah!)

tutorial three!
13 stages - intermediate?
FROM
TO
we have the base

duplicate base > screen 41%
duplicate base > hard light 41%
add a new raster layer fill with #E8EEA2 set to burn 76%
add a new raster layer filled with #66E743 set to lighten 24%
copy merged
paste as a new layer, burn at 76%
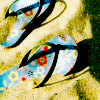
add colour balance and just make midtones 0, -48, 0

add new raster layer fill with #213479 at exclusion 28%
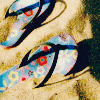
merge all
automatic saturation enchancement > more colourful > strong
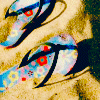
last layer. add a curves layer, RGB, input 164 output 125

sharpen

please let me know if you found this useful!
all used in paint shop pro 7, i believe they're very translatable.
no selective colouring, easy peasy layers, changable!
the last tutorial has curves.
i don't ask for credit, but please, if someone asks where you got the colouring... send them here? :P
NOTE; i slightly adjusted the percentages to make it look how i wanted it, that's what you have to do. :)
tutorial one!
6 stages - very easy to follow.
FROM

TO

we will start off with this base.

1. duplicate & set it to screen, make it as light as it needs to be then merge layers.
2. duplicate & set to hard light 34%.

3. add a new raster layer, fill with #0F1B45 & set to exclusion 63%.

4. add a new raster layer fill with #CFFCFF set this on soft light 89%.

5. copy merged, paste as new layer, burn 100%.

6. add a new raster layer with #0C0C6C set to exclusion 77%.

7. add a new raster new layer overlay #878787 100%.

8. add a saturation layer, just bump it up to +1 and leave it.
THEN
9. adjust ALL layers to suite you, i have like so;

and i changed my saturation to 19 when i adjusted my layers.
so i got;

tutorial two!
10 stages - kinda easy to follow.
FROM

TO

we start off with this base.

duplicate base& set to screen till you get it lighter depending on your base. i did 61%

create a new raster layer set to hard light 65%

add raster layer fill with #0F3773 at exclusion 100%

merge all then add an adjustment layer > up the saturation.
add colour balance > 52, 64, 58

merge all layers
enchance photo > automatic sat enchancement > more colourful and select the strenth TO SUITE YOU, i find all icons vary! i did 11%

merge all, duplicate, screen 12%
add a saturation layer to the base, put the sat up to 6%.

merge all. sharpen if you feel the need too.
result; (i don't like this much, gah!)

tutorial three!
13 stages - intermediate?
FROM

TO

we have the base

duplicate base > screen 41%
duplicate base > hard light 41%

add a new raster layer fill with #E8EEA2 set to burn 76%

add a new raster layer filled with #66E743 set to lighten 24%

copy merged
paste as a new layer, burn at 76%

add colour balance and just make midtones 0, -48, 0

add new raster layer fill with #213479 at exclusion 28%

merge all
automatic saturation enchancement > more colourful > strong

last layer. add a curves layer, RGB, input 164 output 125

sharpen

please let me know if you found this useful!