We pulled too many False Alarms
Some people have requested a tutorial on how to make this effect, which orignally came from this picture.
So here goes my first tutorial! It's how to make a banner so the images are fairly large. You have been warned.
Worked in gimp, translatable.
1. Take your picture and crop it to whatever you like.
2. Now, here I use a colour balance tutorial that I can't actually remember who I got it from. If it's yours or if you know who did it, please tell me and I'll edit in the name.
Midtones (Default)
Red:-100
Green:-66
Blue:-55
You should get something like this :
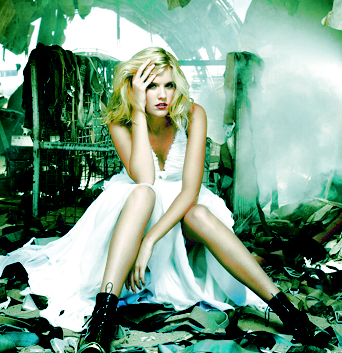
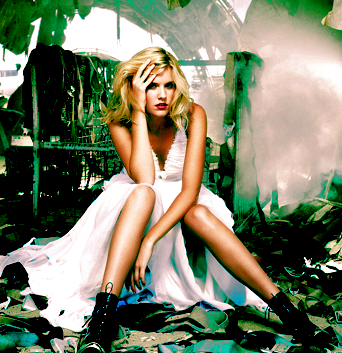
2. Do another colour balance, setting Midtones red to -100. Then you fiddle with the levels of the picture (I normally go for 60 1,00 255 and then decrease the change the first value if it doesn't look right). Then use another colour balance which is +100 for red. Leave the others alone. It should turn out like below
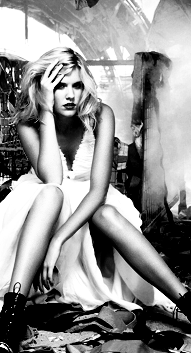
3. Cut a part of this image, the same height but smaller in width and set it to black and white.
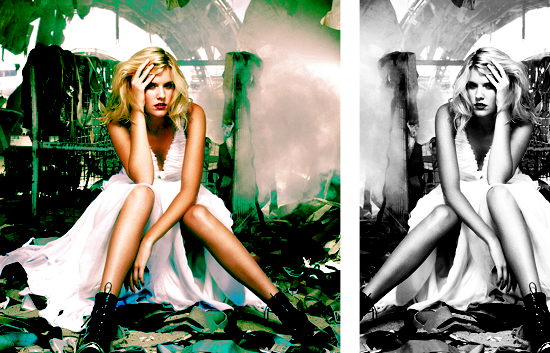
4. Now, add both these pictures together, side by side on the one image. Draw a straight line down separation of the pictures (wow, sucky explanation or what :P). I flipped my black and white image to be cool.
5. Tricker bits. This took me ages to figure out and you might have to fiddle with the settings depending on your pictures. Both of these textures were taken from Tre-xture and are Tx1 and Tx2
Now first step is to copy your base, you'll need it later.
Now, fill a layer with Tx1 and set that to Grain Merge
Fill another layer with Tx2. Set that to Grain Extract
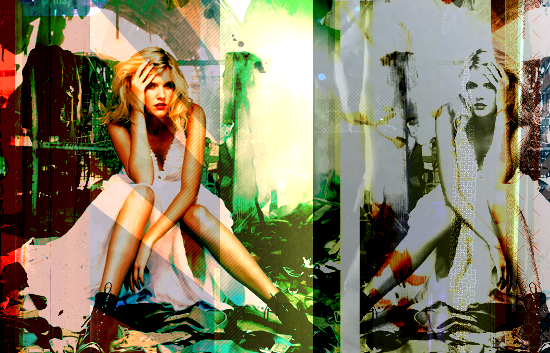
Copy your base on top of this and set it to darken. Flatten all layers.

6. Now, Fill a layer with Tx1 again, again setting it to Grain merge. Copy your base on top and set to multiply

Do Not Flatten layers
7. Fill another layer with White and set that to grain merge. You should get the overall desired effect of
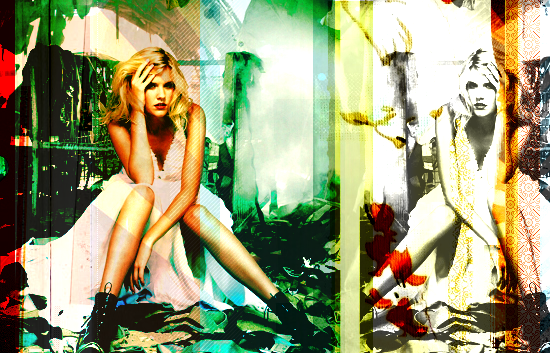
Now you may fiddle to your hearts content. Hope that has helped.
So here goes my first tutorial! It's how to make a banner so the images are fairly large. You have been warned.
Worked in gimp, translatable.
1. Take your picture and crop it to whatever you like.
2. Now, here I use a colour balance tutorial that I can't actually remember who I got it from. If it's yours or if you know who did it, please tell me and I'll edit in the name.
Midtones (Default)
Red:-100
Green:-66
Blue:-55
You should get something like this :

2. Do another colour balance, setting Midtones red to -100. Then you fiddle with the levels of the picture (I normally go for 60 1,00 255 and then decrease the change the first value if it doesn't look right). Then use another colour balance which is +100 for red. Leave the others alone. It should turn out like below

3. Cut a part of this image, the same height but smaller in width and set it to black and white.

4. Now, add both these pictures together, side by side on the one image. Draw a straight line down separation of the pictures (wow, sucky explanation or what :P). I flipped my black and white image to be cool.

5. Tricker bits. This took me ages to figure out and you might have to fiddle with the settings depending on your pictures. Both of these textures were taken from Tre-xture and are Tx1 and Tx2
Now first step is to copy your base, you'll need it later.
Now, fill a layer with Tx1 and set that to Grain Merge
Fill another layer with Tx2. Set that to Grain Extract

Copy your base on top of this and set it to darken. Flatten all layers.

6. Now, Fill a layer with Tx1 again, again setting it to Grain merge. Copy your base on top and set to multiply

Do Not Flatten layers
7. Fill another layer with White and set that to grain merge. You should get the overall desired effect of

Now you may fiddle to your hearts content. Hope that has helped.