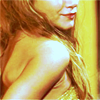
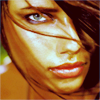
(no subject)
this 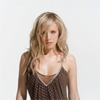
to
- Duplicate your base, set it on screen. Depending on your image, you may want to lower or higher your opacity. I put mine on around 40%.
- Duplicate your base, set it on color burn. I put mine on around 10%.
- New adjustment layer, levels. RGB input 0 / .80 / 242 output 0 255 (100% opacity)
- New layer, set on exclusion, 100% opacity, fill with #230201
- New adjustment layer, selective color (100% opacity)
REDS 0 63 84 0
- New adjustment layer, selective color (100% opacity)
REDS 0 0 100 0
YELLOW 0 0 100 0
- New adjustment layer, selective color (100% opacity)
WHITES 0 +66 0 0
- Duplicate the above adjust. layer. ^^ (20% opacity)
- I took this and put it on a new layer, set to multiply, erasing everything on Kristen's face and body.
- Then I used the pen tool to outline her body.
To outline - Select the brush tool, and make it 4 pixels thick (or however thick to want your outline to be). Then select the freeform pen tool and select this option. On a new layer trace your figure. Then right click with your mouse, select stroke path, and from the menu select brush. Then press delete on your keyboard...there you go! (or right click and select delete path).
Now, I didn't want this one be really bright, but if you want you can always put up the saturation of your image and add more yellow through selective coloring. ^.^
Others with the same technique


to

- Duplicate your base, set it on screen. Depending on your image, you may want to lower or higher your opacity. I put mine on around 40%.
- Duplicate your base, set it on color burn. I put mine on around 10%.
- New adjustment layer, levels. RGB input 0 / .80 / 242 output 0 255 (100% opacity)
- New layer, set on exclusion, 100% opacity, fill with #230201
- New adjustment layer, selective color (100% opacity)
REDS 0 63 84 0
- New adjustment layer, selective color (100% opacity)
REDS 0 0 100 0
YELLOW 0 0 100 0
- New adjustment layer, selective color (100% opacity)
WHITES 0 +66 0 0
- Duplicate the above adjust. layer. ^^ (20% opacity)
- I took this and put it on a new layer, set to multiply, erasing everything on Kristen's face and body.
- Then I used the pen tool to outline her body.
To outline - Select the brush tool, and make it 4 pixels thick (or however thick to want your outline to be). Then select the freeform pen tool and select this option. On a new layer trace your figure. Then right click with your mouse, select stroke path, and from the menu select brush. Then press delete on your keyboard...there you go! (or right click and select delete path).
Now, I didn't want this one be really bright, but if you want you can always put up the saturation of your image and add more yellow through selective coloring. ^.^
Others with the same technique
