Tutorial: Ashley Olsen
How to go from

-->

I felt like making a new tutorial and since I liked the outcome of my MKA icons, I figured I'd make something out of it. This tut can be used as a guide but I don't want clones popping out EVERYWHERE. I'm using PS7, BTW.
FIRST STEP:
Take your base, this is mine:

SECOND STEP:
Add a new Color Fill Layer, filled with a light blue, #98C9F6, and set it on Color Burn, 70%.

THIRD STEP:
Add another Color Fill layer, now with a beige, #E3CA9A, and set it to Overlay 85%.

FOURTH STEP:
A Selective Color layer by

brasaremean. It just looked awesome on it so I thought she wouldn't mind.
RED: -100, 0, +100, 0
YELLOW: +100, 0, -55, 0
NEUTRALS: +100, 0, -40, 0

FIFTH STEP:
Make a new layer. Then take the Line Tool (U), at 1px, with the color White. Then, I make an outline around Ashley, but leaving a little bit of space between her and the line.

*edit* here are some screencaps of where the Line Tool is located.


SIXTH STEP:
Then I took a grungy texture by

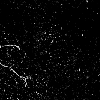
lovelamp and set it to Screen. There was some grunges on Ashley so I took the eraser and deleted EVERYTHING INSIDE of the outline.
-->

SEVENTH STEP:
I added a tiny text brush by

unmasked_icons and put it on top of Ashley. And you're done!

Other Examples using this tutorial:
