some kind of...tutorial?

to

PROGRAM: Photoshop CS (may be used in PSP)
INCLUDES: Adjustment Layers, Curves, Selective Color (Saturation for PSP)
GOOD FOR: Magazine scans, screencaps that can be corrected, good quality images, uh...bright stuff? XD
01. Start off with your base. If you have a dark image, lighten it. Try to correct any image that has too much of one color or looks bad or something.
02. Create a new layer and fill with #E3BA79. Set to multiply.

03. Go back to your base and duplicate it. Drag this to the top of the multiply layer. Set this layer to softlight.

04. Create a new curve layer (Layer > New Adjustment Layer > Curves) with these points:
RGB:
1) I: 53 O: 78
2) I: 132 O: 165
RED:
1) I: 58 O: 63
2) I: 137 O: 132
GREEN:
1) I: 77 O: 87
2) I: 143 O: 139
BLUE:
1) I: 55 O: 74
2) I: 115 O: 119
3) I: 161 O: 164
Keep this layer at normal.

05. Go back down to your base. Duplicate it and drag it all the way to the top (on top of the newly made curves layer). Set it to screen.

06. Create a new layer and fill with the color #8DE0FF. Set to colorburn.

07. Now this part is a little tricky and may not be required. Create a gradient map layer (Layer > New Adjustment Layer > Gradient Map). Click on the little box that shows the color. Make the left side of the gradient white and the right side, black. Then, check the box next to Reverse and click OK. Set the layer to softlight and 50%. If you're confused about this, please feel free to ask.

08. Create another curves layer:
RGB:
1) I: 106 O: 71
2) I: 158 O: 149

09. Create a Hue/Saturation layer (Layer > New Adjustment Layer > Hue/Saturation). Increase the saturation to +25.

10. Now, create a Selective color layer (Layer > New Adjustment Layer > Selective Color). {If you have PSP, create a Hue/Saturation layer. Increase the reds, cyans, magentas and yellows rather than just the master. Play around with what you need.}
Selective Color:
RED:
-100, 0, 0, 0
CYANS:
0, +100, -100, 0
NEUTRALS:
-30, +15, +35, -5
Done! If there are any questions, feel free to ask!
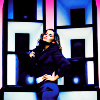
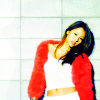
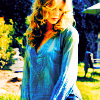
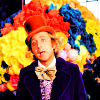
Other examples: