Tutorial 05 - Thorn Queen
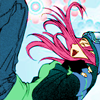
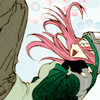
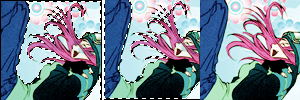
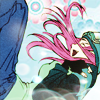
I'll be showing how we go from [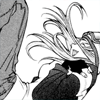
] to [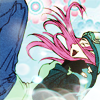
]
:) As requested by a friend of a friend.
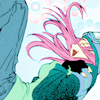
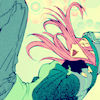
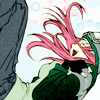
1. Find your base. Which means, pick an image :D! I found mine via airgear_awards because I was bored and looking for a good image to color and viola >>;! Go to Image > Mode and click RGB Color. First off this is only way that you're even gonna get color on the base and cropping looks a LOT better when you do this first.
Crop it, resize it and you have a base. I recommend keeping the base at 200x200 It's easier to color this way. Just zoom out 50% if you must >>;
2. Double click your Background Layer and click 'Yes' when the pop up appears. Under Layers should be a drop down Menu, select Multiply. Go to the bottom, next to the trashcan should be a little button,
, click it and you get a new layer. Drag it below your Multiply layer.
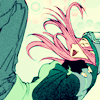
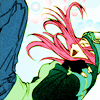
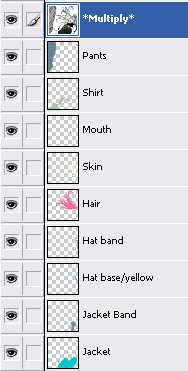
Time to Start Coloring! Everything in your icon gets its own layer- hair, skin, eyes, clothing. EVERYTHING! @__@ Even shading! (which I'm not doing in this tutorial because I just didn't do it in this one)
Jacket/Cap - #00C8C8
Band on Jacket/Hat- #788B9D
Hair- #F56CA1
Skin- #FFF0DD
Mouth- #702C2C
Shirt- #A4C8AF
Pants- #678291
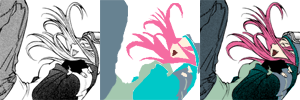
My Layers
3. The Background! cdg has some wonderful textures and I couldn't help but use one. [
]
Take this Image and put it at the VERY BOTTOM. And you've colored correctly, it should fill up the white space (if the bg is blank) nicely :)
[
]
4. Create a new layer, bring it to the very top. CTRL + ALT + SHIFT+ E. Instead of merging everything down we make...a stamp, I think its called >>;
5. Here comes memory lane where we use a colouring technique from a previous tutorial. Create a New Layer, look over to your left (?) and double click on your Color Picker :D! Fill this layer with #F7941C, Saturation 50%
]
6. New Layer, fill with #E2B9B1, Soft Light
[
]
7. .....New Layer, fill with #B2F4FB, Soft Light
[
]
8. Guess what? New Layer, fill with #000040, Exclusion
[
]
9. Let's go down 4 layers and come back to your stamped image. Right Click > Duplicate. Hit Ok, drag it to the top. Image > Adjustments > Desaturate. Soft Light.
[
]
10. :D Ok Now Near the eye is an empty box right? (if you have CS/7?) click it and a link appears. Link the Saturation/S.Light/S.Light/Exclusion layers together. what i'm talking about
10.5 If you have CS2 Just click the layers, holding down the SHIFT key, right click And Merge the layers
Set this new layer to Soft Light
[
]
11. Duplicate your stamped image, bring it to the top. Soft Light (yes, I know I abuse Soft Light 6_6; ) I want the jeans to stand out more, so I go back to the jeans layer, duplicate that, bring it to the top and set it to Hue.
[
]
12. New layer, fill it with #F7941C, Saturation 50%
[
]
13. Go to the bottom where we have our little ying yang symbol thing [
] and click on it and go to Color Balance. Midtones: -16, -18,+60
[
]
14. Go to Hue/Saturation, Saturation -24
15. The background is all faded now, that's not good ;-;! Go pull up your background layer and bring it to the top. This is why I suggest having the image around 200x200 (or even 400x400 if your image was that big Oo; ). Go to the Polygonial Lasso Tool,
, and zoom in on your image. Start outline the image with the tool >>;
16. Afterward go up to Select > Inverse and go down to your layers and click on the button that sort of looks like a camera [
]. :D yay! Set this layer you Multiply, 75%
[
]
17. Now for light textures! I used one by simpleandclean.
[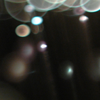
]
I rotated it Vertically and then Horizontal before dragging it into the manga file. Set it to Screen
[
]
18. Duplicate the layer and click the camera looking button again. Click on the attached Layer Mask and with a black brush go over parts of the texture you don't want on it. With me it was the soft lights near her leg/hair because then it felt busy to me. Reduce the duplicated screen layer to 75%
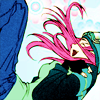
o o! And you're done! Don't be afraid to ask me questions!
] to [
]
:) As requested by a friend of a friend.
1. Find your base. Which means, pick an image :D! I found mine via airgear_awards because I was bored and looking for a good image to color and viola >>;! Go to Image > Mode and click RGB Color. First off this is only way that you're even gonna get color on the base and cropping looks a LOT better when you do this first.
Crop it, resize it and you have a base. I recommend keeping the base at 200x200 It's easier to color this way. Just zoom out 50% if you must >>;
2. Double click your Background Layer and click 'Yes' when the pop up appears. Under Layers should be a drop down Menu, select Multiply. Go to the bottom, next to the trashcan should be a little button,
, click it and you get a new layer. Drag it below your Multiply layer.
Time to Start Coloring! Everything in your icon gets its own layer- hair, skin, eyes, clothing. EVERYTHING! @__@ Even shading! (which I'm not doing in this tutorial because I just didn't do it in this one)
Jacket/Cap - #00C8C8
Band on Jacket/Hat- #788B9D
Hair- #F56CA1
Skin- #FFF0DD
Mouth- #702C2C
Shirt- #A4C8AF
Pants- #678291
My Layers
3. The Background! cdg has some wonderful textures and I couldn't help but use one. [
]
Take this Image and put it at the VERY BOTTOM. And you've colored correctly, it should fill up the white space (if the bg is blank) nicely :)
[
]
4. Create a new layer, bring it to the very top. CTRL + ALT + SHIFT+ E. Instead of merging everything down we make...a stamp, I think its called >>;
5. Here comes memory lane where we use a colouring technique from a previous tutorial. Create a New Layer, look over to your left (?) and double click on your Color Picker :D! Fill this layer with #F7941C, Saturation 50%
]
6. New Layer, fill with #E2B9B1, Soft Light
[
]
7. .....New Layer, fill with #B2F4FB, Soft Light
[
]
8. Guess what? New Layer, fill with #000040, Exclusion
[
]
9. Let's go down 4 layers and come back to your stamped image. Right Click > Duplicate. Hit Ok, drag it to the top. Image > Adjustments > Desaturate. Soft Light.
[
]
10. :D Ok Now Near the eye is an empty box right? (if you have CS/7?) click it and a link appears. Link the Saturation/S.Light/S.Light/Exclusion layers together. what i'm talking about
10.5 If you have CS2 Just click the layers, holding down the SHIFT key, right click And Merge the layers
Set this new layer to Soft Light
[
]
11. Duplicate your stamped image, bring it to the top. Soft Light (yes, I know I abuse Soft Light 6_6; ) I want the jeans to stand out more, so I go back to the jeans layer, duplicate that, bring it to the top and set it to Hue.
[
]
12. New layer, fill it with #F7941C, Saturation 50%
[
]
13. Go to the bottom where we have our little ying yang symbol thing [
] and click on it and go to Color Balance. Midtones: -16, -18,+60
[
]
14. Go to Hue/Saturation, Saturation -24
15. The background is all faded now, that's not good ;-;! Go pull up your background layer and bring it to the top. This is why I suggest having the image around 200x200 (or even 400x400 if your image was that big Oo; ). Go to the Polygonial Lasso Tool,
, and zoom in on your image. Start outline the image with the tool >>;
16. Afterward go up to Select > Inverse and go down to your layers and click on the button that sort of looks like a camera [
]. :D yay! Set this layer you Multiply, 75%
[
]
17. Now for light textures! I used one by simpleandclean.
[
]
I rotated it Vertically and then Horizontal before dragging it into the manga file. Set it to Screen
[
]
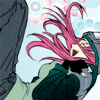
18. Duplicate the layer and click the camera looking button again. Click on the attached Layer Mask and with a black brush go over parts of the texture you don't want on it. With me it was the soft lights near her leg/hair because then it felt busy to me. Reduce the duplicated screen layer to 75%
o o! And you're done! Don't be afraid to ask me questions!