Tutorial #5
Learn how to make this icon: 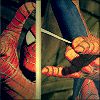
I'm using PSP 7 for this icon. I used someone else's tutorial for it and adjusted it to fit this icon. Sorry, I don't have the link. I used this tutorial. Stop bitching at me. I lost the link before.
I start with my base:

Duplicate, set to screen at 95%, and sharpen twice.

Merge your layers and then create a new layer. Using the draw tool, I make a line five pixels wide with the color #F5E9C7 and move it to the very right of the icon. Merge your layers again.
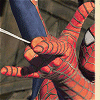
Here comes the tricky part. Select about a third of your icon to the very right, including the line. Go to Edit > Cut and then deselect. Right click your background layer in the layer palette and click Promote to Layer. Use the move tool to move the rest of the icon to the right, where the cut part used to be. Then go to Edit > Paste > As New Layer and move that in the empty spot.
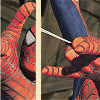
Make a new layer and set it to Multiply at 100%. Select the paint bucket (fill tool) and under Tool Options, change the opacity of the tool to 40%. The opacity of the actual layer is still at 100%, we just changed the opacity of the bucket. Fill it with #E0CCB4. Make a new layer and fill it with the same color, except change the blend mode to Overlay at 100%.
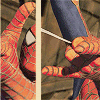
Paste this texture as a new layer.

Go to Image > Flip so that the darker part is at the bottom. Set it to Multiply at 50%.
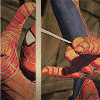
Now copy and paste this gradient as a new layer.

Set it to Hard Light at 25%.
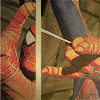
Merge all your layers and then go to Colors > Adjust > Color Balance and use these settings:
Shadows: -35 -3 40
Midtones: 61 66 60
Highlights: 70 74 37
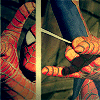
Now create a new layer, select all (Ctrl + A), go to Selections > Modify > Contract and set it to one pixel, then go to Selections > Invert and use a round paintbrush in the color black and paint over your entire icon. It should leave you with a one pixel border around your icon. Set the blend mode to Multiply at 40%.
And you're done!

I'm using PSP 7 for this icon. I used someone else's tutorial for it and adjusted it to fit this icon. Sorry, I don't have the link. I used this tutorial. Stop bitching at me. I lost the link before.
I start with my base:
Duplicate, set to screen at 95%, and sharpen twice.
Merge your layers and then create a new layer. Using the draw tool, I make a line five pixels wide with the color #F5E9C7 and move it to the very right of the icon. Merge your layers again.
Here comes the tricky part. Select about a third of your icon to the very right, including the line. Go to Edit > Cut and then deselect. Right click your background layer in the layer palette and click Promote to Layer. Use the move tool to move the rest of the icon to the right, where the cut part used to be. Then go to Edit > Paste > As New Layer and move that in the empty spot.
Make a new layer and set it to Multiply at 100%. Select the paint bucket (fill tool) and under Tool Options, change the opacity of the tool to 40%. The opacity of the actual layer is still at 100%, we just changed the opacity of the bucket. Fill it with #E0CCB4. Make a new layer and fill it with the same color, except change the blend mode to Overlay at 100%.
Paste this texture as a new layer.
Go to Image > Flip so that the darker part is at the bottom. Set it to Multiply at 50%.
Now copy and paste this gradient as a new layer.
Set it to Hard Light at 25%.
Merge all your layers and then go to Colors > Adjust > Color Balance and use these settings:
Shadows: -35 -3 40
Midtones: 61 66 60
Highlights: 70 74 37
Now create a new layer, select all (Ctrl + A), go to Selections > Modify > Contract and set it to one pixel, then go to Selections > Invert and use a round paintbrush in the color black and paint over your entire icon. It should leave you with a one pixel border around your icon. Set the blend mode to Multiply at 40%.
And you're done!