Raoul and Christine icon - Tutorial #2
yay! another tutorial xD
from this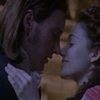
to this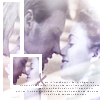
.
*made using PSP8, but could be translated into other versions ^_^
PLEASE DON'T COPY THIS ICON, USE THE STEPS TO CREATE SOMETHING THAT IS YOUR OWN; THAT'S MAKES IT MORE FUN, ANYWAY :)
first i started off with this cap from Andrew Lloyd Webber's The Phantom of the Opera (capped by me) and cropped it down to a 100x100 base:

i then duplicated the base layer and set it to Multiply 100% then i duplicated the Multiply layer and set it to Screen 100% and then duplicated the screened layer 4 more times and set the top most layer to Soft Light 100%; i then desaturated the top layer. now i have this:
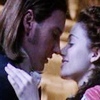
above the Soft Light layer, i created a new raster layer, set it to Color(L). Opactity 50% and flood filled it with black (#000000) then i created another raster layer above that one, set it to Exclusion. 40% and flood filled it with dark blue (#000040). then, above that layer i created an adjustment layer. to do this, go to layers > new adjustment layer > hue/saturation/lightness. when the window opened, i set the saturation to -35 and hit "ok." keeping that adjustment layer set on Normal, i duplicated it and set the duplicated layer to Screen. Opacity 68% to make it a little lighter. so now i've got this:
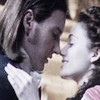
now merage all of the layers together.
then i used this light texture by teh_indy and pasted it over the newly merged layer. I set it to Sreen. Opacity 100%. so no i have this:
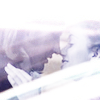
next, i took the eraser tool and used the following settings:
size 71. hardness 70. step 10. density 100. thickness 100. opacity 20.
then i used the eraser to erase little bits of the light texture so that Raoul and Christine are more visable. now i've got this:
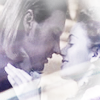
i thought it looked a bit boring, so i took the marquee tool and selected a part from the base and pasted it to the side BENEATH the light texture and set it to Lighten. Opactity 100%. like this:
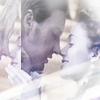
then i selected another part of the base (around the same area) and resized it to about 30x30. then i pasted it OVER the other selection. like this:
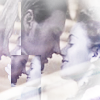
i kept that one set on Normal. Opacity 100%.
merge the layers.
yay! now it's time to have fun with gradients xD
okay, first i created a new raster layer and then used this gradient which i believe is by crumblingwalls.

i did a flood fill with the opacity set at 34 (so really it looks like this), set the layer to Exclusion. Opacity 64%. I then duplicated that Exclusion layer, set it to Dodge. Opacity 100% and i got this:
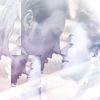
then, in an attempt to choose colors other than blue and purple (since those seem to be all i use lately, lol) i chose another gradient by crumblingwalls
and did a flood fill (opacity still at 34%) and set it to Burn. Opacity 100%. now i have this:
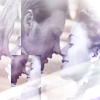
next i decided i wanted boxes around those two images i'd copied and pasted on there, so i first selected the background layer and then took the Preset Shape Tool and went around the smaller box first, using the following settings:
stroke: white. stroke width: 3 uncheck anti-alias
i then converted it to a raster layer.
then i did the same thing on the longer rectangle, using the same settings as above. though once i was finished and had converted it to a raster layer, i had to go back with the eraser tool and erase the part that was covering the smaller box. so now i have this:
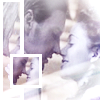
yay! time for lots of brushy fun xD
first i created a new raster layer between the first gradient layer and the boxes and chose black (#000000). then i used this text brush by ohpaintbrush:

i set the layer to Normal. Opacity 74%
i then created another raster layer above that one and used this brush made by xbrokenglass

for the color, i used the eye dropper to extract a purpley color from the icon itself...i ended up with this color:

(#795B79)
i kept the layer set on Normal, but lowered the Opacity to 58%.
and i'm done!
i got this:

**Opacities for layers may vary depending upon your image; don't be afraid to experiment!**
i really hope this helps someone out :) please let me know how it works for all who try it and thanks for reading if you did ^_^ hope it wasn't too confusing :/
please feel free to ask any questions you might have :)
FRIEND ME | RESOURCES | OTHER TUTORIALS
from this
to this
.
*made using PSP8, but could be translated into other versions ^_^
PLEASE DON'T COPY THIS ICON, USE THE STEPS TO CREATE SOMETHING THAT IS YOUR OWN; THAT'S MAKES IT MORE FUN, ANYWAY :)
first i started off with this cap from Andrew Lloyd Webber's The Phantom of the Opera (capped by me) and cropped it down to a 100x100 base:
i then duplicated the base layer and set it to Multiply 100% then i duplicated the Multiply layer and set it to Screen 100% and then duplicated the screened layer 4 more times and set the top most layer to Soft Light 100%; i then desaturated the top layer. now i have this:
above the Soft Light layer, i created a new raster layer, set it to Color(L). Opactity 50% and flood filled it with black (#000000) then i created another raster layer above that one, set it to Exclusion. 40% and flood filled it with dark blue (#000040). then, above that layer i created an adjustment layer. to do this, go to layers > new adjustment layer > hue/saturation/lightness. when the window opened, i set the saturation to -35 and hit "ok." keeping that adjustment layer set on Normal, i duplicated it and set the duplicated layer to Screen. Opacity 68% to make it a little lighter. so now i've got this:
now merage all of the layers together.
then i used this light texture by teh_indy and pasted it over the newly merged layer. I set it to Sreen. Opacity 100%. so no i have this:
next, i took the eraser tool and used the following settings:
size 71. hardness 70. step 10. density 100. thickness 100. opacity 20.
then i used the eraser to erase little bits of the light texture so that Raoul and Christine are more visable. now i've got this:
i thought it looked a bit boring, so i took the marquee tool and selected a part from the base and pasted it to the side BENEATH the light texture and set it to Lighten. Opactity 100%. like this:
then i selected another part of the base (around the same area) and resized it to about 30x30. then i pasted it OVER the other selection. like this:
i kept that one set on Normal. Opacity 100%.
merge the layers.
yay! now it's time to have fun with gradients xD
okay, first i created a new raster layer and then used this gradient which i believe is by crumblingwalls.
i did a flood fill with the opacity set at 34 (so really it looks like this), set the layer to Exclusion. Opacity 64%. I then duplicated that Exclusion layer, set it to Dodge. Opacity 100% and i got this:
then, in an attempt to choose colors other than blue and purple (since those seem to be all i use lately, lol) i chose another gradient by crumblingwalls
and did a flood fill (opacity still at 34%) and set it to Burn. Opacity 100%. now i have this:
next i decided i wanted boxes around those two images i'd copied and pasted on there, so i first selected the background layer and then took the Preset Shape Tool and went around the smaller box first, using the following settings:
stroke: white. stroke width: 3 uncheck anti-alias
i then converted it to a raster layer.
then i did the same thing on the longer rectangle, using the same settings as above. though once i was finished and had converted it to a raster layer, i had to go back with the eraser tool and erase the part that was covering the smaller box. so now i have this:
yay! time for lots of brushy fun xD
first i created a new raster layer between the first gradient layer and the boxes and chose black (#000000). then i used this text brush by ohpaintbrush:
i set the layer to Normal. Opacity 74%
i then created another raster layer above that one and used this brush made by xbrokenglass
for the color, i used the eye dropper to extract a purpley color from the icon itself...i ended up with this color:
(#795B79)
i kept the layer set on Normal, but lowered the Opacity to 58%.
and i'm done!
i got this:
**Opacities for layers may vary depending upon your image; don't be afraid to experiment!**
i really hope this helps someone out :) please let me know how it works for all who try it and thanks for reading if you did ^_^ hope it wasn't too confusing :/
please feel free to ask any questions you might have :)
FRIEND ME | RESOURCES | OTHER TUTORIALS