Tuts 15, 16 & 17: Emmy icons 5, 6 & 7
This was requested by brhadaranyaka.
MADE USING PSP8.

to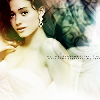
PLEASE DON'T COPY THIS ICON, USE THE STEPS TO CREATE SOMETHING THAT IS YOUR OWN; THAT'S MAKES IT MORE FUN, ANYWAY :)
1. First I took this picture from ER.NET and cropped it down to a 100x100 base:

I sharpened it twice and then took the soften tool(my settings) and went over her skin, avoiding her eyes, lips and nostrils. Then I took the sharpen tool (my settings) and went over both eyes ONCE. I now have this:

Now, duplicate the base layer and set it to SCREEN, 66. Then duplicate the base layer AGAIN and move it above the screen layer; desaturate (Shift+H) and set it to SOFT LIGHT, 100.
MERGE LAYERS.
I thought it was kinda light, so I went to Automatic Contrast Enhancement (Adjust > Brightness and Contrast > Automatic Contrast Enhancement) and used these settings and came out with this:

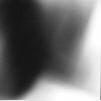
2. Now that my base has been sufficiently prepped, I move on to all of the other effects. I first took a light texure by ? that I flipped and desaturated and set it to SCREEN, 100.
>
For the coloring, I used a texture by firithel_icons and set it to SOFT LIGHT, 100.

>
Then I copied that texture layer, inverted it (Ctrl+I) and i now have this:

>
Next I copied the background layer, brought it to the top, desaturated it and set it to SOFT LIGHT, 100. I now have this:

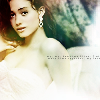
3. For the tiny text, I used a brush in black (#000000) by ingenu0us and lowered the layer opacity to 82.

>
Almost done! For the design in the background, I clicked the font tool:
Decadentia. size 48. color black (#000000)
I typed an upper case "E" and positioned it a little off to the right and set the layer to SOFT LIGHT, 100.

>
**Opacities for layers may vary depending upon your image; don't be afraid to experiment!**
and that's it :) I hope this helps someone!
Requested by ditzy_diva...i think xD

to
PLEASE DON'T COPY THIS ICON, USE THE STEPS TO CREATE SOMETHING THAT IS YOUR OWN; THAT'S MAKES IT MORE FUN, ANYWAY :)
1. I used this image from Emmy-Rossum.Netand cropped it down to a 100x100 base.

Sharpen it ONCE. Take the soften tool (my settings) and go over her skin, avoiding her eyes, lips, etc. Then take the sharpen tool (my settings) go over her eye and her bottom lip once.

2. Go to Adjust > Brightness and Contrast > Automatic Contrast Enhancement and use the following settings:
Darker | Normal | Bold
3. I next used a light texture by ? and placed it in the corner of the icon; i set it to screen and then gently erased the parts that made Emmy's face look odd.

>
4. For the coloring, I used a texture by firithel_icons and did an invert (Ctrl+I) and a mirror (Ctrl+M) so that the red/orange-y part was in the upper left corner; i set it to soft light, opacity 100. I then duplicated it but changed the setting to screen, opacity 44. I duplicated AGAIN, but changed the setting to burn, opacity 36..

>
DO NOT MERGE THE LAYERS.
5. For the smaller crop in the bottom right corner, I first took a border brush by ?, changed the size to 30 and in white (#FFFFFF) and stamped it by her shoulder; set it to screen and duplicate the layer a couple of times and then merge those layers into one layer. I then cropped a part of the base, just her mouth, and took the Magic Wand Tool and clicked inside the box I just made with the border brush. I then went to Edit > Paste > Paste Into Selection. You'll have to Promote it to a new layer (Ctrl+Shift+P) in order to see it.
THIS IS ALL DONE BELOW THE SCREEN LIGHT TEXTURE LAYER.

+
>
6. For the tiny text, I used a brush that I use a lot on a new layer by tinasparkle in white and set the layer to screen.
>
and that's it :)
**Opacities for layers may vary depending upon your image; don't be afraid to experiment!**
It's not completely the same as the original, but it's close xD Hope this helps someone :)
Requested by ladydemando...i think xD

to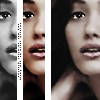
PLEASE DON'T COPY THIS ICON, USE THE STEPS TO CREATE SOMETHING THAT IS YOUR OWN; THAT'S MAKES IT MORE FUN, ANYWAY :)
1. I used this image from Emmy-Rossum.Netand cropped it down to a 100x100 base.

Sharpen it TWICE. Take the soften tool (my settings) and go over her skin, avoiding her eyes, lips, etc. Then take the sharpen tool (my settings) go over her eye and her bottom lip twice.

I also did an Edge Perserving Smooth at level 2 just to get the parts I might've missed when I did it myself.
2. I duplicated the base layerfour times. The first one from the bottom i set to multiply, opacity 100, the second to screen, opacity 100 and desaturated it, the third to soft light, opacity 50 and the top most to soft light, opacity 100 also desaturated. (my layers). I now have this:

MERGE LAYERS.
3. We're going to move the background layer over now. So do a Select All (Ctrl+A), Copy it (Ctrl+C) and then delete it (Ctrl+X). Then do a Paste as New Selection (Ctrl+E) and position it to the right like so:
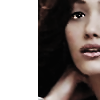
Now, do another New Selection Paste and position it to the left a little. Then crop the parts that are covering the other Emmy base and also part of the other side, like so:
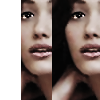
4. In an attempt to make the two parts look different, I duplicated the one all the way on the right, desaturated it and changed the opacity to 32. Then I duplicated the one on the left/middle and set it to soft light, opacity 76.
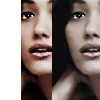
5. For the one on the far left, I simply copied the middle version and desaturated
it. To make it a little more defined I did anAdjust > Brightness and Contrast > Automatic Contrast Enhancement and use the following settings:
Darker | Normal | Bold
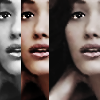
MERGE LAYERS.
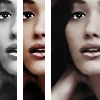
6. Now for those white rectangles. Create a new layer and select the Selection Tool (aka the Marquee Tool) and make a rectangle in between the three Emmys.

>
MERGE LAYERS.
7. For the tiny text, I used a brush by tinasparkle in black (#000000) but modified a bit.
>
MERGE LAYERS FOR FINAL TIME.
and that's all :)
**Opacities for layers may vary depending upon your image; don't be afraid to experiment!**
FRIEND ME | RESOURCES | OTHER TUTORIALS
MADE USING PSP8.
to
PLEASE DON'T COPY THIS ICON, USE THE STEPS TO CREATE SOMETHING THAT IS YOUR OWN; THAT'S MAKES IT MORE FUN, ANYWAY :)
1. First I took this picture from ER.NET and cropped it down to a 100x100 base:
I sharpened it twice and then took the soften tool(my settings) and went over her skin, avoiding her eyes, lips and nostrils. Then I took the sharpen tool (my settings) and went over both eyes ONCE. I now have this:
Now, duplicate the base layer and set it to SCREEN, 66. Then duplicate the base layer AGAIN and move it above the screen layer; desaturate (Shift+H) and set it to SOFT LIGHT, 100.
MERGE LAYERS.
I thought it was kinda light, so I went to Automatic Contrast Enhancement (Adjust > Brightness and Contrast > Automatic Contrast Enhancement) and used these settings and came out with this:
2. Now that my base has been sufficiently prepped, I move on to all of the other effects. I first took a light texure by ? that I flipped and desaturated and set it to SCREEN, 100.
>
For the coloring, I used a texture by firithel_icons and set it to SOFT LIGHT, 100.
>
Then I copied that texture layer, inverted it (Ctrl+I) and i now have this:
>
Next I copied the background layer, brought it to the top, desaturated it and set it to SOFT LIGHT, 100. I now have this:
3. For the tiny text, I used a brush in black (#000000) by ingenu0us and lowered the layer opacity to 82.
>
Almost done! For the design in the background, I clicked the font tool:
Decadentia. size 48. color black (#000000)
I typed an upper case "E" and positioned it a little off to the right and set the layer to SOFT LIGHT, 100.
>
**Opacities for layers may vary depending upon your image; don't be afraid to experiment!**
and that's it :) I hope this helps someone!
Requested by ditzy_diva...i think xD
to
PLEASE DON'T COPY THIS ICON, USE THE STEPS TO CREATE SOMETHING THAT IS YOUR OWN; THAT'S MAKES IT MORE FUN, ANYWAY :)
1. I used this image from Emmy-Rossum.Netand cropped it down to a 100x100 base.
Sharpen it ONCE. Take the soften tool (my settings) and go over her skin, avoiding her eyes, lips, etc. Then take the sharpen tool (my settings) go over her eye and her bottom lip once.
2. Go to Adjust > Brightness and Contrast > Automatic Contrast Enhancement and use the following settings:
Darker | Normal | Bold
3. I next used a light texture by ? and placed it in the corner of the icon; i set it to screen and then gently erased the parts that made Emmy's face look odd.
>
4. For the coloring, I used a texture by firithel_icons and did an invert (Ctrl+I) and a mirror (Ctrl+M) so that the red/orange-y part was in the upper left corner; i set it to soft light, opacity 100. I then duplicated it but changed the setting to screen, opacity 44. I duplicated AGAIN, but changed the setting to burn, opacity 36..
>
DO NOT MERGE THE LAYERS.
5. For the smaller crop in the bottom right corner, I first took a border brush by ?, changed the size to 30 and in white (#FFFFFF) and stamped it by her shoulder; set it to screen and duplicate the layer a couple of times and then merge those layers into one layer. I then cropped a part of the base, just her mouth, and took the Magic Wand Tool and clicked inside the box I just made with the border brush. I then went to Edit > Paste > Paste Into Selection. You'll have to Promote it to a new layer (Ctrl+Shift+P) in order to see it.
THIS IS ALL DONE BELOW THE SCREEN LIGHT TEXTURE LAYER.
+
>
6. For the tiny text, I used a brush that I use a lot on a new layer by tinasparkle in white and set the layer to screen.
>
and that's it :)
**Opacities for layers may vary depending upon your image; don't be afraid to experiment!**
It's not completely the same as the original, but it's close xD Hope this helps someone :)
Requested by ladydemando...i think xD
to
PLEASE DON'T COPY THIS ICON, USE THE STEPS TO CREATE SOMETHING THAT IS YOUR OWN; THAT'S MAKES IT MORE FUN, ANYWAY :)
1. I used this image from Emmy-Rossum.Netand cropped it down to a 100x100 base.
Sharpen it TWICE. Take the soften tool (my settings) and go over her skin, avoiding her eyes, lips, etc. Then take the sharpen tool (my settings) go over her eye and her bottom lip twice.
I also did an Edge Perserving Smooth at level 2 just to get the parts I might've missed when I did it myself.
2. I duplicated the base layerfour times. The first one from the bottom i set to multiply, opacity 100, the second to screen, opacity 100 and desaturated it, the third to soft light, opacity 50 and the top most to soft light, opacity 100 also desaturated. (my layers). I now have this:
MERGE LAYERS.
3. We're going to move the background layer over now. So do a Select All (Ctrl+A), Copy it (Ctrl+C) and then delete it (Ctrl+X). Then do a Paste as New Selection (Ctrl+E) and position it to the right like so:
Now, do another New Selection Paste and position it to the left a little. Then crop the parts that are covering the other Emmy base and also part of the other side, like so:
4. In an attempt to make the two parts look different, I duplicated the one all the way on the right, desaturated it and changed the opacity to 32. Then I duplicated the one on the left/middle and set it to soft light, opacity 76.
5. For the one on the far left, I simply copied the middle version and desaturated
it. To make it a little more defined I did anAdjust > Brightness and Contrast > Automatic Contrast Enhancement and use the following settings:
Darker | Normal | Bold
MERGE LAYERS.
6. Now for those white rectangles. Create a new layer and select the Selection Tool (aka the Marquee Tool) and make a rectangle in between the three Emmys.
>
MERGE LAYERS.
7. For the tiny text, I used a brush by tinasparkle in black (#000000) but modified a bit.
>
MERGE LAYERS FOR FINAL TIME.
and that's all :)
**Opacities for layers may vary depending upon your image; don't be afraid to experiment!**
FRIEND ME | RESOURCES | OTHER TUTORIALS