Tutorial #27 - Hermione Granger icon 3 / Tutorial #28 - Emma Watson icon 2
Requested by _fiery_art
from this to
.
*USING PSP8*
PLEASE DON'T COPY THIS ICON, USE THE STEPS TO CREATE SOMETHING THAT IS YOUR OWN; THAT'S MAKES IT MORE FUN, ANYWAY :)
- I used this image from MuggleNet and rotated it to the right about 15 degrees, then cropped it down to a 100x100 base:
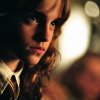
- Sharpen once. Use the soften tool (opactity 40) and go over Hermione's face, avoiding her eyes, mouth/lips, hair and nostrils; JUST THE SKIN. Then use the sharpen tool (opacity 30) and go over her eyes and bottom lip.

- Then duplicate the base twice, set the middle one (the closest to the original base) to sreen 100 and the one above that one to soft light 50; desaturate the soft light layer.
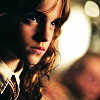
- Create a new layer and flood fill it with a gradient by crumblingwalls; set it to soft light 100

>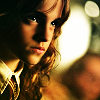
MERGE THE LAYERS.
- Create a new layer again and select the selection tool (the marquee box thing). Select a part of the top of the icon (a smaller rectangle) and then flood fill it with black. Then do the same thing again, but on the bottom half of the icon, this time making the rectangle larger.

>
- For the text, I selected Popsies in size 6, color: white and typed "regret,"placing it toward the bottom right-hand corner. On an entirely new layer, I selected the font Book Antiqua in size 1, color: white and in italics. I then typed a line of random gibberish and stuck spaces in between the letters.
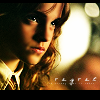
Select both text layers and set them to overlay 100. Duplicate both layers and reduce the opacity to 50. (my layers)

>
**Opacities for layers may vary depending upon your image; don't be afraid to experiment!**
And that's it :) I hope this helps someone!
Requested by _ensoleille.
going from this to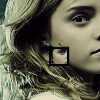
.
PLEASE DON'T COPY THIS ICON, USE THE STEPS TO CREATE SOMETHING THAT IS YOUR OWN; THAT'S MAKES IT MORE FUN, ANYWAY :)
- Started with this image from MuggleNet, rotated it to the left a little, and cropped it down to a 100x100 base.

- Sharpen once. Select the soften tool (opacity 40) and go over Emma's skin.
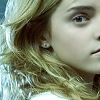
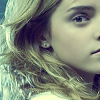
- Create a new layer and flood fill it with a dark blue (#000040) and set it to exclusion 80.

>
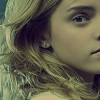
- Create aother new layer and flood fill it with a dark tanish color (#A18563) set the layer to Multiply 30.

>
- Duplicate the base layer and bring it up to the top. Desaturate it and set it to soft light 100. Then duplicate it again, but lower the opacity to 50.
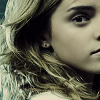
- MERGE LAYERS AND COPY; Paste it in a completely separate area (not on a new layer, just not anywhere associate with the icon you're currently working with). Select a portion of the original base and crop it down. Then resize it so that it'll fit into a little black square that you're going to place on the icon in the next step.

>
>
NOTE: You may have to crop it down further once you get it onto the actual icon.
- Create a new layer and use a brush by _joni in black. Rotate it by 180 and reduce the size to 55.

>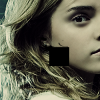
- Now add the picture you cropped in step before last (LOL confused yet? xP)

>
**Opacities for layers may vary depending upon your image; don't be afraid to experiment!**
And that's it :) PLEASE don't hesitate to ask questions xD I hope this helps someone!
FRIEND ME | RESOURCES | OTHER TUTORIALS
from this to
.
*USING PSP8*
PLEASE DON'T COPY THIS ICON, USE THE STEPS TO CREATE SOMETHING THAT IS YOUR OWN; THAT'S MAKES IT MORE FUN, ANYWAY :)
- I used this image from MuggleNet and rotated it to the right about 15 degrees, then cropped it down to a 100x100 base:
- Sharpen once. Use the soften tool (opactity 40) and go over Hermione's face, avoiding her eyes, mouth/lips, hair and nostrils; JUST THE SKIN. Then use the sharpen tool (opacity 30) and go over her eyes and bottom lip.
- Then duplicate the base twice, set the middle one (the closest to the original base) to sreen 100 and the one above that one to soft light 50; desaturate the soft light layer.
- Create a new layer and flood fill it with a gradient by crumblingwalls; set it to soft light 100
>
MERGE THE LAYERS.
- Create a new layer again and select the selection tool (the marquee box thing). Select a part of the top of the icon (a smaller rectangle) and then flood fill it with black. Then do the same thing again, but on the bottom half of the icon, this time making the rectangle larger.
>
- For the text, I selected Popsies in size 6, color: white and typed "regret,"placing it toward the bottom right-hand corner. On an entirely new layer, I selected the font Book Antiqua in size 1, color: white and in italics. I then typed a line of random gibberish and stuck spaces in between the letters.
Select both text layers and set them to overlay 100. Duplicate both layers and reduce the opacity to 50. (my layers)
>
**Opacities for layers may vary depending upon your image; don't be afraid to experiment!**
And that's it :) I hope this helps someone!
Requested by _ensoleille.
going from this to
.
PLEASE DON'T COPY THIS ICON, USE THE STEPS TO CREATE SOMETHING THAT IS YOUR OWN; THAT'S MAKES IT MORE FUN, ANYWAY :)
- Started with this image from MuggleNet, rotated it to the left a little, and cropped it down to a 100x100 base.
- Sharpen once. Select the soften tool (opacity 40) and go over Emma's skin.
- Create a new layer and flood fill it with a dark blue (#000040) and set it to exclusion 80.
>
- Create aother new layer and flood fill it with a dark tanish color (#A18563) set the layer to Multiply 30.
>
- Duplicate the base layer and bring it up to the top. Desaturate it and set it to soft light 100. Then duplicate it again, but lower the opacity to 50.
- MERGE LAYERS AND COPY; Paste it in a completely separate area (not on a new layer, just not anywhere associate with the icon you're currently working with). Select a portion of the original base and crop it down. Then resize it so that it'll fit into a little black square that you're going to place on the icon in the next step.
>
>
NOTE: You may have to crop it down further once you get it onto the actual icon.
- Create a new layer and use a brush by _joni in black. Rotate it by 180 and reduce the size to 55.
>
- Now add the picture you cropped in step before last (LOL confused yet? xP)
>
**Opacities for layers may vary depending upon your image; don't be afraid to experiment!**
And that's it :) PLEASE don't hesitate to ask questions xD I hope this helps someone!
FRIEND ME | RESOURCES | OTHER TUTORIALS