Tutorial #36 - Sydney Bristow Coloring
Requested by potiona.
this to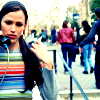
Using PSP8
PLEASE DON'T COPY THIS ICON, USE THE STEPS TO CREATE SOMETHING THAT IS YOUR OWN; THAT'S MAKES IT MORE FUN, ANYWAY :)
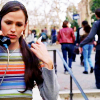
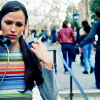
- Cropped this image from Spy Caps down to a 100x100 base.
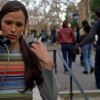
- Created a new layer, filled it with (#F9272B) and set it to soft light 90.

>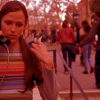
- Created another new layer and filled it with (#3EEFF9); set that one to soft light 100.

>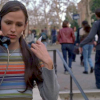
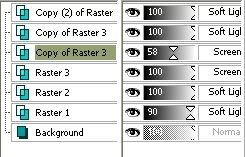
- Copy merge and paste as a new layer 4 times. Set the bottom layer to screen 100 and the one above that one to screen 58. Set the top two to soft light 100.
MY LAYERS
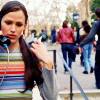
- Beneath the top soft light layers, create a new layer and flood fill with (#030324). Set that layer to exclusion 46.

>
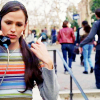
- Create another new layer and fill it with (#D4E7F5). Set that layer to soft light 48.

>
- Create another new layer and fill it with (#9BDCF3). Set it to burn 100.

>
- Now select the topmost layer and go to Layers>New Adjustment Layers>Color Balance and enter the following settings:
Shadows: 40 | 35 | 40
Midtones: 65 | 50 | 65
Highlights: 10 | 10 | -20
* Make sure that "Preserve Luminance" is checked.
** This part actually varies depending on the image, you may need to play around with the settings a bit.
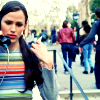
- Create one more New Adjustment Layer, this time for Brightness/Contrast and set the contrast to 15.

And that's all :)
**Opacities for layers may vary depending upon your image; don't be afraid to experiment!**
It's not exact to the original, but it's pretty close. :)
FRIEND ME | RESOURCES | OTHER TUTORIALS
this to
Using PSP8
PLEASE DON'T COPY THIS ICON, USE THE STEPS TO CREATE SOMETHING THAT IS YOUR OWN; THAT'S MAKES IT MORE FUN, ANYWAY :)
- Cropped this image from Spy Caps down to a 100x100 base.
- Created a new layer, filled it with (#F9272B) and set it to soft light 90.
>
- Created another new layer and filled it with (#3EEFF9); set that one to soft light 100.
>
- Copy merge and paste as a new layer 4 times. Set the bottom layer to screen 100 and the one above that one to screen 58. Set the top two to soft light 100.
MY LAYERS
- Beneath the top soft light layers, create a new layer and flood fill with (#030324). Set that layer to exclusion 46.
>
- Create another new layer and fill it with (#D4E7F5). Set that layer to soft light 48.
>
- Create another new layer and fill it with (#9BDCF3). Set it to burn 100.
>
- Now select the topmost layer and go to Layers>New Adjustment Layers>Color Balance and enter the following settings:
Shadows: 40 | 35 | 40
Midtones: 65 | 50 | 65
Highlights: 10 | 10 | -20
* Make sure that "Preserve Luminance" is checked.
** This part actually varies depending on the image, you may need to play around with the settings a bit.
- Create one more New Adjustment Layer, this time for Brightness/Contrast and set the contrast to 15.
And that's all :)
**Opacities for layers may vary depending upon your image; don't be afraid to experiment!**
It's not exact to the original, but it's pretty close. :)
FRIEND ME | RESOURCES | OTHER TUTORIALS