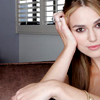
Tutorial #42 - Keira Knightley icon 2
Requested by arenoneleft.
From
to
.
*Made using Photoshop CS and PSP8*
PLEASE DON'T COPY THIS ICON, USE THE STEPS TO CREATE SOMETHING THAT IS YOUR OWN; THAT'S MAKES IT MORE FUN, ANYWAY :)
-This part was done in Photoshop CS.-
- I cropped this image from Keira Fans.Net down to a 100x100 base:

- New Levels layer:
Channel RGB only.
Input Levels: 30 | 1.00 | 245
Output Levels: default

This gives the image a bit more depth.
- New Selective Color layer:
Reds: -20| 0 | +30 | +10
Blues: +100 | -10 | -100 | +10
Magentas: -100 | +100 | 0 | 0
Neutrals: +40 | +15 | +15 | -5

- New Hue/Saturation layer:
Master: 0 | +10 | 0
Reds: 0 | +10 | 0
Yellows: 0 | +10 | 0
Cyans: 0 | +50 | 0
Blues: 0 | +50 | 0
Magentas: 0 | +10 | 0

- Merge all layers. Now duplicate the only layer left, set it to Soft Light 30%:

This adds yet more depth; yay!
-This part was done in PSP8.-
- Create a new, blank layer. Then click the Selection Tool button. Click the drop-down menu below "Selection Type" and select "Rounded Rectangle." Make a selection in the middle of your icon. Then take the Fill Tool and fill it in with white:

>
- For the text, I used these settings:
Book Antiqua | Size 4 | color: #507C8C
Once I was done I set that layer to Multiply 100% to make it darker.

And that's it. :)
**Opacities for layers may vary depending upon your image; don't be afraid to experiment!**
Not exactly like the original, kind of looks like it would need more green and yellow, but it's close! XD
Hope this helps someone!
FRIEND ME | RESOURCES | OTHER TUTORIALS
From
to
.
*Made using Photoshop CS and PSP8*
PLEASE DON'T COPY THIS ICON, USE THE STEPS TO CREATE SOMETHING THAT IS YOUR OWN; THAT'S MAKES IT MORE FUN, ANYWAY :)
-This part was done in Photoshop CS.-
- I cropped this image from Keira Fans.Net down to a 100x100 base:
- New Levels layer:
Channel RGB only.
Input Levels: 30 | 1.00 | 245
Output Levels: default
This gives the image a bit more depth.
- New Selective Color layer:
Reds: -20| 0 | +30 | +10
Blues: +100 | -10 | -100 | +10
Magentas: -100 | +100 | 0 | 0
Neutrals: +40 | +15 | +15 | -5
- New Hue/Saturation layer:
Master: 0 | +10 | 0
Reds: 0 | +10 | 0
Yellows: 0 | +10 | 0
Cyans: 0 | +50 | 0
Blues: 0 | +50 | 0
Magentas: 0 | +10 | 0
- Merge all layers. Now duplicate the only layer left, set it to Soft Light 30%:
This adds yet more depth; yay!
-This part was done in PSP8.-
- Create a new, blank layer. Then click the Selection Tool button. Click the drop-down menu below "Selection Type" and select "Rounded Rectangle." Make a selection in the middle of your icon. Then take the Fill Tool and fill it in with white:
>
- For the text, I used these settings:
Book Antiqua | Size 4 | color: #507C8C
Once I was done I set that layer to Multiply 100% to make it darker.
And that's it. :)
**Opacities for layers may vary depending upon your image; don't be afraid to experiment!**
Not exactly like the original, kind of looks like it would need more green and yellow, but it's close! XD
Hope this helps someone!
FRIEND ME | RESOURCES | OTHER TUTORIALS