Tutorial #43 - Emma Watson icon 3
Coloring tutorial requested by jennijube.
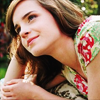
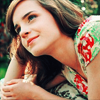
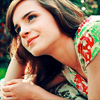
From this to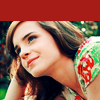
.
*Made using Photoshop CS*
PLEASE DON'T COPY THIS ICON, USE THE STEPS TO CREATE SOMETHING THAT IS YOUR OWN; THAT'S MAKES IT MORE FUN, ANYWAY :)
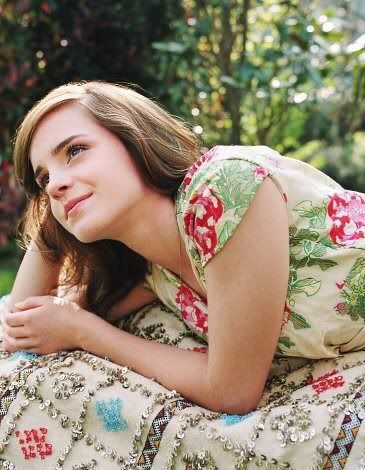
- Cropped this image that I got from MuggleNet.com down to a 100x100 base. Then duplicated that base and set the duplicated layer to soft light 70%.
- Created a Selective Coloring Adjustment Layer with the following settings:
**RESULTS WITH THESE EXACT SETTINGS MAY VARY DEPENDING ON YOUR IMAGE**
Neutrals: +20 | +10 | +20 | 0
Set the layer to Color 100%:
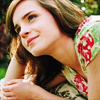
- Created another Selective Coloring Adjustment Layer with the following settings:
Reds: -31 | +6 | +35 | 0
Yellows: -95 | 0 | -80 | 0
Neutrals: +44 | -3 | -6 | 0
Set the layer to Color 100%:
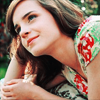
- Created a Color Balance Adjustment Layer with the following settings:
Shadows: -10 | 0 | +10
Midtones: +10 | 0 | -10
Highlights: 0 | 0 | -12
Set the layer to Color 100%:
- Upped the Contrast by +5:

- One more Selective Coloring Adjustment Layer, with the following settings:
Reds: 0 | 0 | +10 | -10
Yellows: 0 | 0 | +5 | -10
Greens: +100 | -50 | +100 | +50
Cyans: +100 | -10 | -100 | +10
Blues: +100 | -10 | -100 | +10
Magentas: -100 | +100 | 0 | 0
Neutrals: +10 | +7 | 0 | +3
Keep layer set to Normal 100%:
- Next move the image down a bit (you'll have to used a duplicated layer if you've merged at all). Select the protion above the layer you just moved down and fill it with a red (#A81C18):
That's all!
**Opacities for layers may vary depending upon your image; don't be afraid to experiment!**
Hope this helps someone!
FRIEND ME | RESOURCES | OTHER TUTORIALS
From this to
.
*Made using Photoshop CS*
PLEASE DON'T COPY THIS ICON, USE THE STEPS TO CREATE SOMETHING THAT IS YOUR OWN; THAT'S MAKES IT MORE FUN, ANYWAY :)
- Cropped this image that I got from MuggleNet.com down to a 100x100 base. Then duplicated that base and set the duplicated layer to soft light 70%.
- Created a Selective Coloring Adjustment Layer with the following settings:
**RESULTS WITH THESE EXACT SETTINGS MAY VARY DEPENDING ON YOUR IMAGE**
Neutrals: +20 | +10 | +20 | 0
Set the layer to Color 100%:
- Created another Selective Coloring Adjustment Layer with the following settings:
Reds: -31 | +6 | +35 | 0
Yellows: -95 | 0 | -80 | 0
Neutrals: +44 | -3 | -6 | 0
Set the layer to Color 100%:
- Created a Color Balance Adjustment Layer with the following settings:
Shadows: -10 | 0 | +10
Midtones: +10 | 0 | -10
Highlights: 0 | 0 | -12
Set the layer to Color 100%:
- Upped the Contrast by +5:
- One more Selective Coloring Adjustment Layer, with the following settings:
Reds: 0 | 0 | +10 | -10
Yellows: 0 | 0 | +5 | -10
Greens: +100 | -50 | +100 | +50
Cyans: +100 | -10 | -100 | +10
Blues: +100 | -10 | -100 | +10
Magentas: -100 | +100 | 0 | 0
Neutrals: +10 | +7 | 0 | +3
Keep layer set to Normal 100%:
- Next move the image down a bit (you'll have to used a duplicated layer if you've merged at all). Select the protion above the layer you just moved down and fill it with a red (#A81C18):
That's all!
**Opacities for layers may vary depending upon your image; don't be afraid to experiment!**
Hope this helps someone!
FRIEND ME | RESOURCES | OTHER TUTORIALS