Tutorial #45 - Buffy icon 2
Another coloring tutorial requested by all_at_once.
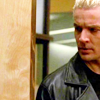
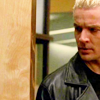
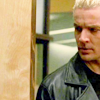
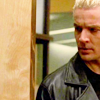
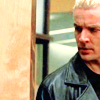
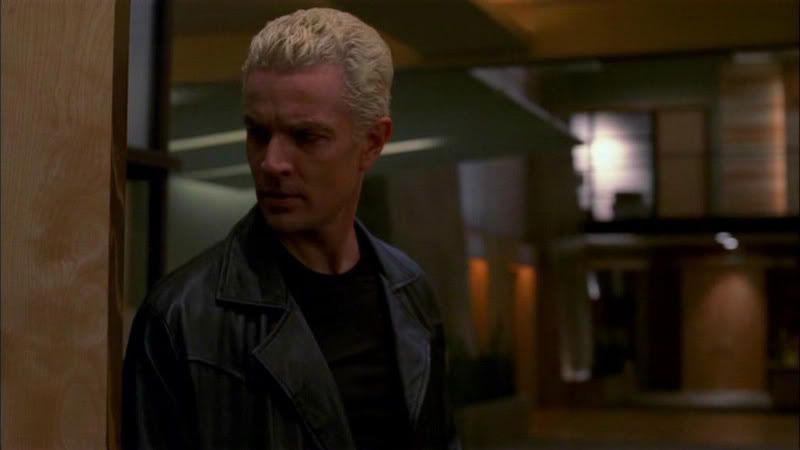
Going from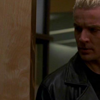
to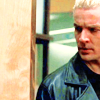
.
*Using Photoshop CS*
PLEASE DON'T COPY THIS ICON, USE THE STEPS TO CREATE SOMETHING THAT IS YOUR OWN; THAT'S MAKES IT MORE FUN, ANYWAY :)
- Cropped this image from Screencap Paradise down to 100x100:
- Used Auto Contrast to brighten up the image a bit, then duplicated the base layer and set it to screen 100%:
- Created a new color layer (F9E4BB) multiply 50%:

>
- Created another new color layer (BBF7F9) soft light 45%:

>
- Created one more new color layer (FAD2D2) color burn 50%:

>
- Upped Hue/Saturation by +5.
- New Selective Color adjustment layer with the following settings:
Reds: 40, 25, 25, 12
Yellows: -26, 69, -45, -48
Greens: 100, 100, -100, 35
Cyans: 100, -39, -100, 43
Blues: 100, 25, -20, 69
Magentas: -12, 20, -21, -37
Whites: 36, -23, 33, -44
Neutrals: 10, 5, 9, -13
Blacks: 12, 18, 8, 9
Layer opacity set to 50%.

-New Selective Color adjustment layer with the following settings:
Reds: -38, -17, -12, 18
Yellows: 100, -34, -49, -60
Cyans: 100, -28, 15, 15
Blues: 18, -21, -52, 16
Whites: 21, -26, 10, -32
Neutrals: 15, -3, -4, 5
Layer opacity set to 50%.

- Upped Hue/Saturation again but this time by +10:
- Created a new color layer (#77A0CF) soft light 50%:

>
- Upped Hue/Saturation one more time by +17:
- Upped Brightness/Contrast by +10, +5:
- One more Selective Color adjustment layer with the following settings:
Greens: 100, -50, 100, 50
Cyans: 100, -10, -100, 10
Blues: 100, -10, -100, 10
Whites: 0, 0, 0, -50
Neutrals: 10, 2, 2, -5
Layer opacity set to 100%.
And that's it! It's identical to the original, but it's pretty close. :)
**Opacities for layers may vary depending upon your image; don't be afraid to experiment!**
That was quite long, so please let me know if anyone needs anything clarified. :) Hope this helps someone!
FRIEND ME | RESOURCES | OTHER TUTORIALS
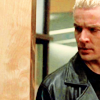
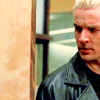
Going from
to
.
*Using Photoshop CS*
PLEASE DON'T COPY THIS ICON, USE THE STEPS TO CREATE SOMETHING THAT IS YOUR OWN; THAT'S MAKES IT MORE FUN, ANYWAY :)
- Cropped this image from Screencap Paradise down to 100x100:
- Used Auto Contrast to brighten up the image a bit, then duplicated the base layer and set it to screen 100%:
- Created a new color layer (F9E4BB) multiply 50%:
>
- Created another new color layer (BBF7F9) soft light 45%:
>
- Created one more new color layer (FAD2D2) color burn 50%:
>
- Upped Hue/Saturation by +5.
- New Selective Color adjustment layer with the following settings:
Reds: 40, 25, 25, 12
Yellows: -26, 69, -45, -48
Greens: 100, 100, -100, 35
Cyans: 100, -39, -100, 43
Blues: 100, 25, -20, 69
Magentas: -12, 20, -21, -37
Whites: 36, -23, 33, -44
Neutrals: 10, 5, 9, -13
Blacks: 12, 18, 8, 9
Layer opacity set to 50%.
-New Selective Color adjustment layer with the following settings:
Reds: -38, -17, -12, 18
Yellows: 100, -34, -49, -60
Cyans: 100, -28, 15, 15
Blues: 18, -21, -52, 16
Whites: 21, -26, 10, -32
Neutrals: 15, -3, -4, 5
Layer opacity set to 50%.
- Upped Hue/Saturation again but this time by +10:
- Created a new color layer (#77A0CF) soft light 50%:
>
- Upped Hue/Saturation one more time by +17:
- Upped Brightness/Contrast by +10, +5:
- One more Selective Color adjustment layer with the following settings:
Greens: 100, -50, 100, 50
Cyans: 100, -10, -100, 10
Blues: 100, -10, -100, 10
Whites: 0, 0, 0, -50
Neutrals: 10, 2, 2, -5
Layer opacity set to 100%.
And that's it! It's identical to the original, but it's pretty close. :)
**Opacities for layers may vary depending upon your image; don't be afraid to experiment!**
That was quite long, so please let me know if anyone needs anything clarified. :) Hope this helps someone!
FRIEND ME | RESOURCES | OTHER TUTORIALS