My First Tutorial
Hey guys since some people want to know how I did my last batch of icons here is a tutorial, really easy. I use Photoshop CS2 but it can be done with normal photochop or CS2. Hope you guys like it and find it helpful.

to
I've never done one so let's see how it goes.
I use
extremefangirl screen caps because I think they are the best, but you can use other caps as long as they are bright.
Okay first you get your pic, any pic but make sure the eyes are visible. This cap belongs to
extremefangirl.

Then I croped it 100 width and Height and got this.

Then I used the blur tool on his face avoiding lips and eyes.
And then used the dodge tool
on his eyes 3 times, you can use it as many time as you want, it depends on how clear you want his eyes.
After that I went to Image, adjustments and selective color. With this settings, you can change it if you want to.

Result

Then I resized the image to 100 width and height.

Result:

Then went to filter, artistic and to Paint Daubs with the stting on the image.

Result:
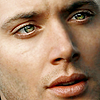
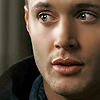
The final thing is use the Blur tool on his face avoiding eyes and lips, taking away everything and making the skin look soft.
And you got the Icon.
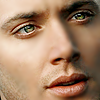
I would love to see your results. Hope the tutorial is okay and have fun.
Other icons using this tutorial:
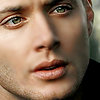
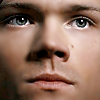

to

I've never done one so let's see how it goes.
I use
extremefangirl screen caps because I think they are the best, but you can use other caps as long as they are bright.
Okay first you get your pic, any pic but make sure the eyes are visible. This cap belongs to
extremefangirl.

Then I croped it 100 width and Height and got this.


Then I used the blur tool on his face avoiding lips and eyes.

And then used the dodge tool

on his eyes 3 times, you can use it as many time as you want, it depends on how clear you want his eyes.
After that I went to Image, adjustments and selective color. With this settings, you can change it if you want to.

Result

Then I resized the image to 100 width and height.

Result:

Then went to filter, artistic and to Paint Daubs with the stting on the image.

Result:

The final thing is use the Blur tool on his face avoiding eyes and lips, taking away everything and making the skin look soft.
And you got the Icon.

I would love to see your results. Hope the tutorial is okay and have fun.
Other icons using this tutorial: