tutorial number three

to

PROGRAM USED: PS 7
INVOLVES: colour balance layers, colour layers, selective colours
DIFFICULTY: medium
NON TRANSFERABLE!
I just got photoshop and was dying to try out selective colouring (yes yes, I too like other PSP users bitch and moan about it but I was really just jealous). Anyhow, I just finished my first icon using selective colouring so I thought I'd post a tutorial, even though I actually haven't posted the icon yet o.o
My Base:

1. Step one, duplicate your base and set to screen at 25%, adjust this to fit your icon though. I also sharpened this layer and fade sharpened at 45%, again, experiment.

2. Colour fill, #061132, set to exclusion at 100%.

3. Colour fill, #C8B3AE, set to multiply at 15%

4. New adjustment layer, selective colour, set to soft light at 100%. These were my settings:
REDS
Cyan : -100
Magenta : +41
Yellow : +100
Black : +27
YELLOWS
Cyan : -100
Magenta : +100
Yellow : +23
Black : 0
CYANS
Cyan : +100
Magenta : +2
Yellow : 0
Black : +2

5. New adjustment layer, colour balance, set to soft light at 100%. These were my settings:
COLOUR BALANCE
-100, 0, +14

6. New adjustment layer, hue + saturation, these were my settings:
SATURATION
+20

7. New adjustment layer, selective colour, these were my settings:
GREENS
Cyan : +100
Magenta : 0
Yellow : 0
Black : 0
CYANS
Cyan : +100
Magenta : +1
Yellow : -100
Black : -100
MAGENTAS
Cyan : +100
Magenta : -7
Yellow : 0
Black : 0

8. New adjustment layer, selective colour, these were my settings:
REDS
Cyan : -100
Magenta : 0
Yellow : 0
Black : 0

9. New adjustment layer, selective colour, these were my settings:
NEUTRALS
Cyan : +50
Magenta : 0
Yellow : -30
Black : 0

My layer pallete:
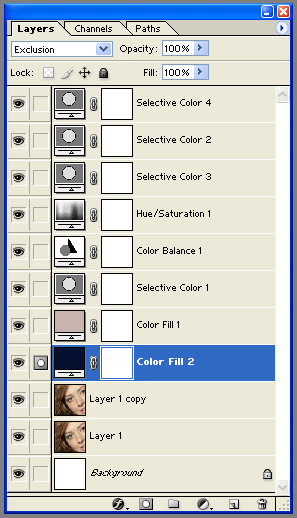
and that's it! I'm not sure how it looks on all pictures, I wanted to get lots of red in because of Alyson's gorgeous hair, so like i said; experiment. If you have any questions please ask, and PSP users I'm sorry, i gave into the dark side that is selective colouring. If you'd like me to attempt a PSP version then let me know who's interested and I'll see if I can give it a go