(no subject)
Ok, here I am again with a new tutorial.
Today we're gonna go from
this
to this
So, here's the base:

1. First, let's make it a little bit lighter. Duplicate the base and set the layer at Screen 45%

->
Here. It may seem a little bit too light at first, but it will look allright in the end.
2. Then duplicate the base once again, set it to Soft Light 1005 and drag onto the top:

->
This step is optional, as some pictures can be already contrast enough, and adding a Soft Light layer will make them look too dark.
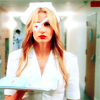
3. This part is the one I like best. Selective colouring!
Reds: -100, +46, +100, +61
Yellows: -100, -17, +79, +76
Neutrals: +29, +8, +24, +12

->
4. Add another selective colouring layer:
Reds: -37, +6, -5, +10
Yellows: -85, -37, +36, +8
Neutrals: +54, +16, -7, +17

->
5. Now create a new fill layer, fill it with #454c6b, and set to Exclusion, 30%

->
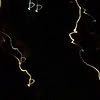
6. This step is as well optional, and you can stop here if you're satisfied with your result, but you may want too add something to your icon, like text or light textures. I chose one made by
xonlyashesxand set it to Screen 100%

+
=
Other icons made with this tutorial:

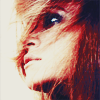
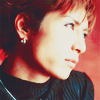
Please comment if you find this tut useful or if you have any questions
Today we're gonna go from
this

to this

So, here's the base:

1. First, let's make it a little bit lighter. Duplicate the base and set the layer at Screen 45%

->

Here. It may seem a little bit too light at first, but it will look allright in the end.
2. Then duplicate the base once again, set it to Soft Light 1005 and drag onto the top:

->

This step is optional, as some pictures can be already contrast enough, and adding a Soft Light layer will make them look too dark.
3. This part is the one I like best. Selective colouring!
Reds: -100, +46, +100, +61
Yellows: -100, -17, +79, +76
Neutrals: +29, +8, +24, +12

->

4. Add another selective colouring layer:
Reds: -37, +6, -5, +10
Yellows: -85, -37, +36, +8
Neutrals: +54, +16, -7, +17

->

5. Now create a new fill layer, fill it with #454c6b, and set to Exclusion, 30%

->

6. This step is as well optional, and you can stop here if you're satisfied with your result, but you may want too add something to your icon, like text or light textures. I chose one made by
xonlyashesxand set it to Screen 100%

+

=

Other icons made with this tutorial:


Please comment if you find this tut useful or if you have any questions