(no subject)

to...
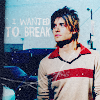
JARED LETO ICON
T U T O R I A L O N E at applehush
Basic/Intermediate Knowledge of Your Graphic Program needed. That's it!
That, and swear that the ugly black text was white when I reviewed it. I can't change it, its too much work! :(
ALRIGHT, ICON TUTORIAL #2, ACTION:

Welcome everybody! Today, we'll be making an icon of Jared Leto.
Just as a refresher (and a last minute chance to realize what you've gotten yourself into), here's what our product will be:


(That's the icon, bud)

So, if you've got your picture and ready to go...let's!

the base.
Prepare your base. I shouldn't have to tell you how to do this, but if you need help, I'm sure there's at least one entry in the icon_tutorial memories that could help you. By the by, I got this image of Jared from Daisy Media. (Great resource for anybody who owns a fansite/graphics site/anything webbie related)


one.
The base looks pretty fine by itself, but I tweaked it a bit by duplicating the base and setting that particular layer to Soft Light, 100 percent. I didn't sharpen the base layer. Why? Because I'm in a phase where I don't feel like doing so, because I feel that the icon would look better without sharpening. and because I've learned the dangers of over-sharpening ;)


two.
Do the exact same thing from step one, but this time, desaturate it.


three.
I Copy-merged (SHIFT+CTRL+C in PSP and Photoshop) the icon, and increased the icon's saturation +40. Granted, tailor those settings to what works best for your icon.


four.
Okay, here's where it might get a bit sticky. I went to the Color Balance options, and I used these settings:
Color Balance:
MIDTONES:
24-0-(-12)
SHADOWS:
-61-0-18
Like I mentioned for step three, adjust these settings for your particular icon. Because if you follow my directions exactly and you're using an image that is darker or lighter than my base, a poor, little, innocent puppy will die of a cuteness attack. TOTALLY KIDDING.


five.
Fantasically simple step. I just used a burn brush, and lightly used it to gloss over Jared, so he's a bit darker. Depending on if your icon is too dark, omit this step. If it's too light at this point, go ahead and do this. I just used it to put emphasis on him in the icon.


six.
Now, to give the icon's text some grit and look faded, I put it under the two upcoming textures. The font is "Jump Start" (found at Da Font), with words lifted from 30 Seconds to Mars(Jared's band, of course)' "The Kill (Bury Me)".


seven.
Now, I put on a texture by peoplemachines at Multiply, 100 percent. I moved it so that that black strip just barely shows on the icon.
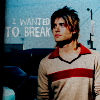

eight.
Almost done. Here, I used the ever-popular "scratch texture" by peoplemachines. Of course, at Screen, 100 percent.
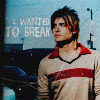

nine.
Almost done, my little children... I opened my Curves window and worked some magic. For the RBG options, (and just those, no Blue, Red, or Green curves were used here) use these settings:
Curves:
INPUT:52
OUTPUT:108.
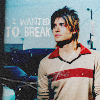

final step.
Last step, homedogs! Copy merge your icon once again, and set to 32 percent Screen.


And that's it! Hope you enjoyed this tutorial as much as I did writing it! I never usually like to write these things, but somehow, it wasn't a hassle to me.
Just some things behind the scenes of this tutorial, just because I can:
x; I made this icon yesterday.
x; HTML is fun to use in tutorials, I've realized. No more plain tutorials from me!
x; This took me 2 hours to write and code.
x; I'll be taking an icon request post when I get at least 15 community watchers (or people who friend this community) here at applehush.
x; I listened to Snakes On A Plane (Bring It) by Cobra Starship for the most of writing this tutorial.
x; That song started to bore me, so I changed it to Do You Remember by The Summer Obsession.
x; This is completely useless. Heh!
Parting words: Be sure to expieriment! Use these steps in different orders, substitute some things (like textures) for others, whatever! And also,
FRIEND applehush!!