tutorial: dean from all hell breaks loose part 2
Tutorial 02
This tutorial was requested by
tehuberfangirland it's not translatable outside of versions of Photoshop with selective coloring, I used PSCS2.
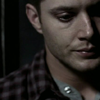
to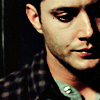
THERE IS A .PSD DOWNLOAD, JUST SCROLL DOWN ALL THE WAY!!!!!!!!!!!!!!
This tutorial is based on
p_precious's tutorial located here, she gets complete credit for most of this tutorial.
Start off with your base and duplicate it twice, setting both duplicated layers to screen:

to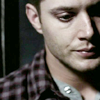
Add a blue #1a245b layer and set it to exclusions 100%:

to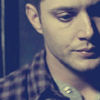
Now, duplicate your base and bring it to the top, set it to soft light 100%:

to
Add a white #eeeeee layer, set it to color burn 100%:

to
Now add a selective color layer set to 100% with these settings:
REDS: -100, 15, 100, 0
YELLOWS: -45, -30, 0, -22
NEUTRALS: 17, -10, -18, -16

to
Now add another selective color layer set to 100% with these settings:
REDS: -70, -30, -25, 22
YELLOWS: -60, -27, -27, -27
NEURALS: -16, -4, 20, 4

to
Now duplicate your base again, bring it to the top, set to to normal 30%:

to
Now add a hue/saturation layer set to 50% with these settings:
MASTER: 0, 40, 0

to
Now add another selective coloring layer set to 100% with these settings:
REDS: -43, 27, -10, -10
YELLOWS: -11, 8, 0, 0
NEUTRALS: 3, 0, 0, -9

to
Now add a white #f0f0f0 layer set to color burn 100%:

to
Now add this texture, set to screen 50%:

to
Now add this texture, set to multiply 50%:

to
Add a yellow #fcdb72 layer, set to soft light 35%:

to
Add a curves layer set to 100%:
Point: 154, 169

to
Add another selective color layer 100% with these settings:
NEUTRALS: 15, 15, -1, 10

to
Add a hue/saturation layer 100% with these settings:
REDS: 0, 9, 0
CYANS: 0, 13, 0
THIS IS WHERE IT GETS KINDA CONFUSING
Now select the icon, go to edit>>copy merge>>edit>>paste
So you still have it looking like this:
Duplicate the merged layer and desaturate the second merged layer by going to edit>>adjustments>>desaturate, and set it to soft light 100%

to
Now, remember that first merged layer? Click on that. (it should be the one that's not desaturated and is at normal 100%)
Go to filter>>sharpen>>unsharp mask with these settings:
Amount: 25%
Radius: 1.0 pixels
Theshold: 0 levels

to
Now we are still on the first merged layer. Go to filter>>sharpen>>smart sharpen with these settings:
Amount: 12%
Radius: 27.3 pixels
Remove: Lens Blur
Check more accurate

to
AND YOU'RE FINISHED!!!
Now what I got the second time:
original: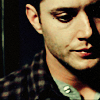
a little difference in the saturation...
And, because I realized how much this sucked w/o the .psd file you can download it here. (Sorry it's megaupload, yousendit was being stupid)
If you have any questions feel free to ask!!!
If you like the tutorial, and my icons, feel free to watch
applepie_icons for further updates! :D
This tutorial was requested by
tehuberfangirland it's not translatable outside of versions of Photoshop with selective coloring, I used PSCS2.

to

THERE IS A .PSD DOWNLOAD, JUST SCROLL DOWN ALL THE WAY!!!!!!!!!!!!!!
This tutorial is based on
p_precious's tutorial located here, she gets complete credit for most of this tutorial.
Start off with your base and duplicate it twice, setting both duplicated layers to screen:

to

Add a blue #1a245b layer and set it to exclusions 100%:

to

Now, duplicate your base and bring it to the top, set it to soft light 100%:

to

Add a white #eeeeee layer, set it to color burn 100%:

to

Now add a selective color layer set to 100% with these settings:
REDS: -100, 15, 100, 0
YELLOWS: -45, -30, 0, -22
NEUTRALS: 17, -10, -18, -16

to

Now add another selective color layer set to 100% with these settings:
REDS: -70, -30, -25, 22
YELLOWS: -60, -27, -27, -27
NEURALS: -16, -4, 20, 4

to

Now duplicate your base again, bring it to the top, set to to normal 30%:

to

Now add a hue/saturation layer set to 50% with these settings:
MASTER: 0, 40, 0

to

Now add another selective coloring layer set to 100% with these settings:
REDS: -43, 27, -10, -10
YELLOWS: -11, 8, 0, 0
NEUTRALS: 3, 0, 0, -9

to

Now add a white #f0f0f0 layer set to color burn 100%:

to

Now add this texture, set to screen 50%:

to

Now add this texture, set to multiply 50%:

to

Add a yellow #fcdb72 layer, set to soft light 35%:

to

Add a curves layer set to 100%:
Point: 154, 169

to

Add another selective color layer 100% with these settings:
NEUTRALS: 15, 15, -1, 10

to

Add a hue/saturation layer 100% with these settings:
REDS: 0, 9, 0
CYANS: 0, 13, 0
THIS IS WHERE IT GETS KINDA CONFUSING
Now select the icon, go to edit>>copy merge>>edit>>paste
So you still have it looking like this:

Duplicate the merged layer and desaturate the second merged layer by going to edit>>adjustments>>desaturate, and set it to soft light 100%

to

Now, remember that first merged layer? Click on that. (it should be the one that's not desaturated and is at normal 100%)
Go to filter>>sharpen>>unsharp mask with these settings:
Amount: 25%
Radius: 1.0 pixels
Theshold: 0 levels

to

Now we are still on the first merged layer. Go to filter>>sharpen>>smart sharpen with these settings:
Amount: 12%
Radius: 27.3 pixels
Remove: Lens Blur
Check more accurate

to

AND YOU'RE FINISHED!!!
Now what I got the second time:

original:

a little difference in the saturation...
And, because I realized how much this sucked w/o the .psd file you can download it here. (Sorry it's megaupload, yousendit was being stupid)
If you have any questions feel free to ask!!!
If you like the tutorial, and my icons, feel free to watch
applepie_icons for further updates! :D