TUTORIAL #3
hello, it's been a long time since i made a tutorial, so i thought it would be nice for a change..
go from this to this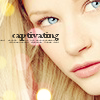
.
- we start off with this picture from lost-media.com.
- i resize and sharpen it. and then i crop it to 100x100 px to get

- then i duplicate the base and set it to screen 30% and get

- next i make a new layer and fill it with #0000FF

- i set it to exclusion 9% to get

- next i make another new layer and fill it with #E7D89F
- i set it to overlay 40% to get

- now i make yet another layer and fill it with #EED7BD
- i set it to overlay 12% to get

- now i make a new layer and only select the eyes with the selection tool or whatever you've got for that and i fill the selection with #1BAFBD

- i set the layer to hue 80% to get

- i want the eyes to look a bit more blue, so i duplicate the layer once to get

- now i take this light texture that i got here @ anais-dirge
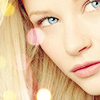
- i rotate and paste it exactly the way i want it =P and set it to screen 100%to get
- now i take this brush which i made myself
- paste it and set it to multiply 100% to get

- and that is the finished icon!!
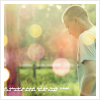
- other icons made with the same technique
01.
02.
*no hotlinking.
*credit, if you use.
*you are welcome to comment. (i'd be happy to see, what others make with this!)
go from this to this

.
- we start off with this picture from lost-media.com.
- i resize and sharpen it. and then i crop it to 100x100 px to get

- then i duplicate the base and set it to screen 30% and get

- next i make a new layer and fill it with #0000FF

- i set it to exclusion 9% to get

- next i make another new layer and fill it with #E7D89F

- i set it to overlay 40% to get

- now i make yet another layer and fill it with #EED7BD

- i set it to overlay 12% to get

- now i make a new layer and only select the eyes with the selection tool or whatever you've got for that and i fill the selection with #1BAFBD

- i set the layer to hue 80% to get

- i want the eyes to look a bit more blue, so i duplicate the layer once to get

- now i take this light texture that i got here @ anais-dirge

- i rotate and paste it exactly the way i want it =P and set it to screen 100%to get

- now i take this brush which i made myself

- paste it and set it to multiply 100% to get

- and that is the finished icon!!
- other icons made with the same technique
01.
02.
*no hotlinking.
*credit, if you use.
*you are welcome to comment. (i'd be happy to see, what others make with this!)