Tutorial #003
I haven't posted a tutorial in a while, and after getting some translation help from crackchemistry I've decided to play around with and create a new tutorial for PSP 9, I'm almost 100% positive it’s translatable into other PSP versions and PS. (the images for this tutorial were taken off of SOMETHING-HAPPENS)
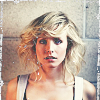
go from
to
001. To start this tutorial prep your icon (crop, resize, sharpen, soften, whatever you want)
002. Duplicate the layer and set it to Screen (depending on the icon the screen should be anywhere from 80-95%) (PREVIEW)
003. Next create a new layer and flood it with a dark navy blue (#000040) set it to Exclusion 43% (PREVIEW)
004. Now create a New Adjustment Layer>> Hue/Saturation/Lightness
Reds>>Saturation = 30
Blues>>Saturation=30
Magentas>>Saturation = 30 (PREVIEW)
005. Now, Duplicate the base layer twice, set the first layer to soft light anywhere between 30-40 and set the second one to Screen anywhere between 20-30. (PREVIEW)
006. Next create a new layer and flood it with a medium blue (#3d83e3) set it to Soft light 63% (PREVIEW)
007. Duplicate the layer, set it to overlay fill 12-15% with red (da1e2b), take an eraser and erase certain places around the face and erase the background. (PREVIEW)
008. Duplicate the layer twice. Set the first one to multiply 56, set the second one to screen 40. (PREVIEW)
009. Use a scratchy texture, set the layer mode to Lighten, I used a texture from peachinparis. (You might want to rotate and duplicate the scratch texture to add to the effect) (PREVIEW)
and your done! remember, this tutorial is meant to be a guide, so you'll probably have to adjust some steps to suit your icon and to get the look you want
Examples :


[Edit] I'd love to see the icons you've made with this tutorial :D
go from

to

001. To start this tutorial prep your icon (crop, resize, sharpen, soften, whatever you want)
002. Duplicate the layer and set it to Screen (depending on the icon the screen should be anywhere from 80-95%) (PREVIEW)
003. Next create a new layer and flood it with a dark navy blue (#000040) set it to Exclusion 43% (PREVIEW)
004. Now create a New Adjustment Layer>> Hue/Saturation/Lightness
Reds>>Saturation = 30
Blues>>Saturation=30
Magentas>>Saturation = 30 (PREVIEW)
005. Now, Duplicate the base layer twice, set the first layer to soft light anywhere between 30-40 and set the second one to Screen anywhere between 20-30. (PREVIEW)
006. Next create a new layer and flood it with a medium blue (#3d83e3) set it to Soft light 63% (PREVIEW)
007. Duplicate the layer, set it to overlay fill 12-15% with red (da1e2b), take an eraser and erase certain places around the face and erase the background. (PREVIEW)
008. Duplicate the layer twice. Set the first one to multiply 56, set the second one to screen 40. (PREVIEW)
009. Use a scratchy texture, set the layer mode to Lighten, I used a texture from peachinparis. (You might want to rotate and duplicate the scratch texture to add to the effect) (PREVIEW)
and your done! remember, this tutorial is meant to be a guide, so you'll probably have to adjust some steps to suit your icon and to get the look you want
Examples :


[Edit] I'd love to see the icons you've made with this tutorial :D