Tutorial: Light Effects with stock images
heee, I feel like oversharing these days... but some people have asked, so... I bring you the
Easy Light Effects Tutorial
from this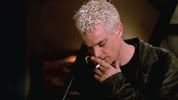
to this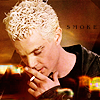
General Notes:
ok, then
Step 01: Cropping
- open your pic
- try to find a nice cropping area.
(e.g. look for what you want to set your focus on, and then try to place this area in the first third or last third of the pic, it doesn't matter whether we speak about top-bottom, or left-right)
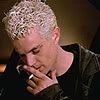
- I wanted to focus on Spike's pretty face of course plus the cigarette, so I cropped like this
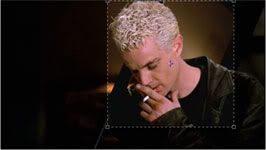
- note that the most important area is in the first third of the final pic
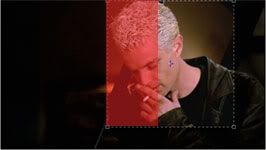
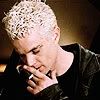
- after some sharpening (Filter- Sharpen- Sharpen) I got this result
Step 02: Preparing
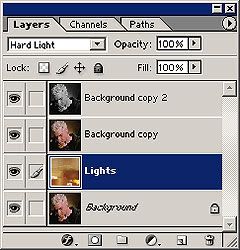
- I duplicated the background layer twice
- the first copy I set on Layer Mode Screen
- the second copy I set on Layer Mode Soft Light and desaturated (ctrl+shift+u) the layer
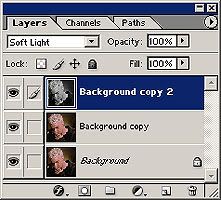
- so far the icon looks like this
Step 03: the secret of easy Light Effects
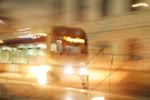
- try to find some stock images with lots of lights, I used this one, please try to find another one. I don't want us all to have the same lights over and over again... I just show it here so that you can get a feeling about what kind of pics I'm talking. google them, or try GettyImages for example.
ETA: I made a post with stock images I made for light effects, you can DL a image pack with 30 stocks in this entry.
- I added the stock image between the background layer and the first copy of it (just copy the image with ctrl+a to mark all, and ctrl+c to copy it, then switch to your icon and press ctrl+v to paste it), set it on Layer Mode Hard Light and moved it around until I liked it.
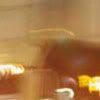
the area I've chosen looked like this
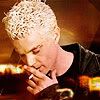
and the result of this step like this
Step 04: Final Touchings
- now you can play around with some more sharpening, but not too much, if it's too much try to fade the effect. with ctrl+shift+f you can get the fade tool, but only immediately after you used the filter.
- add some text.
- do whatever else you like to do...
- save it. I used the png-24 format.
final result:

ETA: additional tips and tricks
that's about it.
if there are any questions feel free to ask :)
Easy Light Effects Tutorial
from this

to this

General Notes:
- I used Photoshop 7.0
- the original pic is from Buffyscreenshots.com when it wasn't on hiatus. feel free to use it for this tutorial but please only for educational reasons, don't claim the final icon yours afterwards...
- I like to work on a 200x200 canvas and resize it in the end. it's just a thing of me, but for this tut I assumed to work in 100x100...
- I also assumed that you know some tools in PS
ok, then
Step 01: Cropping
- open your pic
- try to find a nice cropping area.
(e.g. look for what you want to set your focus on, and then try to place this area in the first third or last third of the pic, it doesn't matter whether we speak about top-bottom, or left-right)
- I wanted to focus on Spike's pretty face of course plus the cigarette, so I cropped like this

- note that the most important area is in the first third of the final pic

- after some sharpening (Filter- Sharpen- Sharpen) I got this result

Step 02: Preparing
- I duplicated the background layer twice
- the first copy I set on Layer Mode Screen
- the second copy I set on Layer Mode Soft Light and desaturated (ctrl+shift+u) the layer

- so far the icon looks like this

Step 03: the secret of easy Light Effects
- try to find some stock images with lots of lights, I used this one, please try to find another one. I don't want us all to have the same lights over and over again... I just show it here so that you can get a feeling about what kind of pics I'm talking. google them, or try GettyImages for example.

ETA: I made a post with stock images I made for light effects, you can DL a image pack with 30 stocks in this entry.
- I added the stock image between the background layer and the first copy of it (just copy the image with ctrl+a to mark all, and ctrl+c to copy it, then switch to your icon and press ctrl+v to paste it), set it on Layer Mode Hard Light and moved it around until I liked it.

the area I've chosen looked like this

and the result of this step like this

Step 04: Final Touchings
- now you can play around with some more sharpening, but not too much, if it's too much try to fade the effect. with ctrl+shift+f you can get the fade tool, but only immediately after you used the filter.
- add some text.
- do whatever else you like to do...
- save it. I used the png-24 format.
final result:

ETA: additional tips and tricks
- sometimes the image is too dark, then add some more layers on screen mode...
- play with the transparency of the layers
- if you want to increase the effect duplicate the light effect layer, sometimes you have to change the layer mode then, for example to screen or soft light (depends on how light/dark you want your end result)
- play around with the layer order, when you're using more layers, the results can vary strongly
- try to use auto-levels/contrast on your screen layer, sometimes this makes the difference you're looking for
that's about it.
if there are any questions feel free to ask :)