Tutorial (3)
This was lots of fun.
It took patience though, haha.
1. Start with THIS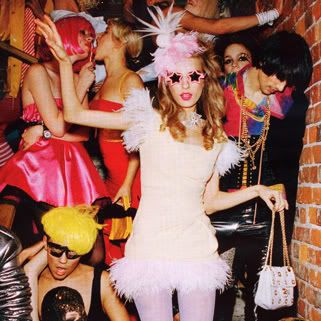
2. Duplicate the layer, delete the original, and put a white layer underneath this.
This is so that you no longer have a ‘background’ image, and so that your image is not locked. The white layer will make it much easier to erase…
3. Because the next thing we are going to do is erase everything except for our focus… and get THIS
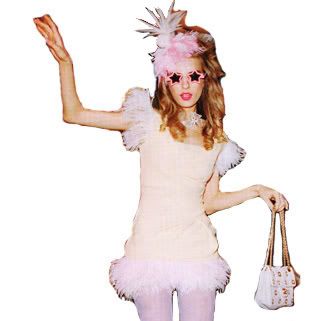
4. Adjust Curves, and get THIS
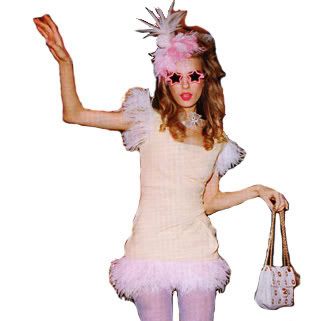
5. Adjust color, and get THIS

6. At this point I am going to crop it, and resize it to standard icon size (100x100). Now I have THIS

7. I am going to make my background layer (the white layer that we made) a nice pink and get THIS

8. Another round of adjusting the color, and we have THIS

9. Now, on the main layer (the one with the chick) make an outer glow. I made mine a bright yellow, set at normal, 100 opacity. I adjusted some other stuff too, but that doesn’t matter. We’re not making the same icon, right? Now I have THIS

10. Copy and paste you’re main layer. Your image should look no different, but you’re layer pallet should look similar to THIS
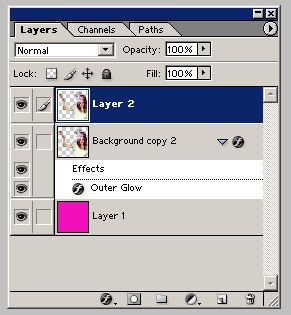
11. Hide that layer that you just made. Set you’re main layer at color burn 100%.
Unhide the layer they you hid, and move it. I now have THIS

12. Add an outer glow to this layer now as well. I made mine in dark purple, set at normal, 100% opacity, just like the other one. I made this one slightly smaller though.

13. Flatten you’re image, and adjust the saturation (I did +30 something) and get THIS

14. Add text if desired, and finish with THIS

It took patience though, haha.
1. Start with THIS
2. Duplicate the layer, delete the original, and put a white layer underneath this.
This is so that you no longer have a ‘background’ image, and so that your image is not locked. The white layer will make it much easier to erase…
3. Because the next thing we are going to do is erase everything except for our focus… and get THIS
4. Adjust Curves, and get THIS
5. Adjust color, and get THIS
6. At this point I am going to crop it, and resize it to standard icon size (100x100). Now I have THIS
7. I am going to make my background layer (the white layer that we made) a nice pink and get THIS
8. Another round of adjusting the color, and we have THIS
9. Now, on the main layer (the one with the chick) make an outer glow. I made mine a bright yellow, set at normal, 100 opacity. I adjusted some other stuff too, but that doesn’t matter. We’re not making the same icon, right? Now I have THIS
10. Copy and paste you’re main layer. Your image should look no different, but you’re layer pallet should look similar to THIS
11. Hide that layer that you just made. Set you’re main layer at color burn 100%.
Unhide the layer they you hid, and move it. I now have THIS
12. Add an outer glow to this layer now as well. I made mine in dark purple, set at normal, 100% opacity, just like the other one. I made this one slightly smaller though.
13. Flatten you’re image, and adjust the saturation (I did +30 something) and get THIS
14. Add text if desired, and finish with THIS