Tutorial #2 : Manga Color Icon
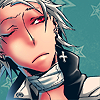
From this to 
Software : Photoshop CS2
Tools : Wacom Intuos 3 (any tablet is OK, don’t worry, or even a mouse pad, if you’re skillful x3)
Difficulty : Medium
Time : ~20 min (a little bit longer if you’re not used to this sort of thing)
Hi :D
Today, we’ll learn how to colour a pic taken from a manga. I chose this base to work with (because I love Haine and I love Shirow Sensei for not using too much screen tones xD)
Start by cropping the pic as you wish, using Fixed Aspect Ratio (width:1 height:1)
Note that the bigger the image the better.
Don’t resize your pic yet.
Adjust the Level as you wish.

Take your Paint Tool (white) and erase the part you don’t want.

Merge all the layers.
To make things easier, I’ll separate the line (in black) from the background (in white).
Make sure that the Default Background and Foreground are black and white.

Now :
Select > All (or Ctrl+A)
Edit > Cut (or Ctrl+X)
Control > New > Layer > Ok (or Ctrl+Shift+N)
Take your paint bucket tool and fill it with black
Edit in Quick Mask Mode
Edit > Paste (or Ctrl+V)
Edit in Standard Mode
Delete (button on keyboard)
Deselected

But if you are lazy, you can just use Multiply on the layer mode (even if it’s maybe a little less comfortable for the next steps).
Ok, now, the base is ready to be coloured =D
Start by deleting the white background.
Layer > New Fill Layer > Solid Colour >Ok
Then chose a colour like Grey or any colour you won't use in this pic (it’s easier to see what you’ve done).
Put it under the first layer.

Create a new layer between the 2 first ones.
I’ll start with the face.
You can take your Paint Tool (Hard Round) and paint happily.
It doesn’t matter if it’s crappy, just make sure that all the parts that need to be coloured are filled in.

Then, Lock the Transparent Pixels.

Chose an Airbrush Hard Round brush and pick a darker colour. We’ll create shadows.
Important : you need to determine where the light comes from.


Now, you have your shadows but it’s still very crappy >o<
Take the Smudge Tool (Soft Round) and smooth out, smooth out, smooth out… STOP! Don’t smooth too much or all what you’ve done will be useless *w*;

Now, use the Burn Tool (Soft Round, Midtones, big size please) and accentuate the shadows. Not too much.

That’s all for the shadows.
Now, add some light.
Take the Dodge Tool (Airbrush Hard Round, Highlights, small size) and add the light on the nose, the lips. Then, always with the Dodge Tool, use a big Soft Round brush on the cheeks.

And that’s done!
Now, you can do the same things for the rest but don’t forget to use a new layer each time you change the part you want to colour (skin, hair, etc…).
… and got it.

I add some bluish backlights cause the pic is a little bit flat xD

Now, you can resize the pic =D

You can now chose the colour of the background, add some textures, etc…
The colouring part is over but still, I love strong colours, so :
Layer > New Adjustment Layer > Selective Colour > Ok


I like to add a Solid Colour Layer (here #001525) in Exclusion, on top of all the layers.

When you’re satisfied, merge all the layers, sharpen.

Done =D
Special thanks to hidden_gems ♥

Software : Photoshop CS2
Tools : Wacom Intuos 3 (any tablet is OK, don’t worry, or even a mouse pad, if you’re skillful x3)
Difficulty : Medium
Time : ~20 min (a little bit longer if you’re not used to this sort of thing)
Hi :D
Today, we’ll learn how to colour a pic taken from a manga. I chose this base to work with (because I love Haine and I love Shirow Sensei for not using too much screen tones xD)
Start by cropping the pic as you wish, using Fixed Aspect Ratio (width:1 height:1)
Note that the bigger the image the better.
Don’t resize your pic yet.
Adjust the Level as you wish.

Take your Paint Tool (white) and erase the part you don’t want.

Merge all the layers.
To make things easier, I’ll separate the line (in black) from the background (in white).
Make sure that the Default Background and Foreground are black and white.

Now :
Select > All (or Ctrl+A)
Edit > Cut (or Ctrl+X)
Control > New > Layer > Ok (or Ctrl+Shift+N)
Take your paint bucket tool and fill it with black
Edit in Quick Mask Mode
Edit > Paste (or Ctrl+V)
Edit in Standard Mode
Delete (button on keyboard)
Deselected

But if you are lazy, you can just use Multiply on the layer mode (even if it’s maybe a little less comfortable for the next steps).
Ok, now, the base is ready to be coloured =D
Start by deleting the white background.
Layer > New Fill Layer > Solid Colour >Ok
Then chose a colour like Grey or any colour you won't use in this pic (it’s easier to see what you’ve done).
Put it under the first layer.

Create a new layer between the 2 first ones.
I’ll start with the face.
You can take your Paint Tool (Hard Round) and paint happily.
It doesn’t matter if it’s crappy, just make sure that all the parts that need to be coloured are filled in.

Then, Lock the Transparent Pixels.

Chose an Airbrush Hard Round brush and pick a darker colour. We’ll create shadows.
Important : you need to determine where the light comes from.


Now, you have your shadows but it’s still very crappy >o<
Take the Smudge Tool (Soft Round) and smooth out, smooth out, smooth out… STOP! Don’t smooth too much or all what you’ve done will be useless *w*;

Now, use the Burn Tool (Soft Round, Midtones, big size please) and accentuate the shadows. Not too much.

That’s all for the shadows.
Now, add some light.
Take the Dodge Tool (Airbrush Hard Round, Highlights, small size) and add the light on the nose, the lips. Then, always with the Dodge Tool, use a big Soft Round brush on the cheeks.

And that’s done!
Now, you can do the same things for the rest but don’t forget to use a new layer each time you change the part you want to colour (skin, hair, etc…).
… and got it.

I add some bluish backlights cause the pic is a little bit flat xD

Now, you can resize the pic =D

You can now chose the colour of the background, add some textures, etc…
The colouring part is over but still, I love strong colours, so :
Layer > New Adjustment Layer > Selective Colour > Ok


I like to add a Solid Colour Layer (here #001525) in Exclusion, on top of all the layers.

When you’re satisfied, merge all the layers, sharpen.

Done =D
Special thanks to hidden_gems ♥