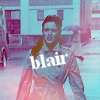
Tutorial 1: Gossip Girl, Blair
This is my first ever tutorial! I'll be posting icons soon but here is a tutorial for Gossip Girl, specifically Blair's dream in The Blair Bitch Project.
This is my first tutorial, so please comment! I'd like to know if I should do more.
Learn how to go From this >

>

or

using PSPX
1: Do whatever you do to get your base, crop, resize sharpen, etc. I took a Gossip Girl screencap from world_dreams … I croped it, resized to 100x100 pixels and sharpened once.

I duplicated my base and set it to Screen 100% . Then I duplicated my Screen layer and changed the opacity to 60%. DON’T MERGE! You may need to add another screen layer after the icon is made, depending on your base.

I went to Layers > Adjustment Layer > Color Balance and added these settings.
MIDTONES: -50, 15, 30

I went to Layers > Adjustment Layer > Curves and added these settings.
RGB: Input 100, Output 150

I went to Layers > Adjustment Layer > Brightness and Contrast and added these settings.
BRIGHTNESS: -40
CONTRAST: 0

I went to Layers > Adjustment Layer > Channel Mixer and added these settings.
RED: 151, -44, -44
Set this Channel Mixer layer to Soft Light.

I went to Layers > Adjustment Layer > Color Balance and added these settings. This is important because without it, you're icon will be REALLY blue!
MIDTONES: 100, -100, -100

I went to Layers > New Raster Layer and set it to Exclusion 100%, filled with this red color #801008

Now you can leave it at that, it 'spretty awesome so you could skip to the text but I wanted to add a little more.
I added this texture by
_iconographer and set it to Lighten 100%

>

Now you can’t see Blair very good so I went to Layers > Adjustment Layers > Brightness and Contrast
BRIGHTNESS: 0
CONTRAST: 40

Add test, I added Blair in Times New Roman, slanted it slightly and I was done! Here’s the finished product.
