Will It Lens? Part 4
If you've missed it, here are parts one, two, and three of our adventures with a 4'x3' fresnel lens, along with a gallery of all the pictures.
Our lens arrived with a corner chipped off, so the lens company sent us a second one for free (which also had its corner chipped off on arrival, but we didn't get a third for free). I've been holding off writing this post because I was hoping to title it "Episode IV: A New Lens," but we still haven't built the frame for the second lens or the frame for the mirrors that will reflect light from both lenses onto a single point. So, instead of waiting for that to happen, I'm posting the results I've already got.
The same SAFETY NOTES as before apply, as always. In lieu of new safety warnings (we haven't had any new dangers come up!), I've got a few tips for anyone trying to duplicate this.
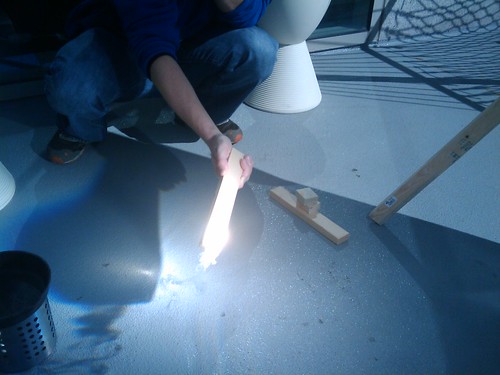
Here's a question for the physicists and/or chemists out there: when we put a piece of wood in the focal point, it caught fire immediately (with red flames, though they don't show up well in the picture),
but when we took it back out, the flames went out immediately, too.
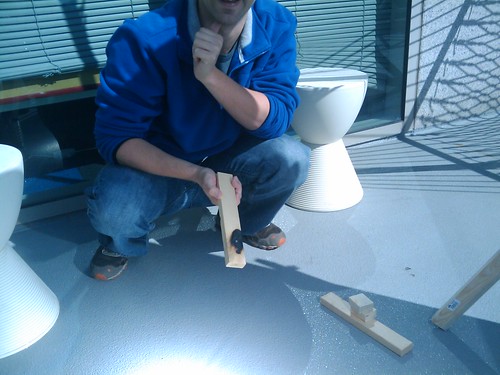
Why didn't the wood keep burning like a normal fire? When we take paper out of the focal point, it continues to burn and we need to douse it with a cup of water, and I can't explain why that doesn't happen with the wood.
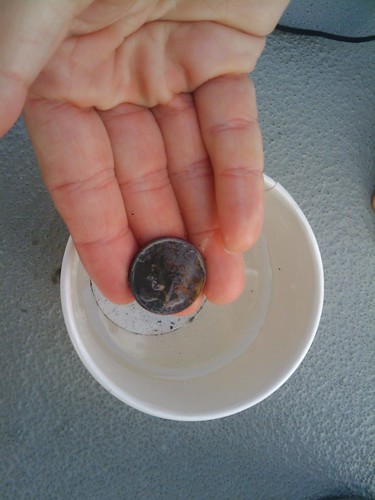
We'd had such good luck with pennies and interesting luck with dimes, we tried a quarter. Parts of it turned black (just like the other coins), but parts turned a red-brown rusty color. We're not sure what that is; oxidized copper is black and oxidized zinc is white, and there shouldn't be any iron in the quarter, so we don't know what happened there.
iguanawow suggested we try soap, hoping for similar results to putting soap in a microwave. Thanks for the suggestion; it totally worked!
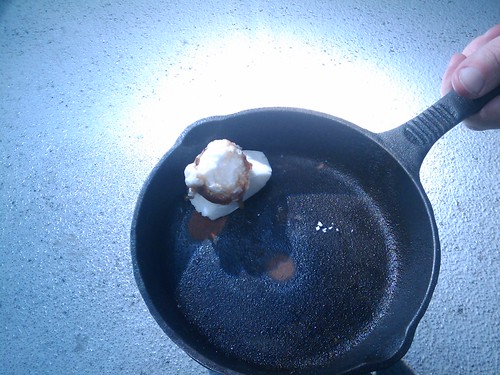
The soap at the focal point foamed up, then the foam broke and melted and flowed down the side of the solid bar, and kinda burned and turned brownish. and the cool thing about this is that as the foam gave way and the liquid flowed out of the focal point, the light could reach new soap, and this continued in perpetuity.
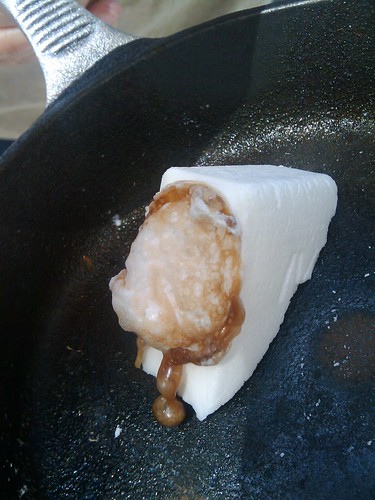
I suspect there's a lot of air in there, because it was cool to the touch ~20 seconds after taking it out of the light. At that point, the foam felt kinda like marshmallows (incidentally, marshmallows are near the top of our list of things to try next). Several hours later, however, the soap had become hard again and was no longer squishy to the touch.

The bar of soap worked so well, we tried liquid dishwasher detergent. It foamed into a shallow layer of tiny bubbles.
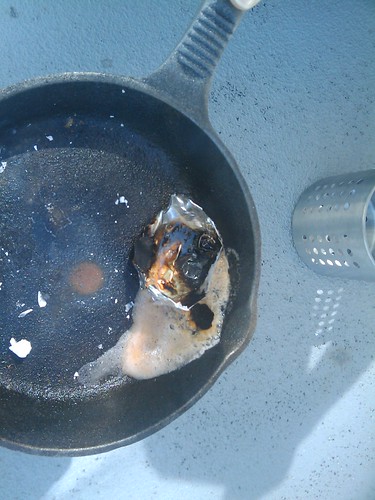
It smelled both lemony fresh and very bad for you in that cleaning solution sort of way, just like you're used to.
Despite our mixed success with foods so far, we decided to try cooking bacon.
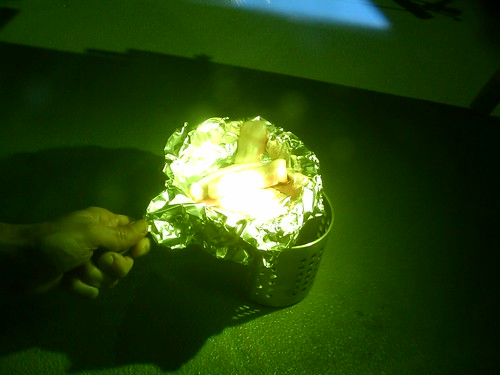
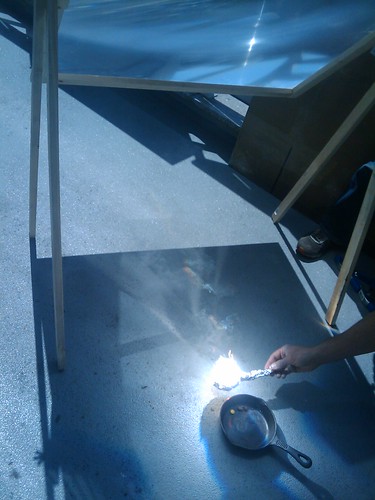
This picture was taken using the #5 welding goggles which is why the pan is half visible but still so blindingly bright; the #12 goggles are always reserved for the person holding the skillet.

The problem with cooking with the lens is that it heats stuff up too hot too fast. So, about a third of the bacon was well done, a third was burnt, and a third was uncooked. Also, we had a huge pool of bacon grease in the bottom of the skillet. but the well-cooked parts tasted great. So, we added an egg.

The egg was covered in the bacon fat, and was delicious. We didn't lens the spoon; we used it to eat the egg afterwards.
We tried honey, which boiled very vigorously.
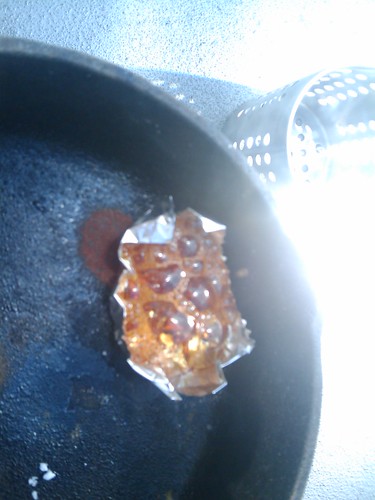
It smelled delicious. After a while, though, it burned, turned black, and smelled terrible. I suspect caramelized honey contains lots of large polymers (or similar molecules), because it was stretchy and solid at the same time (part stuck to the skillet and stretched into really long wisps as we picked it up).
We had mussels for dinner one night, so we saved an empty shell to lens.
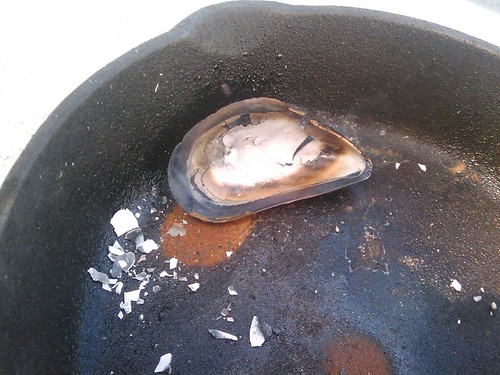
The inside used to be all white (like the rightmost area), but it turned brownish/blackish and then a very ashen white. The top started out completely black, but turned white as it burned (which smelled just as bad as you'd imagine a dead, burning shellfish would). The shell is composed of layers, and they started flaking off both the top and bottom. We also cracked the shell pretty badly; not sure if that was some internal stress in the shell that had always been there, or if heating it caused the hot parts to expand and crack away from the less hot parts. However, the whole thing became so brittle that large pieces fell off at the slightest touch.

Seashells are mostly calcium carbonate (aka limestone), which decomposes around 1100K, which is totally a temperature we can reach (particularly with a nonreflective black object, since it absorbs most of the light). I suspect the white parts are calcium, but I have no idea what carbonate looks like or whether it's still there somewhere.
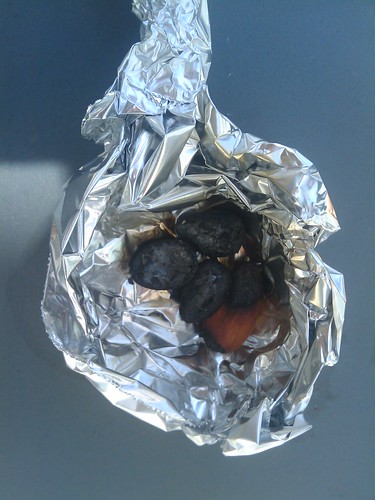
Almonds smoked a lot, but I don't think they produced any flames.
Afterwards, they were very black (no surprise there).
We tried toasting a sandwich, but that didn't work well. In order not to burn it, we kept it away from the focal point, so that the light was more diffuse. After several minutes, the top of the bread was kinda toasted, but I'd recommend going back to your toaster oven or panini press or whatever you typically use to cook sandwiches.
We tried gummy bears, expecting them to behave like jelly beans. However, we couldn't have been more wrong! They foamed up.
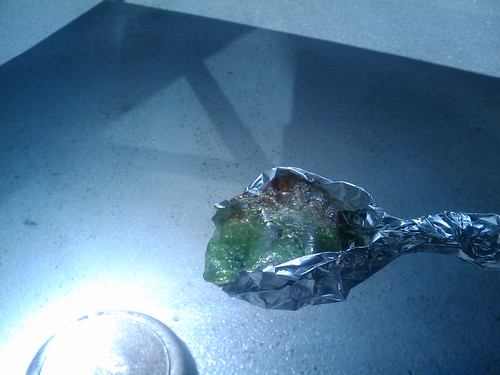
In fact, they foamed up so much that they overflowed the aluminum foil holder. However, the foam collapsed back into its normal, gummy state very quickly as it cooled down.

Afterwards, it didn't look significantly different from the way it started (other than losing the bear shape and melting into one big glob). We weren't brave enough to eat it, but we might try that at some point in the future.
M&Ms smoked away their color, and then burned into black lumps.
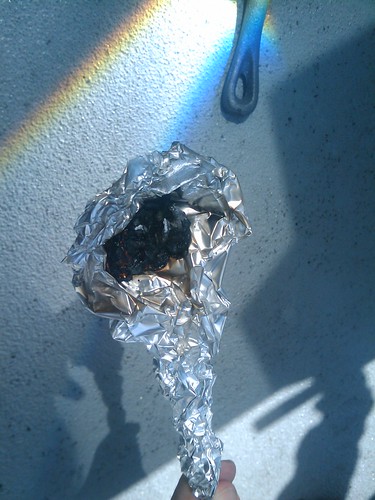
Unlike the Reeses Pieces from my previous post, the candy shell and chocolate contents didn't noticeably separate out into distinct layers.
As always, if you have ideas of stuff to lens, I'd be happy to try them out. Until next time, be safe and have fun!
Edit: In part 5 we achieve much higher temperatures!
Our lens arrived with a corner chipped off, so the lens company sent us a second one for free (which also had its corner chipped off on arrival, but we didn't get a third for free). I've been holding off writing this post because I was hoping to title it "Episode IV: A New Lens," but we still haven't built the frame for the second lens or the frame for the mirrors that will reflect light from both lenses onto a single point. So, instead of waiting for that to happen, I'm posting the results I've already got.
The same SAFETY NOTES as before apply, as always. In lieu of new safety warnings (we haven't had any new dangers come up!), I've got a few tips for anyone trying to duplicate this.
- Build your stand taller than you think you need. When daylight savings time kicked in, the sun was suddenly much higher in the sky during lunch, so we tilted our lens more horizontally to face the sun, and the focal point was in the floor. I don't think we've seriously damaged the floor, but things would work much better if we had a patch of (unburnable) dirt to hold our equipment. We've adjusted the legs of our stand to be taller than they were before.
- Get very strong filters for your welding goggles (I know I said this last time, but it's worth repeating). We started out with #5 filters, which definitely aren't strong enough, but we've upgraded to a #12 filter, which lets you stare at things in the focal point without hurting your eyes. The one tricky thing is that you can't see anything else with them, so you're basically blind from the time you put your goggles on until the time we take the cardboard off the lens and let light through it. but the new filter has really helped people positioning the skillet, since they can see what they're doing.
- Build a lens frame that would be structurally sound even without a lens in it. Our "frame" was 4 boards that were attached to the edges of the lens. This kept it nice and flat, but if you pick it up by the wood, you exert a lot of strain on the lens, and we have a crack in a corner because of this strain. We've got L-brackets now to secure the boards to each other, so hopefully the crack won't worsen.
- Expect that anything you stick in the focal point might be ruined. Even though we can't melt iron, we got the skillet so hot that it spontaneously rusted in a couple places. I don't think it's rusted all the way through, but we definitely have rust spots on the top and corresponding rust spots on the bottom. I now owe Jacob a new skillet. We also have burn marks on the Leatherman we had been using as pliers (luckily they come with a lifetime warranty, so I think we can get those fixed). So, expect that anything you put in the focal point may get ruined by the experience.
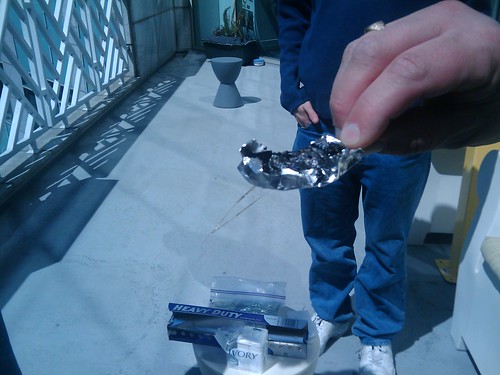
- Go shopping for aluminum foil. We went to the store and found some cheap foil without any non-stick coating that had the advantage of being "heavy duty." Since it's just aluminum without any weird chemicals on the surface, it seems preferable to the stuff we had been using before.
- If you intend to eat anything you make, use a clean surface to cook it (another repeat from last time, but worth the reiteration). This should go without saying, but we thought we were pretty clever when we lined the skillet with aluminum foil, so that our food didn't come into contact with the copper oxide and other nasty things we'd put in it previously. Things like metals and plastics solidify at room temperature (obviously) and stick to whatever they had melted onto, so they're hard to wash away, even if you clean the skillet thoroughly. A fresh lining of aluminum foil removes any doubt about whether there are still carcinogens/irritants touching your food.
Here's a question for the physicists and/or chemists out there: when we put a piece of wood in the focal point, it caught fire immediately (with red flames, though they don't show up well in the picture),

but when we took it back out, the flames went out immediately, too.

Why didn't the wood keep burning like a normal fire? When we take paper out of the focal point, it continues to burn and we need to douse it with a cup of water, and I can't explain why that doesn't happen with the wood.
We'd had such good luck with pennies and interesting luck with dimes, we tried a quarter. Parts of it turned black (just like the other coins), but parts turned a red-brown rusty color. We're not sure what that is; oxidized copper is black and oxidized zinc is white, and there shouldn't be any iron in the quarter, so we don't know what happened there.

iguanawow suggested we try soap, hoping for similar results to putting soap in a microwave. Thanks for the suggestion; it totally worked!

The soap at the focal point foamed up, then the foam broke and melted and flowed down the side of the solid bar, and kinda burned and turned brownish. and the cool thing about this is that as the foam gave way and the liquid flowed out of the focal point, the light could reach new soap, and this continued in perpetuity.

I suspect there's a lot of air in there, because it was cool to the touch ~20 seconds after taking it out of the light. At that point, the foam felt kinda like marshmallows (incidentally, marshmallows are near the top of our list of things to try next). Several hours later, however, the soap had become hard again and was no longer squishy to the touch.

The bar of soap worked so well, we tried liquid dishwasher detergent. It foamed into a shallow layer of tiny bubbles.

It smelled both lemony fresh and very bad for you in that cleaning solution sort of way, just like you're used to.
Despite our mixed success with foods so far, we decided to try cooking bacon.

This picture was taken using the #5 welding goggles which is why the pan is half visible but still so blindingly bright; the #12 goggles are always reserved for the person holding the skillet.

The problem with cooking with the lens is that it heats stuff up too hot too fast. So, about a third of the bacon was well done, a third was burnt, and a third was uncooked. Also, we had a huge pool of bacon grease in the bottom of the skillet. but the well-cooked parts tasted great. So, we added an egg.

The egg was covered in the bacon fat, and was delicious. We didn't lens the spoon; we used it to eat the egg afterwards.
We tried honey, which boiled very vigorously.

It smelled delicious. After a while, though, it burned, turned black, and smelled terrible. I suspect caramelized honey contains lots of large polymers (or similar molecules), because it was stretchy and solid at the same time (part stuck to the skillet and stretched into really long wisps as we picked it up).

We had mussels for dinner one night, so we saved an empty shell to lens.

The inside used to be all white (like the rightmost area), but it turned brownish/blackish and then a very ashen white. The top started out completely black, but turned white as it burned (which smelled just as bad as you'd imagine a dead, burning shellfish would). The shell is composed of layers, and they started flaking off both the top and bottom. We also cracked the shell pretty badly; not sure if that was some internal stress in the shell that had always been there, or if heating it caused the hot parts to expand and crack away from the less hot parts. However, the whole thing became so brittle that large pieces fell off at the slightest touch.

Seashells are mostly calcium carbonate (aka limestone), which decomposes around 1100K, which is totally a temperature we can reach (particularly with a nonreflective black object, since it absorbs most of the light). I suspect the white parts are calcium, but I have no idea what carbonate looks like or whether it's still there somewhere.
Almonds smoked a lot, but I don't think they produced any flames.

Afterwards, they were very black (no surprise there).

We tried toasting a sandwich, but that didn't work well. In order not to burn it, we kept it away from the focal point, so that the light was more diffuse. After several minutes, the top of the bread was kinda toasted, but I'd recommend going back to your toaster oven or panini press or whatever you typically use to cook sandwiches.
We tried gummy bears, expecting them to behave like jelly beans. However, we couldn't have been more wrong! They foamed up.

In fact, they foamed up so much that they overflowed the aluminum foil holder. However, the foam collapsed back into its normal, gummy state very quickly as it cooled down.

Afterwards, it didn't look significantly different from the way it started (other than losing the bear shape and melting into one big glob). We weren't brave enough to eat it, but we might try that at some point in the future.
M&Ms smoked away their color, and then burned into black lumps.

Unlike the Reeses Pieces from my previous post, the candy shell and chocolate contents didn't noticeably separate out into distinct layers.
As always, if you have ideas of stuff to lens, I'd be happy to try them out. Until next time, be safe and have fun!
Edit: In part 5 we achieve much higher temperatures!