Troy Tutorial
Well this is my first tutorial since January
Made in PS CS2 (not transbalable) selective color =(
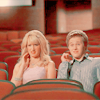
Go from this:
to this:
Let´s start
1-.First crop your base as usually to 100 x 100 then duplicate your base and set it to screen 50% opacity

2-.Now create a new layer and fill it with #fcde76 and set is to Soft Light opacity 40%

3-.Then create another Soft Light Layer 40% of opacity but now fill it with #fe8070

4-.Then open a Selective Color Layer and set this settings =)
Reds
-100,0,+44,0
Yellows
+35,-33,+100,0
Neutrals
+54,-20,-22,0
Click OK

5-.Open another Selective Color layer and set this settings =)
Reds
-100,0,+49,0
Yellows
-100,0,-100,0
Greens
100,0,-54.-7
Click OK

6-Open an Hue/Saturation layer and set the Saturation in +9

7-.Open a Color Balance layer with this settings
Midtones:
+20,-3,-23
Click OK

8-.Bring your base to the top, dessturate it, and set it to soft Light 50% opacity

9-.Create a new layer and fill it with #fe8070 Set in Multiply 100%

10.Create another new layer and fill it with #bbf0fd and set it to soft light 100%

11-.Open another Hue/Saturation Layer and put the Saturation in -42 and the set it to soft light 100%

12-As final step open a Curvez layer with this settings
RGB
Input:103
Output:104
Red
Input:96
Output106
Green
Input:106
Output:98.
Blue
Input:103
Output:112
Click Ok
And this is our final result ^^
Other icons made with this tutorial


As I ever say I like to much to see the results that you obtain ^^
Made in PS CS2 (not transbalable) selective color =(
Go from this:
to this:
Let´s start
1-.First crop your base as usually to 100 x 100 then duplicate your base and set it to screen 50% opacity
2-.Now create a new layer and fill it with #fcde76 and set is to Soft Light opacity 40%
3-.Then create another Soft Light Layer 40% of opacity but now fill it with #fe8070
4-.Then open a Selective Color Layer and set this settings =)
Reds
-100,0,+44,0
Yellows
+35,-33,+100,0
Neutrals
+54,-20,-22,0
Click OK
5-.Open another Selective Color layer and set this settings =)
Reds
-100,0,+49,0
Yellows
-100,0,-100,0
Greens
100,0,-54.-7
Click OK
6-Open an Hue/Saturation layer and set the Saturation in +9
7-.Open a Color Balance layer with this settings
Midtones:
+20,-3,-23
Click OK
8-.Bring your base to the top, dessturate it, and set it to soft Light 50% opacity
9-.Create a new layer and fill it with #fe8070 Set in Multiply 100%
10.Create another new layer and fill it with #bbf0fd and set it to soft light 100%
11-.Open another Hue/Saturation Layer and put the Saturation in -42 and the set it to soft light 100%
12-As final step open a Curvez layer with this settings
RGB
Input:103
Output:104
Red
Input:96
Output106
Green
Input:106
Output:98.
Blue
Input:103
Output:112
Click Ok
And this is our final result ^^
Other icons made with this tutorial
As I ever say I like to much to see the results that you obtain ^^