Tutorial
Requested by
frauleinrk
Warning! This tutorial is pretty damn image heavy.
Learn how to make this in adobe photoshop CS:
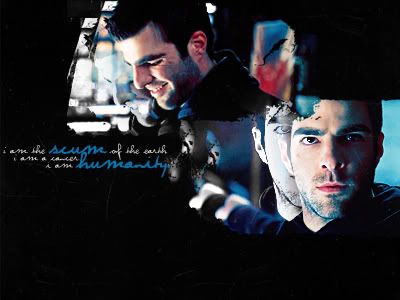
I used this picture and this picture.
I don't have the colouring for these pictures saved, but I'll try to replicate it the best I can.
So, the first thing I needed to do was prepare the bases for colouring by brightening them up. Heroes screencaps tend to be quite dark when Sylar's in them.
(Some steps adjusted from tutorials by
ms_vogue and
lady_iz)
1. Open your image. Duplicate it and set it to soft light 50% (opacity)
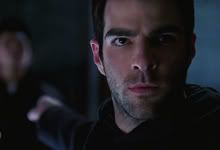
2. Duplicate the base again and set it to screen 60%

3. Fill a new layer with #001C3A and set to exclusion 30%

4. Fill a new layer with #C9DBEB and set to colour burn 50%

5. Fill new layer with #F1AC5E and set to soft light 30%

6. Fill a new layer with #CAAD98 and set to overlay 30%

7. Layer - New Adjustment Layer - Brightness/Contrast. Adjust contrast to +10

8. Layer - New Adjustment Layer - Levels. Adjust the levels for RGB settings to 0 - 1.15 - 248

9. Open up a new layer and stamp (ctrl+alt+shift+e). Go to filter - sharpen - unsharpen mask. Enter settings
Amount: 45
Radius: 1
Threshold: 0

(you may have to experiment with this step. It doesn't work for all images.)
Now I think that the picture is prepared for the colouring because it's colourful and bright enough to work with.
For the other picture, I used the exact same steps, although at the end I thought it appeared a lot less colourful. So, I went back to the original base, went to images - adjustments - auto colour.

Now for the colouring!
10. Duplicate the layer made in step 9. Desaturate it (ctrl+shift+u) and set it to soft light 50%

11. Duplicate layer 9 again and set it above the step 10 layer at screen 60%

12. Fill a new layer with #EEE0CC and set it to soft light 100%

13. Layer - New Adjustment Layer - Selective Colour with these values
Red: -100 0 +100 +100
Yellows: -29 0 -23 0
Neutrals: +70 -20 -46 +20
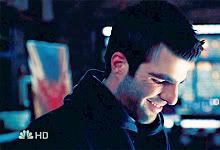
14. Layer - New Adjustment Layer - Colour Balance with these values
Midtones: +8 +10 -12
Shadows: +16 -4 -16
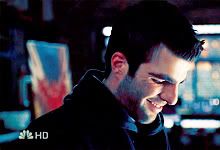
15. Duplicate layer made in step 9, drag to the top. Desaturate (ctrl+shift+u) and set to soft light 70%

16. Create a new layer and stamp (ctrl+alt+shift+e).
For the other picture, repeat steps 10-16. But, on 11 and 12, set it to 90% on both layers, and on step 15, don't desaturate and set to soft light 80% instead. I know it looks slightly different on the original wallpaper, but I can't figure out what I did differently.
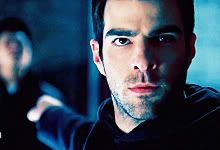
So the images are prepared, now for the actual wallpaper!
17. Create a new image 1024x768. Flood fill with #000000

18. Drag over both pictures to the document and place wherever you like (resize, rotate or flip over, whatever you like.)
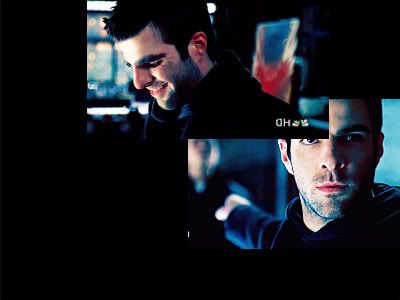
19. Take your eraser tool, and select a grungy border brush such as this by wykedBrush at deviantart. Erase the edges to the picture until you are happy.
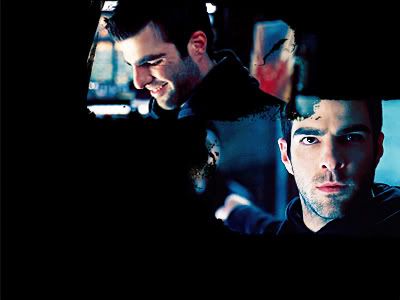
Note: Most border brushes work horizontally or vertically, so it might be useful to rotate your canvas (image - rotate - arbitrary) by a couple of degrees to make it look like it has been torn more realistically. Don't forget to turn the canvas back to its original angle after this step though.
20. Duplicate both pictures. Go to image - adjustments - gradient map and select the black and white gradient.
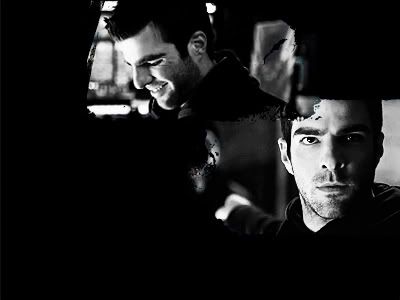
21. For both black and white images, go to image - adjustments - brightness/contrast. Increase brightness to +10 and contrast to +15
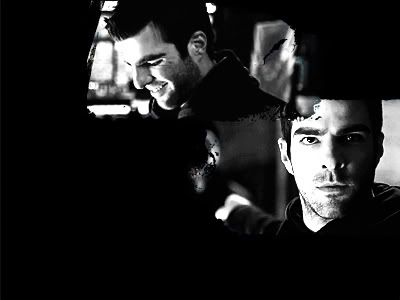
22. Set both pictures to lighten and position them next to the pictures to look like a shadow. Take a round eraser brush set to 0% hardness and erase the parts covering the coloured images face.
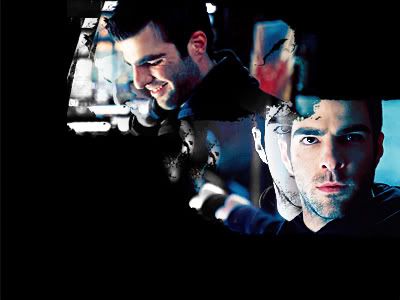
23. Insert some text of your choice (the font I used is called violation from dafont.com)

24. Take a scratchy black and white texture such as this and drag into the window. Set it above all other layers at screen 51%

And we are done! Whew...wasn't that fun?! Well, I hope you learnt something, and remember to experiment with these steps. They won't work perfectly with all images.
I'm sorry if I killed your computer with the image overload.
And, wahay! My first tutorial complete!!
If I confused you or you want me to clarify a certain step, just comment and I'll be happy to do so.
frauleinrk
Warning! This tutorial is pretty damn image heavy.
Learn how to make this in adobe photoshop CS:

I used this picture and this picture.
I don't have the colouring for these pictures saved, but I'll try to replicate it the best I can.
So, the first thing I needed to do was prepare the bases for colouring by brightening them up. Heroes screencaps tend to be quite dark when Sylar's in them.
(Some steps adjusted from tutorials by
ms_vogue and
lady_iz)
1. Open your image. Duplicate it and set it to soft light 50% (opacity)

2. Duplicate the base again and set it to screen 60%

3. Fill a new layer with #001C3A and set to exclusion 30%

4. Fill a new layer with #C9DBEB and set to colour burn 50%

5. Fill new layer with #F1AC5E and set to soft light 30%

6. Fill a new layer with #CAAD98 and set to overlay 30%

7. Layer - New Adjustment Layer - Brightness/Contrast. Adjust contrast to +10

8. Layer - New Adjustment Layer - Levels. Adjust the levels for RGB settings to 0 - 1.15 - 248

9. Open up a new layer and stamp (ctrl+alt+shift+e). Go to filter - sharpen - unsharpen mask. Enter settings
Amount: 45
Radius: 1
Threshold: 0

(you may have to experiment with this step. It doesn't work for all images.)
Now I think that the picture is prepared for the colouring because it's colourful and bright enough to work with.
For the other picture, I used the exact same steps, although at the end I thought it appeared a lot less colourful. So, I went back to the original base, went to images - adjustments - auto colour.

Now for the colouring!
10. Duplicate the layer made in step 9. Desaturate it (ctrl+shift+u) and set it to soft light 50%

11. Duplicate layer 9 again and set it above the step 10 layer at screen 60%

12. Fill a new layer with #EEE0CC and set it to soft light 100%

13. Layer - New Adjustment Layer - Selective Colour with these values
Red: -100 0 +100 +100
Yellows: -29 0 -23 0
Neutrals: +70 -20 -46 +20

14. Layer - New Adjustment Layer - Colour Balance with these values
Midtones: +8 +10 -12
Shadows: +16 -4 -16

15. Duplicate layer made in step 9, drag to the top. Desaturate (ctrl+shift+u) and set to soft light 70%

16. Create a new layer and stamp (ctrl+alt+shift+e).
For the other picture, repeat steps 10-16. But, on 11 and 12, set it to 90% on both layers, and on step 15, don't desaturate and set to soft light 80% instead. I know it looks slightly different on the original wallpaper, but I can't figure out what I did differently.

So the images are prepared, now for the actual wallpaper!
17. Create a new image 1024x768. Flood fill with #000000

18. Drag over both pictures to the document and place wherever you like (resize, rotate or flip over, whatever you like.)

19. Take your eraser tool, and select a grungy border brush such as this by wykedBrush at deviantart. Erase the edges to the picture until you are happy.

Note: Most border brushes work horizontally or vertically, so it might be useful to rotate your canvas (image - rotate - arbitrary) by a couple of degrees to make it look like it has been torn more realistically. Don't forget to turn the canvas back to its original angle after this step though.
20. Duplicate both pictures. Go to image - adjustments - gradient map and select the black and white gradient.

21. For both black and white images, go to image - adjustments - brightness/contrast. Increase brightness to +10 and contrast to +15

22. Set both pictures to lighten and position them next to the pictures to look like a shadow. Take a round eraser brush set to 0% hardness and erase the parts covering the coloured images face.

23. Insert some text of your choice (the font I used is called violation from dafont.com)

24. Take a scratchy black and white texture such as this and drag into the window. Set it above all other layers at screen 51%

And we are done! Whew...wasn't that fun?! Well, I hope you learnt something, and remember to experiment with these steps. They won't work perfectly with all images.
I'm sorry if I killed your computer with the image overload.
And, wahay! My first tutorial complete!!
If I confused you or you want me to clarify a certain step, just comment and I'll be happy to do so.