012.
Sorry for my laziness but I just needed to take some time off to find my muse, perhaps. And now I'm coming back with a tutorial =))
How to make
from
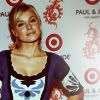
So first of all you crop your base and if you need do Auto Color or Auto Levels to make your base look more .. warm, perhaps. In my case I did Auto Color because as you see the original picture is a bit brighter for my taste.
After the auto color the real coloring begans:
1. Curves:
RGB:
point1: input: 33
output: 44
point2: input: 151
output: 118
point3: input: 186
output: 189
2. Now we'll use a Fill Layer with dark brown, something like #270202 set to Exclusion. I left the opacity to 100% but you can change it according to your picture.
3. It's time for my favourite Selective Color Layer:
Reds:
c: -30
m: 25
y: 50
b: 20
Cyans:
c: -49
Neutrals:
b:5
If your icon looks too red, you can reduse either the opacity of the whole layer or only the amount of the REDS section.
4. Now I use a Color Balance layer:
Midtones: -26; 0; -33
Shadows: 33; -6; -16
Highlights: 0; 0; 0
Set its opacity to 60%
Now use whatever textures or text you want and your done =))
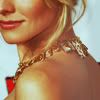
Here is my result:

And some other results(but with small changes in the opacity percents in some layers because they were too red):


It's not as cool as I thought to be, but I hope you will like it =)
How to make

from

So first of all you crop your base and if you need do Auto Color or Auto Levels to make your base look more .. warm, perhaps. In my case I did Auto Color because as you see the original picture is a bit brighter for my taste.
After the auto color the real coloring begans:
1. Curves:
RGB:
point1: input: 33
output: 44
point2: input: 151
output: 118
point3: input: 186
output: 189
2. Now we'll use a Fill Layer with dark brown, something like #270202 set to Exclusion. I left the opacity to 100% but you can change it according to your picture.
3. It's time for my favourite Selective Color Layer:
Reds:
c: -30
m: 25
y: 50
b: 20
Cyans:
c: -49
Neutrals:
b:5
If your icon looks too red, you can reduse either the opacity of the whole layer or only the amount of the REDS section.
4. Now I use a Color Balance layer:
Midtones: -26; 0; -33
Shadows: 33; -6; -16
Highlights: 0; 0; 0
Set its opacity to 60%
Now use whatever textures or text you want and your done =))
Here is my result:

And some other results(but with small changes in the opacity percents in some layers because they were too red):


It's not as cool as I thought to be, but I hope you will like it =)