(no subject)
ICON TUTORIAL
Made by Photoshop6 but this is very translatable.
From this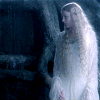
to this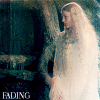
Tutorial #01: The Mirror of Galadriel
+ you may take the icon, if you credit, comment and don't hotlink
+ this is my first tutorial so I'd love to know what you think about it
I. I have this base ready. It isn't very sharp yet.

II. At first, I duplicated the base, sharpened it and set Screen with opacity of 40%
Now I have a brighter, sharper and "shining" icon.
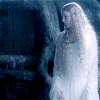
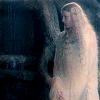
III. I added this nice reddish texture by the magnicifent colorfilter. Set Multiply 100%
--->
IV. Added another texture by colorfilter and set it Overlay 100%.
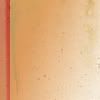
--->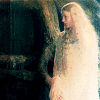
V. As I found the texture's effect too red and bright on Galadriel's gown,
I erased 40% of the layer on Galadriel and the roots of the trees.
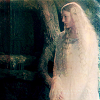
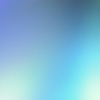
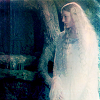
VI. Next, I added a gradient by ? and set it 100% Soft Light.
--->
VII. Now, I found the image too bluish so I lessened the gradient's saturation (Saturation -90 in the Hue/Saturation adjusting. You may adjust the saturation as you like, or then skip this step).
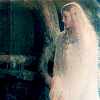
VIII. Added some texts (font is Apple Garamond) and tada, I'm done!

Have fun&tell me what you think :) I'd love to see what you come up with, so feel free to post your own icon in a comment ^^
Made by Photoshop6 but this is very translatable.
From this
to this
Tutorial #01: The Mirror of Galadriel
+ you may take the icon, if you credit, comment and don't hotlink
+ this is my first tutorial so I'd love to know what you think about it
I. I have this base ready. It isn't very sharp yet.
II. At first, I duplicated the base, sharpened it and set Screen with opacity of 40%
Now I have a brighter, sharper and "shining" icon.
III. I added this nice reddish texture by the magnicifent colorfilter. Set Multiply 100%
--->
IV. Added another texture by colorfilter and set it Overlay 100%.
--->
V. As I found the texture's effect too red and bright on Galadriel's gown,
I erased 40% of the layer on Galadriel and the roots of the trees.
VI. Next, I added a gradient by ? and set it 100% Soft Light.
--->
VII. Now, I found the image too bluish so I lessened the gradient's saturation (Saturation -90 in the Hue/Saturation adjusting. You may adjust the saturation as you like, or then skip this step).
VIII. Added some texts (font is Apple Garamond) and tada, I'm done!
Have fun&tell me what you think :) I'd love to see what you come up with, so feel free to post your own icon in a comment ^^