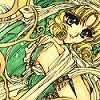
My 1st Icon Tut.....
From this: 
to this:
Step 001
Start out with this base from clamp_visual:
Step 002
Duplicate the base, desaturate, then set to soft-light. Make a new layer and fill it with black. Set that layer to color.
Step 003
If you have Photoshop, create a new adjustment layer (it's the semi-circle). A window will pop out; click Gradient (no, not Gradient Map). If the gradient is black and white, change the black to white. My english is bad. If the white gradient layer is covering Fuu's face a lot, play with the layer's opacity.
Step 004
Use the following textures by colorfilter:

and
set the first to screen and the other to lighten. Make another layer and fill it with black, set it to soft-light.
Step 005
Use some defocused light textures from fangirls_inc and set them to screen.
Step 006
Duplicate the base again and put the copy on top of all the layers and set it to soft-light.
Step 007

Use this gradient from noctuidae, set it to color, opacity 50%.
Step 008
GRADIENTS! Use these three gradients (from moorka, and from someone else which I don't remember...) and set all of them to soft-light:


Step 009
Final touch: Make a new layer below the pastel gradient from noctuidae and put any tiny text brush you want. I used this brush from icon_bacchanal:

And voila!!!

I hope this tutorial has helped you. I suck at this.
to this:
Step 001
Start out with this base from clamp_visual:
Step 002
Duplicate the base, desaturate, then set to soft-light. Make a new layer and fill it with black. Set that layer to color.
Step 003
If you have Photoshop, create a new adjustment layer (it's the semi-circle). A window will pop out; click Gradient (no, not Gradient Map). If the gradient is black and white, change the black to white. My english is bad. If the white gradient layer is covering Fuu's face a lot, play with the layer's opacity.
Step 004
Use the following textures by colorfilter:
and
set the first to screen and the other to lighten. Make another layer and fill it with black, set it to soft-light.
Step 005
Use some defocused light textures from fangirls_inc and set them to screen.
Step 006
Duplicate the base again and put the copy on top of all the layers and set it to soft-light.
Step 007
Use this gradient from noctuidae, set it to color, opacity 50%.
Step 008
GRADIENTS! Use these three gradients (from moorka, and from someone else which I don't remember...) and set all of them to soft-light:
Step 009
Final touch: Make a new layer below the pastel gradient from noctuidae and put any tiny text brush you want. I used this brush from icon_bacchanal:
And voila!!!
I hope this tutorial has helped you. I suck at this.