Tutorial #12
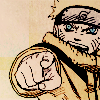
Look, a tut! Aren't you all happy? :D And since I got plenty of time, I'll be making a bunch of tuts in the coming days. XD; This is your typical manga-coloring tut, requested by ryin_ryuji. I use Photoshop, btw. And this ain't newbie friendly either...methinks.
How to make this:

o1. Look for a manga image you want to icon and colorize. Make sure the image you're cropping has a pure white background. If not, erase all the black/gray areas on the background.
o2. Once you've finished cropping your image to 100x100 pixels, grab an ordinary 1-5 px brush and go crazy with the coloring process. Basically, you have the freedom to decide what colors your character's clothes would have. Create a new layer (or several layers), grab the brush tool set to the size of 5pt (or 3pt), colorize, and set the layer to multiply. Although there are plenty of ways on how to color manga images. :D
o3. Once you're done coloring your image, flatten all the layers (Layer->Flatten Image). Look for a nice texture that could go along with your image (mine is a yellowish texture with hues of light blue and green and it comes from gender) and set it to Multiply. If it covers up your character, erase areas of the texture that's covering up your character with the Eraser tool or you can use a layer mask (if you're using Photoshop, see that icon of a gray rectangle with a white circle inside it on the bottom of the Layers palette? That's the one. :D).
o4. I used this texture by blimey_icons and set it to Color Dodge. I recommend you use a similar texture, like those popular scratch textures people make these days.
o5. New color layer: select a light yellow color and set to Darken. Play with the opacity.
o6. New color layer: select a light grayish pink color and set to Multiply. If it's too dark, lower the opacity.
o7. New color layer: select a light green layer and set to Saturation. Play with the opacity.
o8. Another scratch/dust texture by blimey_icons. Set to soft light. Play with the opacity.
o9. Color layer: Fill it with blue (any kind of blue will work) and set to Soft light. Play with the opacity.
1o. Put a random texture on top of all of your layers and set it to soft light. Once again, play with the opacity.
11. Color layer: Fill it with a light brown color and set it to Color Burn. Play with the opacity.
12. Duplicate your image, set it on top of everything, set to Soft Light.
13. Color layer: Fill it with a dark blue color and set it to Exclusion with an opacity lower than 70%.
14. New layer: Fill with a red gradient (mine came from this set) and set to Soft Light. Play with the opacity.
15. New layer: fill with a dark blue color. Set it to soft light. Play with the opacity.
16. Another gradient from my Kobato set. This time a blue one. Set it to soft light. ALWAYS, play with the opacity.
17. Go to Layer->New Adjustment Layer and select Gradient. If the colors are your usual black&white, click okay and set it to Soft Light. Lower the opacity to something you like.
18. New layer: fill with a gray color and set it to Color Burn. If it's too dark, lower the opacity or choose a lighter shade of gray. :D
And you're done. Easy, no?
How to make this:

o1. Look for a manga image you want to icon and colorize. Make sure the image you're cropping has a pure white background. If not, erase all the black/gray areas on the background.
o2. Once you've finished cropping your image to 100x100 pixels, grab an ordinary 1-5 px brush and go crazy with the coloring process. Basically, you have the freedom to decide what colors your character's clothes would have. Create a new layer (or several layers), grab the brush tool set to the size of 5pt (or 3pt), colorize, and set the layer to multiply. Although there are plenty of ways on how to color manga images. :D
o3. Once you're done coloring your image, flatten all the layers (Layer->Flatten Image). Look for a nice texture that could go along with your image (mine is a yellowish texture with hues of light blue and green and it comes from gender) and set it to Multiply. If it covers up your character, erase areas of the texture that's covering up your character with the Eraser tool or you can use a layer mask (if you're using Photoshop, see that icon of a gray rectangle with a white circle inside it on the bottom of the Layers palette? That's the one. :D).
o4. I used this texture by blimey_icons and set it to Color Dodge. I recommend you use a similar texture, like those popular scratch textures people make these days.
o5. New color layer: select a light yellow color and set to Darken. Play with the opacity.
o6. New color layer: select a light grayish pink color and set to Multiply. If it's too dark, lower the opacity.
o7. New color layer: select a light green layer and set to Saturation. Play with the opacity.
o8. Another scratch/dust texture by blimey_icons. Set to soft light. Play with the opacity.
o9. Color layer: Fill it with blue (any kind of blue will work) and set to Soft light. Play with the opacity.
1o. Put a random texture on top of all of your layers and set it to soft light. Once again, play with the opacity.
11. Color layer: Fill it with a light brown color and set it to Color Burn. Play with the opacity.
12. Duplicate your image, set it on top of everything, set to Soft Light.
13. Color layer: Fill it with a dark blue color and set it to Exclusion with an opacity lower than 70%.
14. New layer: Fill with a red gradient (mine came from this set) and set to Soft Light. Play with the opacity.
15. New layer: fill with a dark blue color. Set it to soft light. Play with the opacity.
16. Another gradient from my Kobato set. This time a blue one. Set it to soft light. ALWAYS, play with the opacity.
17. Go to Layer->New Adjustment Layer and select Gradient. If the colors are your usual black&white, click okay and set it to Soft Light. Lower the opacity to something you like.
18. New layer: fill with a gray color and set it to Color Burn. If it's too dark, lower the opacity or choose a lighter shade of gray. :D
And you're done. Easy, no?