Tutorial #03 -- Simple & Stupid 8D
Oh wow; 68 people watching the community *o* Thank you guys~ And thanks to watermirror120 for being so awesome and keeping this community alive & pretty using her l33t iconing skillz :3
Yup; I'm still alive if anyone remembers me, just not updating much -- I'm blaming it on school >o> Anyhow; I've whipped up a quick tutorial today~ Just don't pay any attention to the fact that this is a pretty crap icon. It's fairly simple so it's one for the beginners and lazy people ((like myself)) ;D
From here:
to here: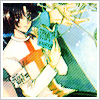
1. Put this texture by gender on layer 1 at Normal 100%
2. Choose your base; mine is one of Yuzuriha from X. Prior to this, you should have brushed up your base up a bit in another psd. -- I fixed my base up by adjusting through Curves & Colour Balance.

3. Desaturate your base and put it on top of the texture, set it on Colour Burn 100%
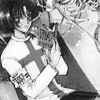
4. Because it looks all squicky and yuck now, we'll be taking the original version of the base and bringing it up top. Set this too Lighten 100%

5. Duplicate that layer, set on Soft Light 100%. Then go to the eraser tool, select a splatter brush ((mine was by unioncity)) and use it to erase a bit of the layer to make it look textured and less boring 8D

+
------>
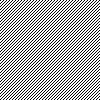
6. Complete it off with this diagonal pattern on top, set on Overlay 25%
7. Add borders and any other decorations you might want ^^
And now I'll abuse the printscreen function and show you the layer pallete for the icon 8D:
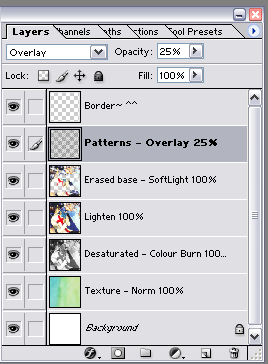
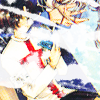
And if you have all that on your own layer pallette, your result should be this:

Tadaaa~
There's only 6 main layers; so I hope everyone finds this helpful :3
I'm in a rush so if there's anything I missed or you don't understand, feel free to ask. Now back to homework I go ;~;
Yup; I'm still alive if anyone remembers me, just not updating much -- I'm blaming it on school >o> Anyhow; I've whipped up a quick tutorial today~ Just don't pay any attention to the fact that this is a pretty crap icon. It's fairly simple so it's one for the beginners and lazy people ((like myself)) ;D
From here:

to here:

1. Put this texture by gender on layer 1 at Normal 100%

2. Choose your base; mine is one of Yuzuriha from X. Prior to this, you should have brushed up your base up a bit in another psd. -- I fixed my base up by adjusting through Curves & Colour Balance.

3. Desaturate your base and put it on top of the texture, set it on Colour Burn 100%

4. Because it looks all squicky and yuck now, we'll be taking the original version of the base and bringing it up top. Set this too Lighten 100%

5. Duplicate that layer, set on Soft Light 100%. Then go to the eraser tool, select a splatter brush ((mine was by unioncity)) and use it to erase a bit of the layer to make it look textured and less boring 8D

+

------>

6. Complete it off with this diagonal pattern on top, set on Overlay 25%

7. Add borders and any other decorations you might want ^^
And now I'll abuse the printscreen function and show you the layer pallete for the icon 8D:

And if you have all that on your own layer pallette, your result should be this:

Tadaaa~
There's only 6 main layers; so I hope everyone finds this helpful :3
I'm in a rush so if there's anything I missed or you don't understand, feel free to ask. Now back to homework I go ;~;