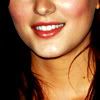
(no subject)
requested by cats_like_trees
from
to
000
crop your picture.

001
duplicate your base and set it to screen (opacity: 100%)

002
make a new color fill layer and fill it with #140202. set it to exclusion (opacity: 100%)

003
make another color fill layer and this time with #292404. set it to lighten (opacity: 100%)

004
make one more copy of your base, drag it on top of the color layers and set it to soft light (opacity: 70%)

005
make a new adjustment layer -> curves. (opacity: 100%)
RGB
move the point from the bottom left-hand corner to Input:0 Output:30
move the point from the top righ-hand corner to Input:234 Output:241
make a new point; Input:115 Output:132
looks like this
RED
Input: 137 Outup: 135
looks like this
GREEN
Input: 132 Outup: 134
looks like this
BLUE
Input: 135 Outup: 126
looks like this

006
make a new adjustment layer -> color balance (opacity: 100%)
Shadows: +5 | +9 | +6
Midtones: +3 | 0 | +11
Highlights: +10 | +3 | +7

007
copy this color balance layer and change the numbers of the shadows to (opacity: 100%)
Shadows: +14 | +9 | +6

008
now add a color fill layer with #523B17 and set it to color burn (opacity: 35%)

009
make another color fill layer, this time with #3C3C34 and set it to soft light (opacity: 100%)

010
add a new adjustment layer -> color balance (opacity: 100%)
Shadows: -15 | 0 | +6
Midtones: 0 | 0 | +15
Highlights: -11 | 0 | +13

011
make a new adjustment layer -> hue/saturation (opacity: 100%)
Master: +7
Yellow: -10

012
and the last step:
add a color fill layer with #BDBDBD and set it to soft light (opacity: 18%)

other icons made with similar settings


and some more of the icons over here
I won't upload the psd.
My tutorials usually aren't very difficult and if you still have a problem or don't understand something, I'll always try to help you.
from

to

000
crop your picture.

001
duplicate your base and set it to screen (opacity: 100%)

002
make a new color fill layer and fill it with #140202. set it to exclusion (opacity: 100%)

003
make another color fill layer and this time with #292404. set it to lighten (opacity: 100%)

004
make one more copy of your base, drag it on top of the color layers and set it to soft light (opacity: 70%)

005
make a new adjustment layer -> curves. (opacity: 100%)
RGB
move the point from the bottom left-hand corner to Input:0 Output:30
move the point from the top righ-hand corner to Input:234 Output:241
make a new point; Input:115 Output:132
looks like this
RED
Input: 137 Outup: 135
looks like this
GREEN
Input: 132 Outup: 134
looks like this
BLUE
Input: 135 Outup: 126
looks like this

006
make a new adjustment layer -> color balance (opacity: 100%)
Shadows: +5 | +9 | +6
Midtones: +3 | 0 | +11
Highlights: +10 | +3 | +7

007
copy this color balance layer and change the numbers of the shadows to (opacity: 100%)
Shadows: +14 | +9 | +6

008
now add a color fill layer with #523B17 and set it to color burn (opacity: 35%)

009
make another color fill layer, this time with #3C3C34 and set it to soft light (opacity: 100%)

010
add a new adjustment layer -> color balance (opacity: 100%)
Shadows: -15 | 0 | +6
Midtones: 0 | 0 | +15
Highlights: -11 | 0 | +13

011
make a new adjustment layer -> hue/saturation (opacity: 100%)
Master: +7
Yellow: -10

012
and the last step:
add a color fill layer with #BDBDBD and set it to soft light (opacity: 18%)

other icons made with similar settings
and some more of the icons over here
I won't upload the psd.
My tutorials usually aren't very difficult and if you still have a problem or don't understand something, I'll always try to help you.