Tutorials: More Blue Color Burns!
Tutorials by request, done in PS CS and likely translateable to PSP.

01.
Cropped base from caps by dj43.
02.
Duplicate base twice, set to Screen 100%.
03.
New layer filled with dark blue (I used #011435) set to Exclusion 100%.
04.
Duplicate the base and drag it up to the top; set to Screen 100%.
05.
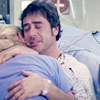
New layer filled with light blue (I used #CCE1F9) set to Color Burn 100%.
06.
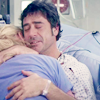
Erase the blue parts off of faces and skin.
07.
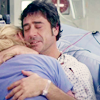
New layer filled with yellowish-tan (I used #ECDEC2), set to Color Burn, 60% opacity.
08.
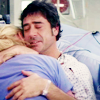
Create a new layer and stamp a copy of everything you've done so far in the new layer by pressing CTRL+ALT+SHIFT+E. Duplicate that layer and set the top one to Soft Light. Using your smudge tool and a setting of soft round brush 100px, smudge this top layer a little to give it a sort of "glowy" look. This is optional, and totally up to you based on the cap and how it looks after smudging.
09.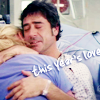
Add text - "This Year's Love" is Jenkins v2.0, 17px with a drop shadow (#5262AC set to Multiply, 100% opacity, 30 degree angle, distance: 1, spread: 0, size: 1). Rotate the text to a slight angle.
10.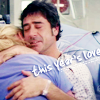
Type in some nonsensical lines for tiny text. I don't know the settings for these because I rasterized the layer to rotate it slightly, but it's probably Times New Roman set to 1 or 2 pt.
11.

Create a new layer under the text and tiny text, but above the soft light layer. Using a soft-edged round brush (this one is around 17px), draw a smudge underneath the text to make it stand out better. I used #222180, and set it to Multiply, 50%. You are FINISHED.

01.
Cropped base from caps by dj43.
02.
Duplicate base three times, set all duplicate layers to Screen 100%.
03.

New layer filled with dark blue (I used #011435) set to Exclusion 100%.
04.
Duplicate the base and drag it up to the top; set to Screen 100%.
05.

New layer filled with light blue (I used #C9DBEB) set to Color Burn 100%.
06.

Erase the blue parts off of faces and skin.
07.
Duplicate the blue color burn layer twice.
08.

Create a new layer and stamp a copy of everything you've done so far in the new layer by pressing CTRL+ALT+SHIFT+E. Duplicate that layer and set the top one to Soft Light. Sharpen and fade sharpen this layer as needed.

01.

Cropped base from caps by dj43.
02.

Duplicate base twice, set to Screen 100%.
03.


New layer filled with dark blue (I used #011435) set to Exclusion 100%.
04.

Duplicate the base and drag it up to the top; set to Screen 100%.
05.


New layer filled with light blue (I used #CCE1F9) set to Color Burn 100%.
06.


Erase the blue parts off of faces and skin.
07.


New layer filled with yellowish-tan (I used #ECDEC2), set to Color Burn, 60% opacity.
08.


Create a new layer and stamp a copy of everything you've done so far in the new layer by pressing CTRL+ALT+SHIFT+E. Duplicate that layer and set the top one to Soft Light. Using your smudge tool and a setting of soft round brush 100px, smudge this top layer a little to give it a sort of "glowy" look. This is optional, and totally up to you based on the cap and how it looks after smudging.
09.

Add text - "This Year's Love" is Jenkins v2.0, 17px with a drop shadow (#5262AC set to Multiply, 100% opacity, 30 degree angle, distance: 1, spread: 0, size: 1). Rotate the text to a slight angle.
10.

Type in some nonsensical lines for tiny text. I don't know the settings for these because I rasterized the layer to rotate it slightly, but it's probably Times New Roman set to 1 or 2 pt.
11.


Create a new layer under the text and tiny text, but above the soft light layer. Using a soft-edged round brush (this one is around 17px), draw a smudge underneath the text to make it stand out better. I used #222180, and set it to Multiply, 50%. You are FINISHED.

01.

Cropped base from caps by dj43.
02.

Duplicate base three times, set all duplicate layers to Screen 100%.
03.


New layer filled with dark blue (I used #011435) set to Exclusion 100%.
04.

Duplicate the base and drag it up to the top; set to Screen 100%.
05.


New layer filled with light blue (I used #C9DBEB) set to Color Burn 100%.
06.


Erase the blue parts off of faces and skin.
07.

Duplicate the blue color burn layer twice.
08.


Create a new layer and stamp a copy of everything you've done so far in the new layer by pressing CTRL+ALT+SHIFT+E. Duplicate that layer and set the top one to Soft Light. Sharpen and fade sharpen this layer as needed.