tutorial 03
we'll be making this icon:
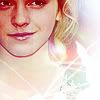
-ok, start off with your base, and sharpen once. I chose this base:

-new layer, Hard light, 100. I used this base by disappearicons
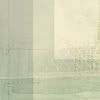
-Now copy and paste the base onto a new layer so it's on top of the green base/texture and set it to Overlay
now, we're gunna be making a lot of layers so keep up. all gradients from crumblingwalls

soft ligh, 100

color, 33

color burn, 40
screen, 100
color burn, 100
color burn, 100

multiply, 46

lighten, 100
-Get a whit soft brush, and just kind of make a little bit on the side like so:

I used a brush.. I'm not sure who made it but I got it from 100x100_brushes
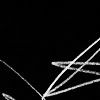
another new layer and I used a brush from dorky_duck whick I rotated and erased a bit:
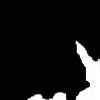
and to finish I usd a texture again from dorky_duck which I erased off emaa's face, and set it to overlay:

it looked really nice but it was kinda blegh, so I copied the base and pasted it on top of everything setting it to soft light.
TADA!!
please, DO NOT copy this tutorial word for word, it's meant to guid you.
Also something really useful on how to get awesome coloring just make about 6 layers and put a different gradient onto each, then starting from the top layer make each layer invisible till the last one, and set it to your liking. and just keep going up and make sure you make the layer visible before you change the mode.
I hope this wasn't too difficult.

-ok, start off with your base, and sharpen once. I chose this base:

-new layer, Hard light, 100. I used this base by disappearicons

-Now copy and paste the base onto a new layer so it's on top of the green base/texture and set it to Overlay
now, we're gunna be making a lot of layers so keep up. all gradients from crumblingwalls

soft ligh, 100

color, 33

color burn, 40

screen, 100

color burn, 100

color burn, 100

multiply, 46

lighten, 100
-Get a whit soft brush, and just kind of make a little bit on the side like so:

I used a brush.. I'm not sure who made it but I got it from 100x100_brushes

another new layer and I used a brush from dorky_duck whick I rotated and erased a bit:

and to finish I usd a texture again from dorky_duck which I erased off emaa's face, and set it to overlay:

it looked really nice but it was kinda blegh, so I copied the base and pasted it on top of everything setting it to soft light.
TADA!!
please, DO NOT copy this tutorial word for word, it's meant to guid you.
Also something really useful on how to get awesome coloring just make about 6 layers and put a different gradient onto each, then starting from the top layer make each layer invisible till the last one, and set it to your liking. and just keep going up and make sure you make the layer visible before you change the mode.
I hope this wasn't too difficult.