TUTORIAL NUMBER TWENTY.
b&w tutorial psp9.
someone over at icon_tutorial asked for tips on b&w icons so i made this tutorial.
Going from THIS to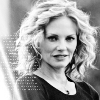
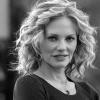
<< from this to this >>
First you need to open your program you'll be using. I'll be using PSP9.
Open up your image. I'll be using THIS picture of Marg Helgenberger.
Crop and resize.


LAYER >> NEW ADJUSTMENT LAYER >> LEVELS
RGB: Input: 0 / 1.35 / 255
Leave output and everything else how it is.
Merge all.
Duplicate your base and set to SOFT LIGHT / OPACITY 100.
Merge all.


Duplicate your base and set to SOFT LIGHT / OPACITY 100.
Merge all.
Paste THIS texture as a new layer at SCREEN / OPACITY 100


Paste THIS texture as a new layer at SCREEN / OPACITY 100.
Merge all.
This step is completely optional and depends on the image.
ADJUST >> SHARPNESS >> UNSHARP MASK
Radius: 2.00
Strength: 12
Clipping: 0
& make sure luminance only is UNchecked.
You're done! =]

Like what you see? Join the community.
someone over at icon_tutorial asked for tips on b&w icons so i made this tutorial.
Going from THIS to


<< from this to this >>

First you need to open your program you'll be using. I'll be using PSP9.
Open up your image. I'll be using THIS picture of Marg Helgenberger.
Crop and resize.


LAYER >> NEW ADJUSTMENT LAYER >> LEVELS
RGB: Input: 0 / 1.35 / 255
Leave output and everything else how it is.
Merge all.
Duplicate your base and set to SOFT LIGHT / OPACITY 100.
Merge all.


Duplicate your base and set to SOFT LIGHT / OPACITY 100.
Merge all.
Paste THIS texture as a new layer at SCREEN / OPACITY 100


Paste THIS texture as a new layer at SCREEN / OPACITY 100.
Merge all.
This step is completely optional and depends on the image.
ADJUST >> SHARPNESS >> UNSHARP MASK
Radius: 2.00
Strength: 12
Clipping: 0
& make sure luminance only is UNchecked.
You're done! =]

Like what you see? Join the community.