Tutorial #18 - Wesley Gibson & Tutorial #19 - Zanessa
Tutorial #18 - Wesley Gibson..
Learn how to many the following icon.
from this
to this
In 3 easy steps . Done in Photoshop, using Brightness/Contrast and Channel Mixer .
Step 1 [a] : I'm using this screen cap from Wanted . Crop and resize the image 100x100.

[b]: And then you desaturate the icon ( shift+ctrl+U)

Step 2: Brightness/Contract
Brightness: -23
Contrast: +2

Step 3: Channel Mixer
Click on the box where it says Monochrome [ bottom left corner ]
Red: +66%
Green: +22%
Blue: +20%
Constant: -6

& your done , you can add text or texture up to you. :)
Other icons made with same coloring but tweaked abit

Tutorial #19 - Zanessa
Learn how to make the following icon.
from this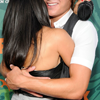
to this
Done in Photoshop, using Selective Coloring, Curves, Channel Mixer +more
Step 1: Crop and resize image 100x100.

Step 2: Channel Mixer
Output channel: Red
Source channels
RED: +100%
GREEN: -20%
BLUE: -40%
CONSTANT: +20%
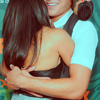
Step 3: Color Balance
Midtones: -32,+5,+8
Hightlights: +11, -18, -17
Shadows: +11, +10, -6
Step 4: Selective Coloring
Reds: -100, 0, +79, +78
Whites: -100, -100, -100, 0

Step 5: Curves
Input : 116 Output : 139

Step 6: Selective Coloring
Greens: +100, 0, 0, 0
Cyans: +93, +100, -97, 0

and your finished. i added some text and a Soft Round 70 pixels brush and then Gaussian Blur it.
Other icons made with same coloring but tweaked abit


hope you found these tutorials helpful :)
Learn how to many the following icon.
from this

to this
In 3 easy steps . Done in Photoshop, using Brightness/Contrast and Channel Mixer .
Step 1 [a] : I'm using this screen cap from Wanted . Crop and resize the image 100x100.

[b]: And then you desaturate the icon ( shift+ctrl+U)

Step 2: Brightness/Contract
Brightness: -23
Contrast: +2

Step 3: Channel Mixer
Click on the box where it says Monochrome [ bottom left corner ]
Red: +66%
Green: +22%
Blue: +20%
Constant: -6
& your done , you can add text or texture up to you. :)
Other icons made with same coloring but tweaked abit


Tutorial #19 - Zanessa
Learn how to make the following icon.
from this

to this
Done in Photoshop, using Selective Coloring, Curves, Channel Mixer +more
Step 1: Crop and resize image 100x100.

Step 2: Channel Mixer
Output channel: Red
Source channels
RED: +100%
GREEN: -20%
BLUE: -40%
CONSTANT: +20%

Step 3: Color Balance
Midtones: -32,+5,+8
Hightlights: +11, -18, -17
Shadows: +11, +10, -6

Step 4: Selective Coloring
Reds: -100, 0, +79, +78
Whites: -100, -100, -100, 0

Step 5: Curves
Input : 116 Output : 139

Step 6: Selective Coloring
Greens: +100, 0, 0, 0
Cyans: +93, +100, -97, 0
and your finished. i added some text and a Soft Round 70 pixels brush and then Gaussian Blur it.
Other icons made with same coloring but tweaked abit


hope you found these tutorials helpful :)