{Tutorial} Manga Colouring - Part II
So...finally a tutorial. People have been asking me for one for quite a while, hopefully this will be worth the wait.
Program: Adobe Photoshop CS
Difficulty: Intermediate - It uses combinations of blur and sharpening, and brushes with varying sharpness, opacity and blending mode. Requires certain amount of experience with Photoshop as I won't explain every single step in full details. It's not awfully complicated, but it does take quite a lot of patience and enthusiasm |D
From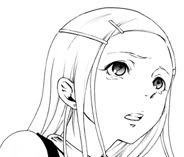
to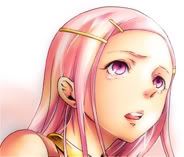
Please be aware that this tutorial is image heavy. And loooooong in general.
( Part I )
Hair
Now directly above skin ref, create a new layer and name it hair base. Repeat the processes above, paint the base colour, shade, and highlights. Remember to use different hues of colours for the shading to make it more appealing. I used mainly sharp brushes to shade the hair. For highlights, you might want to use the Dodge tool instead of the paint brush for more interesting effects this time.
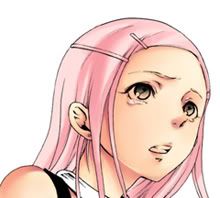
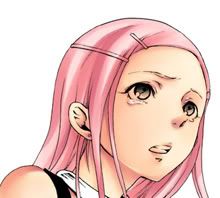
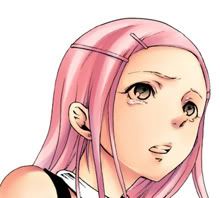
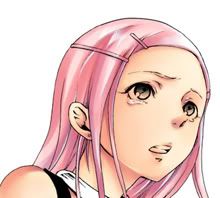
Click on thumbnails to enlarge.

The Tiny Parts

Let's colour her eye whites and teeth now. I usually do these two in the same layer, since they are both white with shades of gray.
Anyway, create a new layer and call it eyewhite. Use a semi-sharp brush, and paint her eyewhites and teeth with white in brush opacity 100%. Lots of people don't shade the eyewhites, it's really up to you. I usually add a light layer of gray/grayish-blue shades on top of it. If you are shading the eyewhites, use a softer brush with a lower brush opacity (40%-60%). Merge the gray shades and the base layer, lower the opacity to 50%-95% so the white doesn't stand out too much from the rest of the colouring.
After that, create a new layer under eyewhite to colour in her mouth. Use shades of pink.
Now let's finish her hair clips and collar...whatever you call that. New layer above all the hair layers, I named it yellow. Paint the base with a bright yellow, then choose a darker yellow and change your brush's blending mode into multiply (Your layer's mode is still on normal though!). Lower the brush's opacity a bit, and gradually paint the shade on the same layer. The yellow will slowly turn into a shiny, gold-like colour. Now choose a bright yellow colour, change your brush's blending mode to overlay/dodge/hard light, and do the highlights. The result should be...well, shiny. xD If it becomes too shiny for your liking, fix it with hue/saturation or brightness/contrast.
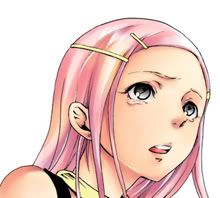
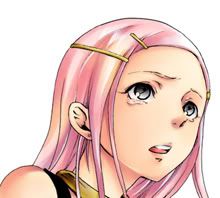
1) Base. 2) Brush set to multiply, dark yellow colour. 3) Brush set to overlay, extremely light yellow.

Colour fixed with adjustments.
Above the Line Art...
As you may have noticed, I usually set my line art on multiply and put my colour layers underneath. Well, here's an exception. Her eyes are pretty much pre-shaded by the screentone, so let's take advantage of that. Create a new layer, called eyes, above the line art layer. Paint some purple on her eyes, maybe shade it a bit on the same layer, and set the layer on overlay/color/screen.


1) Coloured, and 2) Set layer to overlay/color/screen. Remember this layer has to be above the line art!

Create a new layer above the line art, again, and name it dress. Colour her dress with pale orange and shade it. Because her dress was inked in black, overlay and color won't work as well here as the eyes. Try using screen or normal.
Now fix up a few things, and you're done with the colouring!
Here's an optional step, I used selective color and color balance to tint the line art a bit purple. You may also choose to colour the line art parts by parts by using screen/color brushes or adjustment layers, etc.
Touch-Ups
For touch-ups, generally speaking I used a few colour adjustment layers to make the colours more appealing, then some gradient and soft light layers to strengthen the light effects. If you want to be creative, do something with the background and use some Photoshop filters too.


1) Colour fixed with adjustment layers. 2) Added several low opacity gradient and soft light layers.
Ah, and here's where the final sharpening comes in. Make sure your history palette is opened and working, at least recording four steps because you will need it. After all your adjustments are done, save, and flatten image. Press Ctrl A to select everything, and then Ctrl C to copy. Go to your history palette, and click on the step just right before you flatten image. Now the whole thing is back to layers again, press Ctrl P to paste the flattened version that you just copied on top of everything. Sharpen that layer. Lower the opacity to 10-40% so the image isn't oversharpened. I also Gaussian Blurred the image a bit.
HERE'S THE FINAL PRODUCT!

In case if you are confused, my layers look like this at the end (from top to bottom):
Sharpened flatten layer > Gaussian Blur layer > Soft Light > Light Effects > Color Adjustments*4 > Eyes > Dress > Line Art > Yellow > Hair > Eyewhites > Mouth > Skin > Blue irrelevant layer > Background.
How you structure your layers doesn't really matter as long as they work out, as in, parts that needed to be covered are covered and parts that need to appear do appear.
So here's the end of the tutorial. This is my first tutorial ever, so I hope I did an okay job and it will be at least helpful to someone? xDD
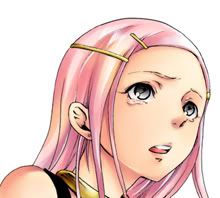
This Anemone colouring isn't as elaborated as my recent ones oh god look at this thing I'm working on...the hair alone kills me orz, but it serves the purpose of a tutorial I think :x I didn't realize how hard it is to colour and screencap and write every five minutes. It's like impossible to focus on one task and make the colouring look good |DDD
If you have any questions regarding this tutorial, feel free to comment and ask. As I said, I couldn't explain every step in details or it would make the tutorial twice as long (...not that it's not tl;dr enough already. I even split it into two parts! lsdkjflsd). I know I skipped many steps especially near the end, so I suppose I didn't make everything crystal clear. Otherwise, I still want to hear what you guys think about it ♥
Oh oh oh and of course, please watch this community if you want to see my colourings in the future. I should have another post ready soon, so watch out for it! 8D
Program: Adobe Photoshop CS
Difficulty: Intermediate - It uses combinations of blur and sharpening, and brushes with varying sharpness, opacity and blending mode. Requires certain amount of experience with Photoshop as I won't explain every single step in full details. It's not awfully complicated, but it does take quite a lot of patience and enthusiasm |D
From
to
Please be aware that this tutorial is image heavy. And loooooong in general.
( Part I )
Hair
Now directly above skin ref, create a new layer and name it hair base. Repeat the processes above, paint the base colour, shade, and highlights. Remember to use different hues of colours for the shading to make it more appealing. I used mainly sharp brushes to shade the hair. For highlights, you might want to use the Dodge tool instead of the paint brush for more interesting effects this time.
Click on thumbnails to enlarge.
The Tiny Parts
Let's colour her eye whites and teeth now. I usually do these two in the same layer, since they are both white with shades of gray.
Anyway, create a new layer and call it eyewhite. Use a semi-sharp brush, and paint her eyewhites and teeth with white in brush opacity 100%. Lots of people don't shade the eyewhites, it's really up to you. I usually add a light layer of gray/grayish-blue shades on top of it. If you are shading the eyewhites, use a softer brush with a lower brush opacity (40%-60%). Merge the gray shades and the base layer, lower the opacity to 50%-95% so the white doesn't stand out too much from the rest of the colouring.
After that, create a new layer under eyewhite to colour in her mouth. Use shades of pink.
Now let's finish her hair clips and collar...whatever you call that. New layer above all the hair layers, I named it yellow. Paint the base with a bright yellow, then choose a darker yellow and change your brush's blending mode into multiply (Your layer's mode is still on normal though!). Lower the brush's opacity a bit, and gradually paint the shade on the same layer. The yellow will slowly turn into a shiny, gold-like colour. Now choose a bright yellow colour, change your brush's blending mode to overlay/dodge/hard light, and do the highlights. The result should be...well, shiny. xD If it becomes too shiny for your liking, fix it with hue/saturation or brightness/contrast.
1) Base. 2) Brush set to multiply, dark yellow colour. 3) Brush set to overlay, extremely light yellow.
Colour fixed with adjustments.
Above the Line Art...
As you may have noticed, I usually set my line art on multiply and put my colour layers underneath. Well, here's an exception. Her eyes are pretty much pre-shaded by the screentone, so let's take advantage of that. Create a new layer, called eyes, above the line art layer. Paint some purple on her eyes, maybe shade it a bit on the same layer, and set the layer on overlay/color/screen.
1) Coloured, and 2) Set layer to overlay/color/screen. Remember this layer has to be above the line art!
Create a new layer above the line art, again, and name it dress. Colour her dress with pale orange and shade it. Because her dress was inked in black, overlay and color won't work as well here as the eyes. Try using screen or normal.
Now fix up a few things, and you're done with the colouring!
Here's an optional step, I used selective color and color balance to tint the line art a bit purple. You may also choose to colour the line art parts by parts by using screen/color brushes or adjustment layers, etc.
Touch-Ups
For touch-ups, generally speaking I used a few colour adjustment layers to make the colours more appealing, then some gradient and soft light layers to strengthen the light effects. If you want to be creative, do something with the background and use some Photoshop filters too.
1) Colour fixed with adjustment layers. 2) Added several low opacity gradient and soft light layers.
Ah, and here's where the final sharpening comes in. Make sure your history palette is opened and working, at least recording four steps because you will need it. After all your adjustments are done, save, and flatten image. Press Ctrl A to select everything, and then Ctrl C to copy. Go to your history palette, and click on the step just right before you flatten image. Now the whole thing is back to layers again, press Ctrl P to paste the flattened version that you just copied on top of everything. Sharpen that layer. Lower the opacity to 10-40% so the image isn't oversharpened. I also Gaussian Blurred the image a bit.
HERE'S THE FINAL PRODUCT!
In case if you are confused, my layers look like this at the end (from top to bottom):
Sharpened flatten layer > Gaussian Blur layer > Soft Light > Light Effects > Color Adjustments*4 > Eyes > Dress > Line Art > Yellow > Hair > Eyewhites > Mouth > Skin > Blue irrelevant layer > Background.
How you structure your layers doesn't really matter as long as they work out, as in, parts that needed to be covered are covered and parts that need to appear do appear.
So here's the end of the tutorial. This is my first tutorial ever, so I hope I did an okay job and it will be at least helpful to someone? xDD
This Anemone colouring isn't as elaborated as my recent ones oh god look at this thing I'm working on...the hair alone kills me orz, but it serves the purpose of a tutorial I think :x I didn't realize how hard it is to colour and screencap and write every five minutes. It's like impossible to focus on one task and make the colouring look good |DDD
If you have any questions regarding this tutorial, feel free to comment and ask. As I said, I couldn't explain every step in details or it would make the tutorial twice as long (...not that it's not tl;dr enough already. I even split it into two parts! lsdkjflsd). I know I skipped many steps especially near the end, so I suppose I didn't make everything crystal clear. Otherwise, I still want to hear what you guys think about it ♥
Oh oh oh and of course, please watch this community if you want to see my colourings in the future. I should have another post ready soon, so watch out for it! 8D