tutorial two
today we are going from
this: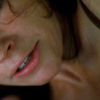
to this: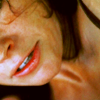
Program: Photoshop CS2
Uses: Curves, Selective Colouring, and Colour Balance
Start with your base.

Duplicate it twice and set both layers to screen. The middle layer should be at 100% and the top layer should be at 40%. Your icons should look like this.
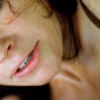
Make a new layer and fill it with 684718 and set that to Soft Light 100% (depending on the picture, you may want to decrease the opacity amount.) Your icon should look like this.
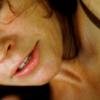
Now add a Curves layer (Layers>New Adjustment Layer>Curves)
RGB
Point One:
Input: 132
Output: 124
RED
Point One:
Input: 255
Output: 241
Point Two:
Input: 170
Output: 191
Point Three:
Input: 79
Output: 78
Point Four:
Input: 0
Output: 17
GREEN
Point One:
Input: 128
Output: 136
Your icon should look like this.
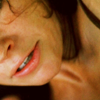
Now add a Selective Colouring layer. (Layers>New Adjustment Layer>Selective Colour)
(For different pictures you may want to fool around with this step.)
REDS
Cyan: -38
Magenta: -9
Yellow: -4
Black +50
NEUTRALS
Cyan: -4
Magenta: -3
Yellow: +4
Black -24
Your icons should now look like this.
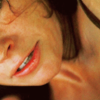
Now add a Colour Balance layer (Layers>New Adjustment Layer>Colour Blance)
Midtones
-29, -20, +25
Highlights
-23, +6, +53
Shadows
+7, -2, -28
And you're DONE!

Other icons made with similar colouring


this:
to this:
Program: Photoshop CS2
Uses: Curves, Selective Colouring, and Colour Balance
Start with your base.
Duplicate it twice and set both layers to screen. The middle layer should be at 100% and the top layer should be at 40%. Your icons should look like this.
Make a new layer and fill it with 684718 and set that to Soft Light 100% (depending on the picture, you may want to decrease the opacity amount.) Your icon should look like this.
Now add a Curves layer (Layers>New Adjustment Layer>Curves)
RGB
Point One:
Input: 132
Output: 124
RED
Point One:
Input: 255
Output: 241
Point Two:
Input: 170
Output: 191
Point Three:
Input: 79
Output: 78
Point Four:
Input: 0
Output: 17
GREEN
Point One:
Input: 128
Output: 136
Your icon should look like this.
Now add a Selective Colouring layer. (Layers>New Adjustment Layer>Selective Colour)
(For different pictures you may want to fool around with this step.)
REDS
Cyan: -38
Magenta: -9
Yellow: -4
Black +50
NEUTRALS
Cyan: -4
Magenta: -3
Yellow: +4
Black -24
Your icons should now look like this.
Now add a Colour Balance layer (Layers>New Adjustment Layer>Colour Blance)
Midtones
-29, -20, +25
Highlights
-23, +6, +53
Shadows
+7, -2, -28
And you're DONE!
Other icons made with similar colouring