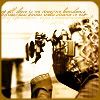
Tutorial #3 > Stella Bonasera
Made with Adobe Photoshop Elements 2.0. Translatable.
Level: Easy/Medium (uses a lot of textures)
1. Crop your image. I just let a little border above the picture.
2. Duplicate your base twice and set each to Screen 100%. Then go to Filter > Sharpen > Sharpen.
Merge all layers.
3. Go to Adjust > Brightness/Contrast. Then set Brightness to +30, Contrast to +40.
4. Add this texture
set it to Hard Light 100%
5. Duplicate your base twice. Set each to Soft Light 100%
6. Add this texture
set it to Color 100%
7. Add this texture
set it to Soft Light 100%
8. Add this texture
set it to Soft Light 70%
9. Add a new layer. Add some border brush like this
on it.
And that's it. You're done.
I guess you never expected that this is such an easy tut, huh?! ^_^
Tell me what you think about it. And I would love to see what you're come up with.
Edit: Just thought I had to tell you... Seriously I had to remake it, cause when I made this icon the first time, I merged all layers together so I couldn't figure out, how I did it. I had to try it out again.
Original:

Remake:
<-- This one is a little bit brighter than the Original. And I cropped it a little bit bigger, but I think I managed to remake it quite good. ^_^
*proud look* This one won 1st place in Challenge 9 @
csi_icontests