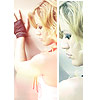
Icon Tutorial 01
Icon Tutorial 01
It's about time I make a tutorial. It's been at least a year since I made any tutorial, but this is my first one for an icon. Hope you find it useful.
Going from this to
Icon Tutorial 01 - Made by ealias of Bedazzling. Credit is appreciated :)
Step 1: Original image - I always duplicate the original picture in case I make a mistake. Crop the image and sharpen.

Step 2: Duplicate the original image again. Crop and sharpen.

Step 3: In the first duplicate, apply Color Balance (CTRL + B) with the settings -50, 40, 70.

Step 4: Place this texture by awmpdotnet on Hard Light. Mask it so it only covers the picture on the left (the second duplicate).


Step 5: Fill a new layer with #051026 and set it to Exclusion. Erase the edges so it covers only part of the white space. Bring down the opacity to 80%.


Step 6: Add text. Flatten all your layers, or what I like to do instead is Stamp Visible (CTRL + ALT + SHIFT + E). Sharpen once more.
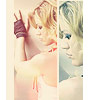
Final image:
Let me know how it works for you.
Picture from UKCGalleries.com, texture from awmpdotnet
It's about time I make a tutorial. It's been at least a year since I made any tutorial, but this is my first one for an icon. Hope you find it useful.
Going from this to
Icon Tutorial 01 - Made by ealias of Bedazzling. Credit is appreciated :)
Step 1: Original image - I always duplicate the original picture in case I make a mistake. Crop the image and sharpen.

Step 2: Duplicate the original image again. Crop and sharpen.

Step 3: In the first duplicate, apply Color Balance (CTRL + B) with the settings -50, 40, 70.

Step 4: Place this texture by awmpdotnet on Hard Light. Mask it so it only covers the picture on the left (the second duplicate).


Step 5: Fill a new layer with #051026 and set it to Exclusion. Erase the edges so it covers only part of the white space. Bring down the opacity to 80%.


Step 6: Add text. Flatten all your layers, or what I like to do instead is Stamp Visible (CTRL + ALT + SHIFT + E). Sharpen once more.
Final image:
Let me know how it works for you.
Picture from UKCGalleries.com, texture from awmpdotnet