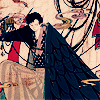
Dou/Wata Tutorial!
Today we will be going from 
to
in ten relatively easy steps!
xxxHolic - Doumeki Shizuka/Watanuki Kimihiro
1. Crop you image to 100x100 pixels. Sharpen if necessary.

2. Duplicate your base three times. Set the first (on your layer's pallet: closest to the base) to Multiply at 100%, the second to at Screen at 100%, and the third to Soft Light at 100%.

>>
3. Duplicate your base again, drag it to the top, Desaturate, set to Soft Light at 100%.

>>
4. Filter>Blur>Guassian Blur. I set mine to 1.0.

>>
5. Create a new layer, fill it with a dark blue (#001947) set to Exclusion at 100%.

>>
6. Create another fill layer, fill it with a light blue (#8be0ff), and set to Color Burn at 100%.

>>
7. Create another layer, fill it with a light pink (#ffc0dc), set to Soft Light at 30%.

>>
8. Use this texture by
toybirds , set to Multiply at 100%.

>>
9. Duplicate your base again, drag to the top, Desaturate, set to Soft Light at 100%.

>>
10. Layer>New Adjustment Layer>Color Balance.
Midtones- 100%, 10%, 0%
Shadows- 100%, 0%, 0%
Highlights- -100%, -100%, -100%

>>
Other icons made with this tutorial:


Voila! A lovely xxxHolic icon in ten relatively easy steps! Remember that these steps will vary depending on your base! Feel free to experiment! Hope you enjoy. <3

to

in ten relatively easy steps!
xxxHolic - Doumeki Shizuka/Watanuki Kimihiro
1. Crop you image to 100x100 pixels. Sharpen if necessary.

2. Duplicate your base three times. Set the first (on your layer's pallet: closest to the base) to Multiply at 100%, the second to at Screen at 100%, and the third to Soft Light at 100%.

>>

3. Duplicate your base again, drag it to the top, Desaturate, set to Soft Light at 100%.

>>

4. Filter>Blur>Guassian Blur. I set mine to 1.0.

>>

5. Create a new layer, fill it with a dark blue (#001947) set to Exclusion at 100%.

>>

6. Create another fill layer, fill it with a light blue (#8be0ff), and set to Color Burn at 100%.

>>

7. Create another layer, fill it with a light pink (#ffc0dc), set to Soft Light at 30%.

>>

8. Use this texture by
toybirds , set to Multiply at 100%.

>>

9. Duplicate your base again, drag to the top, Desaturate, set to Soft Light at 100%.

>>

10. Layer>New Adjustment Layer>Color Balance.
Midtones- 100%, 10%, 0%
Shadows- 100%, 0%, 0%
Highlights- -100%, -100%, -100%

>>

Other icons made with this tutorial:
Voila! A lovely xxxHolic icon in ten relatively easy steps! Remember that these steps will vary depending on your base! Feel free to experiment! Hope you enjoy. <3