(no subject)
I was making icons and realized how pretty the icons made with these layers were coming out, so I decided to make a tutorial. ;)
This is a short tutorial, using curves and channel mixer. I made the icon in PSCS2. If you have curves in your program, this tutorial will work for you.
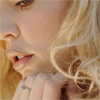
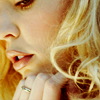
>>
Please comment if you plan to use this tutorial. ♥ Also, I'd love to see what you come up with by using this tutorial.
i. Start off with your base.

ii. Add a curves layer. This will brighten up the colors.
RGB
1st Point: 66,90
2nd Point 164, 206
RED
1st Point: 136, 120
GREEN
1st Point: 131, 121
BLUE
1st Point: 141, 132
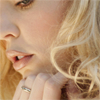
iii. Add another curves layer. This layer is what sets this tutorial from other tutorials. By manuvering the curves layer in this way, the icon becomes more dull but when you reach the last step the red is brought out, along with the other colors.
RED
1st Point: 61, 100
2nd Point: 103, 116
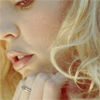
iv. Add a Channel Mixer layer. This will add more blue to the icon, which I tend to do often when making icons.
Don't mess with anything, except for...
RED
Red: +95 (Originally 100)

v. Duplicate the base twice. Put both of them on top of the other layers. Set both of the bases to Soft Light.
* this step is crucial. don't forget to add the soft light layers, because if you don't, the person in the icon will look blue as though they have phemonia! *
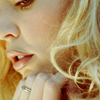
with 1 base set to soft light

with 2 bases set to soft light
^^the better one.
Another Icon made w/ Same Steps
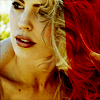
If you are interested in seeing more of my icons, and haven't already joined/watched: WATCH/JOIN

This is a short tutorial, using curves and channel mixer. I made the icon in PSCS2. If you have curves in your program, this tutorial will work for you.

>>

Please comment if you plan to use this tutorial. ♥ Also, I'd love to see what you come up with by using this tutorial.
i. Start off with your base.

ii. Add a curves layer. This will brighten up the colors.
RGB
1st Point: 66,90
2nd Point 164, 206
RED
1st Point: 136, 120
GREEN
1st Point: 131, 121
BLUE
1st Point: 141, 132

iii. Add another curves layer. This layer is what sets this tutorial from other tutorials. By manuvering the curves layer in this way, the icon becomes more dull but when you reach the last step the red is brought out, along with the other colors.
RED
1st Point: 61, 100
2nd Point: 103, 116

iv. Add a Channel Mixer layer. This will add more blue to the icon, which I tend to do often when making icons.
Don't mess with anything, except for...
RED
Red: +95 (Originally 100)

v. Duplicate the base twice. Put both of them on top of the other layers. Set both of the bases to Soft Light.
* this step is crucial. don't forget to add the soft light layers, because if you don't, the person in the icon will look blue as though they have phemonia! *

with 1 base set to soft light

with 2 bases set to soft light
^^the better one.
Another Icon made w/ Same Steps

If you are interested in seeing more of my icons, and haven't already joined/watched: WATCH/JOIN