Art tutorial
This tutorial shows how to achieve the look of an image fading into the background. I’ve written it using PS7, but I imagine that it can be translated into other programmes. I’ve written how I achieved a few variations of the style, as with most tutorials it can all be adapted to what you want to create.
So we’re going to create this.
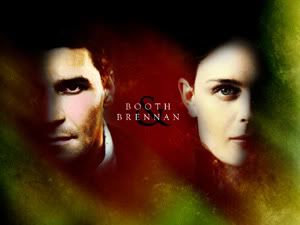
as well as a couple of variations under the cut.
Create a blank canvas and then open the images to use.
The images I used David and Emily
Click and drag them onto new layers on the blank document. Because I wanted both of the faces to match as far as colouring I used auto levels (Image >Adjustments >Auto levels)
Duplicate each of these layers and set to ‘Soft Light’. For ease of use it’s best to link the copies together.
Create a new layer at the top of your artwork fill this layer in black.
Select a 200px feathered round brush (one of the presets), opacity and flow set at 100% and slowly erase parts of the black layer as required. In this case half of each face. Areas of this layer can always be repainted if required.
I then added a texture layer and set it to pin light. Now switch the visibility of the texture layer off, go back to your black layer and then Select > All (Ctrl A) and copy the entire image (Edit > copy merged). Paste this layer on to the top of the image.
Set the blending mode of this layer to ‘soft light’. This brings the faces much more to the forefront of the image and darkens the texture to tie it all together more.
After that I added a bit of text and then it’s done!
---
Obviously you can play around with the different textures and blending modes to achieve different looks. For the following I had the same layers underneath my texture layer as used in the above tutorial, but I’ve listed next to them what layers I had on top of them.
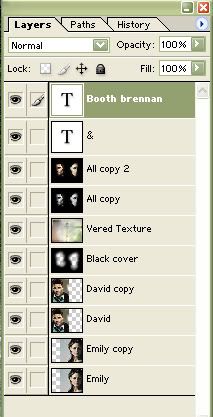
This texture by Vered set to hard light, a copy of all before the texture layer desaturated and set to colour, another copy set to overlay.
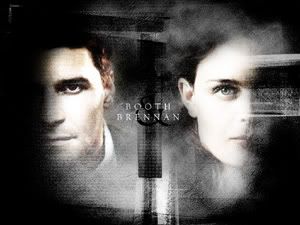
Layers
You can even amend it further by adding another texture over the top of all the layers. I added this texture by me set to overlay.
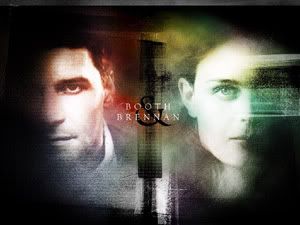
You can also use this method to have white background as well, although I’ve found that a lot of the time they don’t look as good (just depends on your images really).
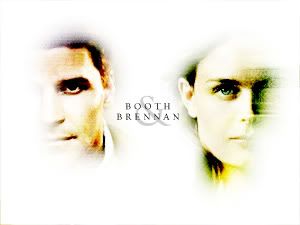
Layers
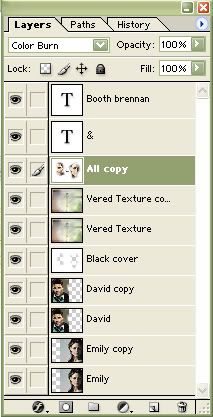
In this version though I used the same first few layers but turned the black layer to white (Image >adjustments > Invert or Ctrl I) then set the texture layer to screen and copied it and set it to Colour burn. I then used the copy all layer and set that to colour burn.
I think that's about it. The basic idea is the same for each just with a little tweeking for different styles. You could also try experimenting with different brushes to erase parts of your black layer and see the sorts of effects that gives you.
Let me know what you all come up with if you try it out, and feel free to snag any of these trials for your desktop wallpaper. :D
So we’re going to create this.

as well as a couple of variations under the cut.
Create a blank canvas and then open the images to use.
The images I used David and Emily
Click and drag them onto new layers on the blank document. Because I wanted both of the faces to match as far as colouring I used auto levels (Image >Adjustments >Auto levels)
Duplicate each of these layers and set to ‘Soft Light’. For ease of use it’s best to link the copies together.
Create a new layer at the top of your artwork fill this layer in black.
Select a 200px feathered round brush (one of the presets), opacity and flow set at 100% and slowly erase parts of the black layer as required. In this case half of each face. Areas of this layer can always be repainted if required.
I then added a texture layer and set it to pin light. Now switch the visibility of the texture layer off, go back to your black layer and then Select > All (Ctrl A) and copy the entire image (Edit > copy merged). Paste this layer on to the top of the image.
Set the blending mode of this layer to ‘soft light’. This brings the faces much more to the forefront of the image and darkens the texture to tie it all together more.
After that I added a bit of text and then it’s done!
---
Obviously you can play around with the different textures and blending modes to achieve different looks. For the following I had the same layers underneath my texture layer as used in the above tutorial, but I’ve listed next to them what layers I had on top of them.
This texture by Vered set to hard light, a copy of all before the texture layer desaturated and set to colour, another copy set to overlay.

Layers

You can even amend it further by adding another texture over the top of all the layers. I added this texture by me set to overlay.

You can also use this method to have white background as well, although I’ve found that a lot of the time they don’t look as good (just depends on your images really).

Layers

In this version though I used the same first few layers but turned the black layer to white (Image >adjustments > Invert or Ctrl I) then set the texture layer to screen and copied it and set it to Colour burn. I then used the copy all layer and set that to colour burn.
I think that's about it. The basic idea is the same for each just with a little tweeking for different styles. You could also try experimenting with different brushes to erase parts of your black layer and see the sorts of effects that gives you.
Let me know what you all come up with if you try it out, and feel free to snag any of these trials for your desktop wallpaper. :D