alvanista [31]
That needed to be written badly. For real.
Going from
to
in PSPXI, as requested by aurturius. Uses Curves.
1. Start out as usual, taking your base and opening into your image-editing software of choice~

2. Now, duplicate your base and set it to Soft Light, 100%.

3. Make a new layer, fill it with #021538 [
] and set it to Exclusion, 100%.

4. Make another layer, fill it with #eaeffa [
] and set it to Burn, 100%.

5. Duplicate your base, drag it to top and set it to Soft Light, 100%.

6. Go to Layers -> Adjustment Layer -> Curves. Set the Blues to Input 71, Output 84.

7. Make a new layer, fill it with #eeebde [
]. Set it to Darken, 100%.

8. Dupliate your base, drag it to top and set it to Soft Light, 40%.

9. Use this two textures: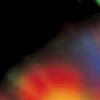
(by cdg)
(by damnicons) and set them both to Screen, 100%.

10. Now, take this texture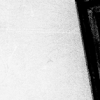
(by toybirds). I decided I wanted to use it, but I found it to dark. So, I went to Adjust -> Brightness and Contrast -> Brightness/Contrast, lightened it, rotated and wound up with this: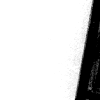
. Then, I pasted it on a new layer, moved it to right a bit and set to Multiply, 100%.

11. Then, take this texture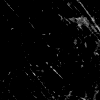
(by fangirls_inc, I believe) and set it to Screen, 60%.

12. Lastly, duplicate your base, drag it to top, and set it to Soft Light, 40%. Erase the part that goes over the black space on the right.
That's it~

Going from

to

in PSPXI, as requested by aurturius. Uses Curves.
1. Start out as usual, taking your base and opening into your image-editing software of choice~

2. Now, duplicate your base and set it to Soft Light, 100%.

3. Make a new layer, fill it with #021538 [

] and set it to Exclusion, 100%.

4. Make another layer, fill it with #eaeffa [

] and set it to Burn, 100%.

5. Duplicate your base, drag it to top and set it to Soft Light, 100%.

6. Go to Layers -> Adjustment Layer -> Curves. Set the Blues to Input 71, Output 84.

7. Make a new layer, fill it with #eeebde [

]. Set it to Darken, 100%.

8. Dupliate your base, drag it to top and set it to Soft Light, 40%.

9. Use this two textures:

(by cdg)

(by damnicons) and set them both to Screen, 100%.

10. Now, take this texture

(by toybirds). I decided I wanted to use it, but I found it to dark. So, I went to Adjust -> Brightness and Contrast -> Brightness/Contrast, lightened it, rotated and wound up with this:

. Then, I pasted it on a new layer, moved it to right a bit and set to Multiply, 100%.

11. Then, take this texture

(by fangirls_inc, I believe) and set it to Screen, 60%.

12. Lastly, duplicate your base, drag it to top, and set it to Soft Light, 40%. Erase the part that goes over the black space on the right.
That's it~
