Tutorial (14)
Make 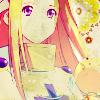
or
from
using PSP8. Translatable. Uses Curves and is image heavy!
Sharpen base if need be. Paste this texture (by me) and set to lighten 100%.
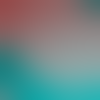
=
Duplicate base and bring to the top. Set to screen 50%.

=
Duplicate base and bring to the top. Set to softlight 100%.

=
Set #020846 to exclusion 100%.

=
Set #FFC0C0 to burn 100%.

=
Set #80FFFF to overlay 40%.

=
Go to Layers > New Adjustment Layer > Color Balance. Set shadows cyan to -40 and highlights red to 40.
=
Set #DF0B4C to lighten 25%.

=
Duplicate base and bring to the top. Set to softlight 100%. Go to Colors > Adjust > Hue/Saturation/Lightness. Set saturation to -100.

=
Go to Layers > New Adjustment Layer > Curves. Set RGB input to 51 and output to 13, Red output to 47, and Blue output to 55.
=
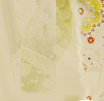
Paste this texture (by 77words) and set to darken 100%.
=
Go to Layers > New Adjustment Layer > Brightness/Contrast. Set brightness to 10 and contrast to 10.
=
Merge layers. Go to Effects > Sharpen > Unsharp Mask. Set radius to 100.00 and strength to 35.

=
Alternately, by taking out this texture, you get this:

Play around with the opacity if your icon is too dark or too light. Please don't copy exactly. Thanks for reading :)
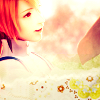
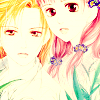
Icons made using this tutorial
Like what you see? Why don't you friend us!

or

from

using PSP8. Translatable. Uses Curves and is image heavy!
Sharpen base if need be. Paste this texture (by me) and set to lighten 100%.

=

Duplicate base and bring to the top. Set to screen 50%.

=

Duplicate base and bring to the top. Set to softlight 100%.

=

Set #020846 to exclusion 100%.

=

Set #FFC0C0 to burn 100%.

=

Set #80FFFF to overlay 40%.

=

Go to Layers > New Adjustment Layer > Color Balance. Set shadows cyan to -40 and highlights red to 40.

=

Set #DF0B4C to lighten 25%.

=

Duplicate base and bring to the top. Set to softlight 100%. Go to Colors > Adjust > Hue/Saturation/Lightness. Set saturation to -100.

=

Go to Layers > New Adjustment Layer > Curves. Set RGB input to 51 and output to 13, Red output to 47, and Blue output to 55.

=

Paste this texture (by 77words) and set to darken 100%.

=

Go to Layers > New Adjustment Layer > Brightness/Contrast. Set brightness to 10 and contrast to 10.

=

Merge layers. Go to Effects > Sharpen > Unsharp Mask. Set radius to 100.00 and strength to 35.

=

Alternately, by taking out this texture, you get this:

Play around with the opacity if your icon is too dark or too light. Please don't copy exactly. Thanks for reading :)
Icons made using this tutorial


Like what you see? Why don't you friend us!