Tutorial (35)
Request by ryin_ryuiji!
Make
from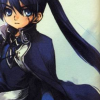
using PSP8. Translatable. Image heavy!
Sharpen base if need be. Paste this texture (by me) and set it to screen 50%. Move around to your liking.
=
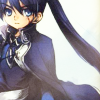
Duplicate base and bring to the top. Set to screen 100%.

=
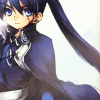
Duplicate base and bring to the top. Set to softlight 25%.

=
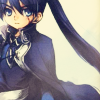
Set #000724 to exclusion 100%

=
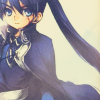
Set #FEB884 to luminance (legacy) 20%

=
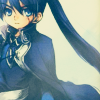
Set #C1FFFB to burn 100%

=
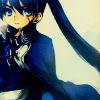
Duplicate base and bring to the top. Set to burn 50%. Go to Effects > Blur > Gaussian Blur, and set radius to 10.00.

=
Duplicate base and bring to the top. Set to softlight 10%

=
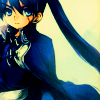
Go to Layers > New Adjustment Layer > Hue/Saturation/Lightness. Set saturation to 40.
=
Go to Layers > New Adjustment Layer > Color Balance. Set midtones cyan to -80, midtones blue to 40, and highlights red to 100.
=
Paste this texture (by me) and set it to screen 25%. Move around to your liking.
=
Paste this texture (by me) and set it to screen 25%. Move around to your liking.

=
Play around with the opacity if your icon is too dark or too light. Please don't copy exactly. Thanks for reading :)
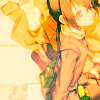
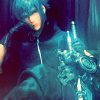
Icons made using this tutorial
Like what you see? Why don't you friend us!
Make

from

using PSP8. Translatable. Image heavy!
Sharpen base if need be. Paste this texture (by me) and set it to screen 50%. Move around to your liking.

=

Duplicate base and bring to the top. Set to screen 100%.

=

Duplicate base and bring to the top. Set to softlight 25%.

=

Set #000724 to exclusion 100%

=

Set #FEB884 to luminance (legacy) 20%

=

Set #C1FFFB to burn 100%

=

Duplicate base and bring to the top. Set to burn 50%. Go to Effects > Blur > Gaussian Blur, and set radius to 10.00.

=

Duplicate base and bring to the top. Set to softlight 10%

=

Go to Layers > New Adjustment Layer > Hue/Saturation/Lightness. Set saturation to 40.

=

Go to Layers > New Adjustment Layer > Color Balance. Set midtones cyan to -80, midtones blue to 40, and highlights red to 100.

=

Paste this texture (by me) and set it to screen 25%. Move around to your liking.

=

Paste this texture (by me) and set it to screen 25%. Move around to your liking.

=

Play around with the opacity if your icon is too dark or too light. Please don't copy exactly. Thanks for reading :)
Icons made using this tutorial


Like what you see? Why don't you friend us!