300 Icon Tutorial
This tutorial was requested by adair7 and stjimmyrules
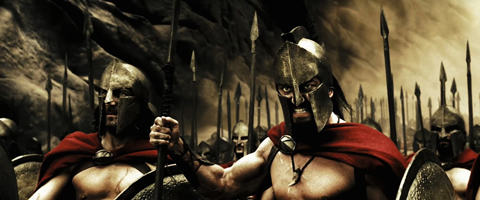
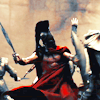
Learn how to make this icon:
step 1:
get your image and open it. This was mine:

step 2:
Crop your image. I did mine like this:

step 3:
Now screen your image two times:

step 4:
Now go to Layer, New Adjustment Layer and then Selective Coloring.
These are you setting:
Reds:
c: -100
m: +27
y: +18
Yellows:
c: -68
m: +28
y: +44
Neutrals:
c: +26
m: -8
y: -10
your image should look like this:
step 5:
Open a new Selective Coloring Layer. These are your settibgs:
Red:
c: -100
m: +27
y: +18
Yellow:
c: -56
m: +20
y: +25
Neutrals:
c: +5
m: -8
y: -10
your image should look like this:
step 6:
Now go to Layer, New Adjustment Layer and then Hue/Saturation. Set the saturation to +10
your image should look like this:
step 7:
Now open a new Selectice Coloring Layer. These are your settings:
Neutrals:
c: -28
m: -15
y: -28
your image should look like this:
Last step!! Step 8:
Open your a new Selective Coloring Layer. These are your settings:
Reds:
c: -27
m: +25
y: +28
Yellows:
c: -25
m: +15
y: +25
Neutrals:
c: -10
m: -7
y: -10
There you have it! This should be your final result:
Other icons made using the same technique with different settings:


Learn how to make this icon:

step 1:
get your image and open it. This was mine:

step 2:
Crop your image. I did mine like this:

step 3:
Now screen your image two times:

step 4:
Now go to Layer, New Adjustment Layer and then Selective Coloring.
These are you setting:
Reds:
c: -100
m: +27
y: +18
Yellows:
c: -68
m: +28
y: +44
Neutrals:
c: +26
m: -8
y: -10
your image should look like this:

step 5:
Open a new Selective Coloring Layer. These are your settibgs:
Red:
c: -100
m: +27
y: +18
Yellow:
c: -56
m: +20
y: +25
Neutrals:
c: +5
m: -8
y: -10
your image should look like this:

step 6:
Now go to Layer, New Adjustment Layer and then Hue/Saturation. Set the saturation to +10
your image should look like this:

step 7:
Now open a new Selectice Coloring Layer. These are your settings:
Neutrals:
c: -28
m: -15
y: -28
your image should look like this:

Last step!! Step 8:
Open your a new Selective Coloring Layer. These are your settings:
Reds:
c: -27
m: +25
y: +28
Yellows:
c: -25
m: +15
y: +25
Neutrals:
c: -10
m: -7
y: -10
There you have it! This should be your final result:

Other icons made using the same technique with different settings:


