Full icon tutorial - Kelly Clarkson
As requested by duckadork.
How to go from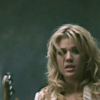
to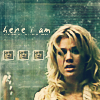
The initial colouring of this icon was adapted from this tutorial by campbell_soup.
Made in PSP9, but adaptable to earlier versions/PS.
1. I started with this pic (capped by erede). I cropped it to a square, then used Edge Preserving Smooth (strength 3) and sharpened twice, before resizing to 100x100.

2. I used Unsharp Mask on the base (radius 1, strength 50, clipping 3). I then went to Adjust > Brightness and Contrast > Brightness/Contrast and upped the contrast to 25 to get the following base.
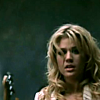
3. I then added this texture by lily_sunshine on overlay at 60%.
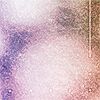
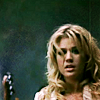
4. Then this gradient (I think it's by crumblingwalls, correct me if I'm wrong) on hard light at 68%.

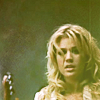
5. I then put this texture by gender on lighten at 40%. I mirrored the texture so that the light line wasn't covering Kelly's face.
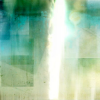
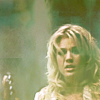
6. Then I added this texture by colorfilter on hard light, 40%, and erased the parts covering Kelly.

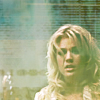
7. I then duplicated the base layer, dragged it to the top, and set it to soft light at 100%.
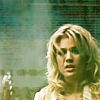
Note: For the following steps (all the white brushes) you might have to adjust the opacity of the layers (might be a Photoshop thing, not entirely sure). Just fiddle with the opacities of the brush layers a little until they look right.
8. I then added this brush by gender in white and again erased the parts covering Kelly. I left the layer blend mode at normal, 60%.
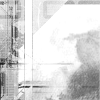
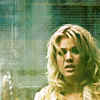
9. Then I added this brush by propaganda_live in white and erased the parts covering Kelly. Layer blend mode - normal, 42%.
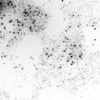
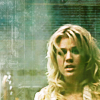
10. I added this brush by iconswithlove in white (normal, 40%), mirrored it, and erased the parts covering Kelly.
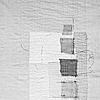
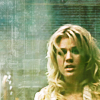
11. I then added the brush from step 9 again in white. This time I mirrored the layer and set it to 80% opacity.
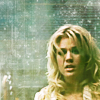
12. At this point I decided that Kelly was starting to look a little blurry, so I went back to the background layer and sharpened it once.
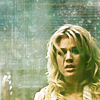
13. I added the text "here i am" in Alpha Mack, size 16 in white, and left it at 100%.
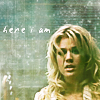
14. On a new layer, I then added the text "once again i'm torn into pieces" underneath the larger text, also in white, and set the opacity to 80%.
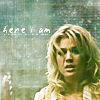
15. I then added this brush by _joni in black, mirrored it, erased the part covering the guitar, and set the layer to soft light.
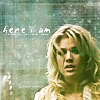
16. I duplicated the base image again, dragged it to the top and set it to soft light.
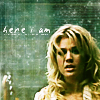
17. I created a new layer, filled it with #031032 and set it to exclusion.
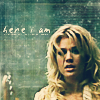
18. I decided the middle of the text was a little difficult to see on the light background, so on a new layer I drew a black line over the text, gaussian blurred it at a strength of 5, and dragged the layer underneath the text layer. I then set this layer to soft light and duplicated it to increase the effect.
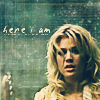
19. I copied an area of Kelly's face (Edit > Copy Merged) and pasted it as a new image. I resized it to 9x8 pixels, copied it into a new layer on the icon, and duplicated it twice. I set the opacity of this layer to 60%.
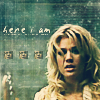
20. I decided the small images needed borders, so I took this border brush by _joni, resized it to fit the small images, and added it on a new layer.


This tutorial is designed as a guide to show you how I achieved effects in this icon, please do not copy it exactly. If you make something using it, I'd love to see.
The icon itself is up for grabs - just make sure to credit me (fadedpages) if you take it, please.
How to go from

to

The initial colouring of this icon was adapted from this tutorial by campbell_soup.
Made in PSP9, but adaptable to earlier versions/PS.
1. I started with this pic (capped by erede). I cropped it to a square, then used Edge Preserving Smooth (strength 3) and sharpened twice, before resizing to 100x100.

2. I used Unsharp Mask on the base (radius 1, strength 50, clipping 3). I then went to Adjust > Brightness and Contrast > Brightness/Contrast and upped the contrast to 25 to get the following base.

3. I then added this texture by lily_sunshine on overlay at 60%.


4. Then this gradient (I think it's by crumblingwalls, correct me if I'm wrong) on hard light at 68%.


5. I then put this texture by gender on lighten at 40%. I mirrored the texture so that the light line wasn't covering Kelly's face.


6. Then I added this texture by colorfilter on hard light, 40%, and erased the parts covering Kelly.


7. I then duplicated the base layer, dragged it to the top, and set it to soft light at 100%.

Note: For the following steps (all the white brushes) you might have to adjust the opacity of the layers (might be a Photoshop thing, not entirely sure). Just fiddle with the opacities of the brush layers a little until they look right.
8. I then added this brush by gender in white and again erased the parts covering Kelly. I left the layer blend mode at normal, 60%.


9. Then I added this brush by propaganda_live in white and erased the parts covering Kelly. Layer blend mode - normal, 42%.


10. I added this brush by iconswithlove in white (normal, 40%), mirrored it, and erased the parts covering Kelly.

11. I then added the brush from step 9 again in white. This time I mirrored the layer and set it to 80% opacity.

12. At this point I decided that Kelly was starting to look a little blurry, so I went back to the background layer and sharpened it once.

13. I added the text "here i am" in Alpha Mack, size 16 in white, and left it at 100%.

14. On a new layer, I then added the text "once again i'm torn into pieces" underneath the larger text, also in white, and set the opacity to 80%.

15. I then added this brush by _joni in black, mirrored it, erased the part covering the guitar, and set the layer to soft light.


16. I duplicated the base image again, dragged it to the top and set it to soft light.

17. I created a new layer, filled it with #031032 and set it to exclusion.

18. I decided the middle of the text was a little difficult to see on the light background, so on a new layer I drew a black line over the text, gaussian blurred it at a strength of 5, and dragged the layer underneath the text layer. I then set this layer to soft light and duplicated it to increase the effect.

19. I copied an area of Kelly's face (Edit > Copy Merged) and pasted it as a new image. I resized it to 9x8 pixels, copied it into a new layer on the icon, and duplicated it twice. I set the opacity of this layer to 60%.

20. I decided the small images needed borders, so I took this border brush by _joni, resized it to fit the small images, and added it on a new layer.


This tutorial is designed as a guide to show you how I achieved effects in this icon, please do not copy it exactly. If you make something using it, I'd love to see.
The icon itself is up for grabs - just make sure to credit me (fadedpages) if you take it, please.